Ogden Cami Hack: Adding a waist tie

Hi everyone! Alexis from @myysweetsunshine on The Maker Studio today and excited to share a new project with you all.
The Ogden by True Bias is a tried and true pattern is never going out of style! I have seen several versions of the Ogden by many amazing makers. Well today, I am going to share mine! I love a good elastic waist dress, I feel it gives the waist definition and an overall style. An updated, trendy version of the elastic waistband is threading ties through the casing and tie on each side of the waist. It’s one of my favorite details! So, below are the steps to creating a longer lined bodice with waist ties. This is also a cute detail on the Grace dress by Marsha Style!!

Note: Follow the original Ogden instructions besides what steps are listing below…
My example is based on a size 4 and a 5’ 5” height. If you sew a larger or smaller size you may need to modify my measurements below.
Options steps:
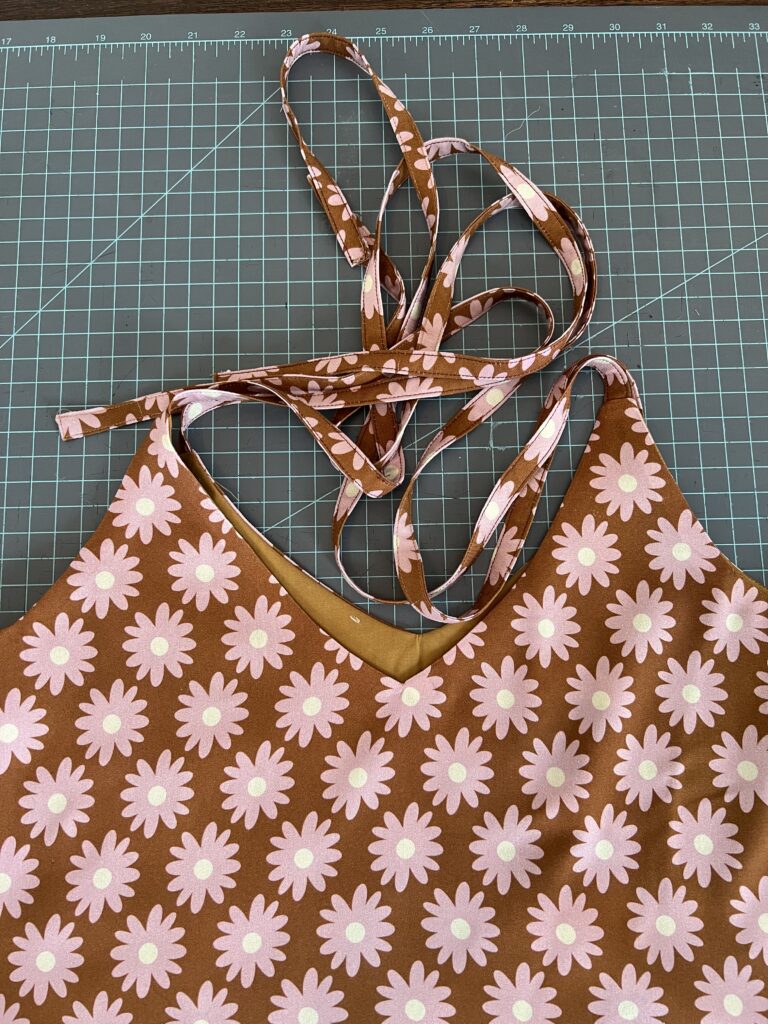
- Straps: I cut my straps length at 26”. I did this so I can tie them on the shoulder. You can certainly keep the straps per the original instructions.
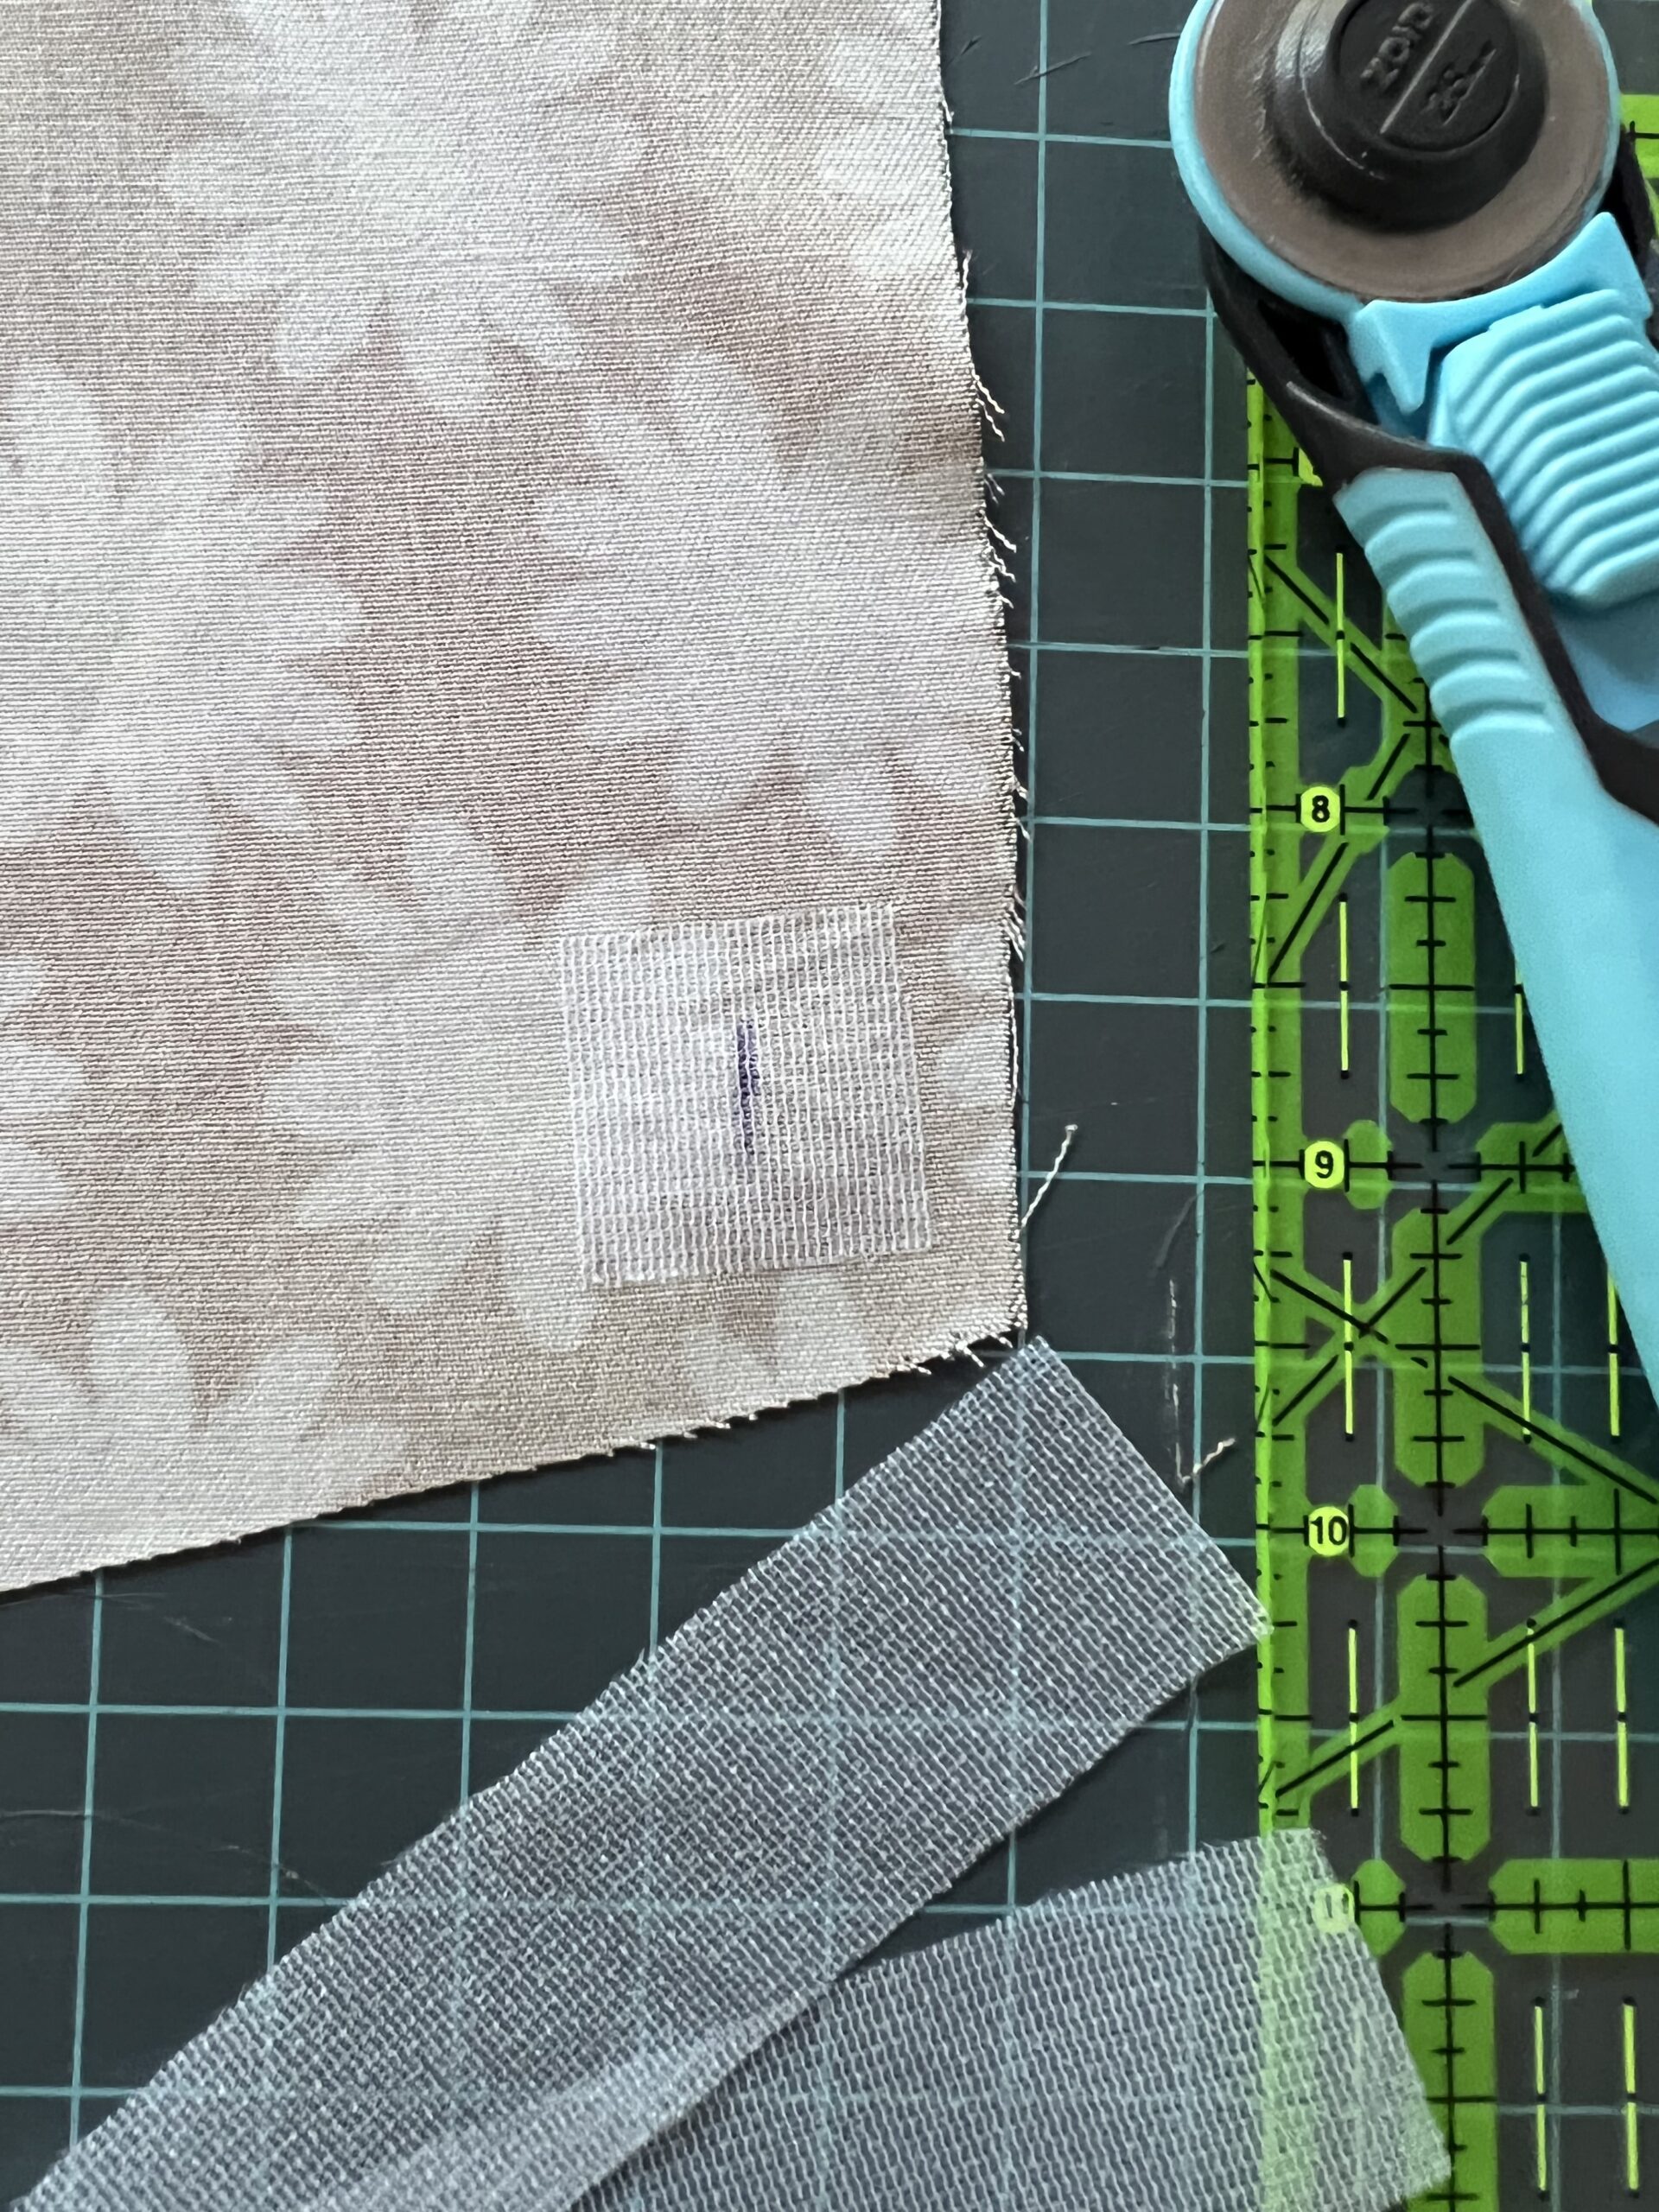
- Waist Ties: I used ready-made ties but you can also make your own. For example, cut 2 at 36” x 1” for a size 4. Go up 1” in length for each size. Fold the ties in half with wrong sides touching and stitch with a 1/8” SA. Turn right side out and topstitch.
- Skirt: This depends on how full you prefer your skirts. I love a full skirt so I used the full width of fabric. Cut two (front and back) 36” x Full width.
Step A:
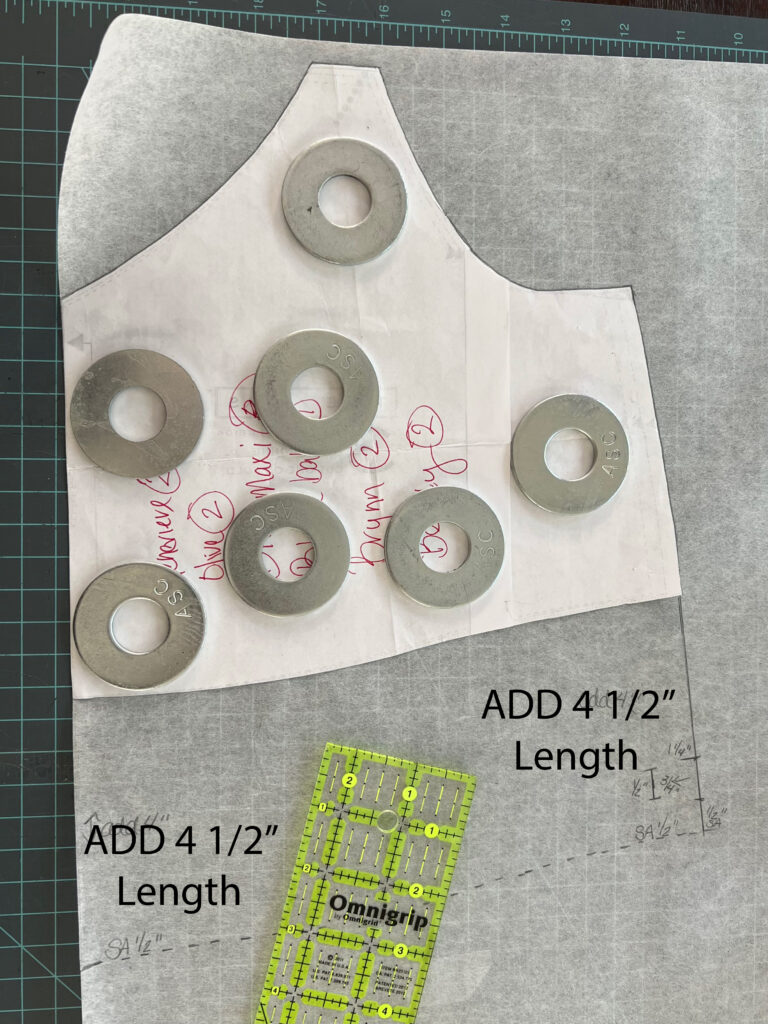
Add 4 ½” to the length of both the Front and Back Bodice Lining pattern pieces. I traced new pattern pieces on tracing paper. You will need to cut 4, 2 Main (front and back) and 2 Lining (front and back).
Step B:
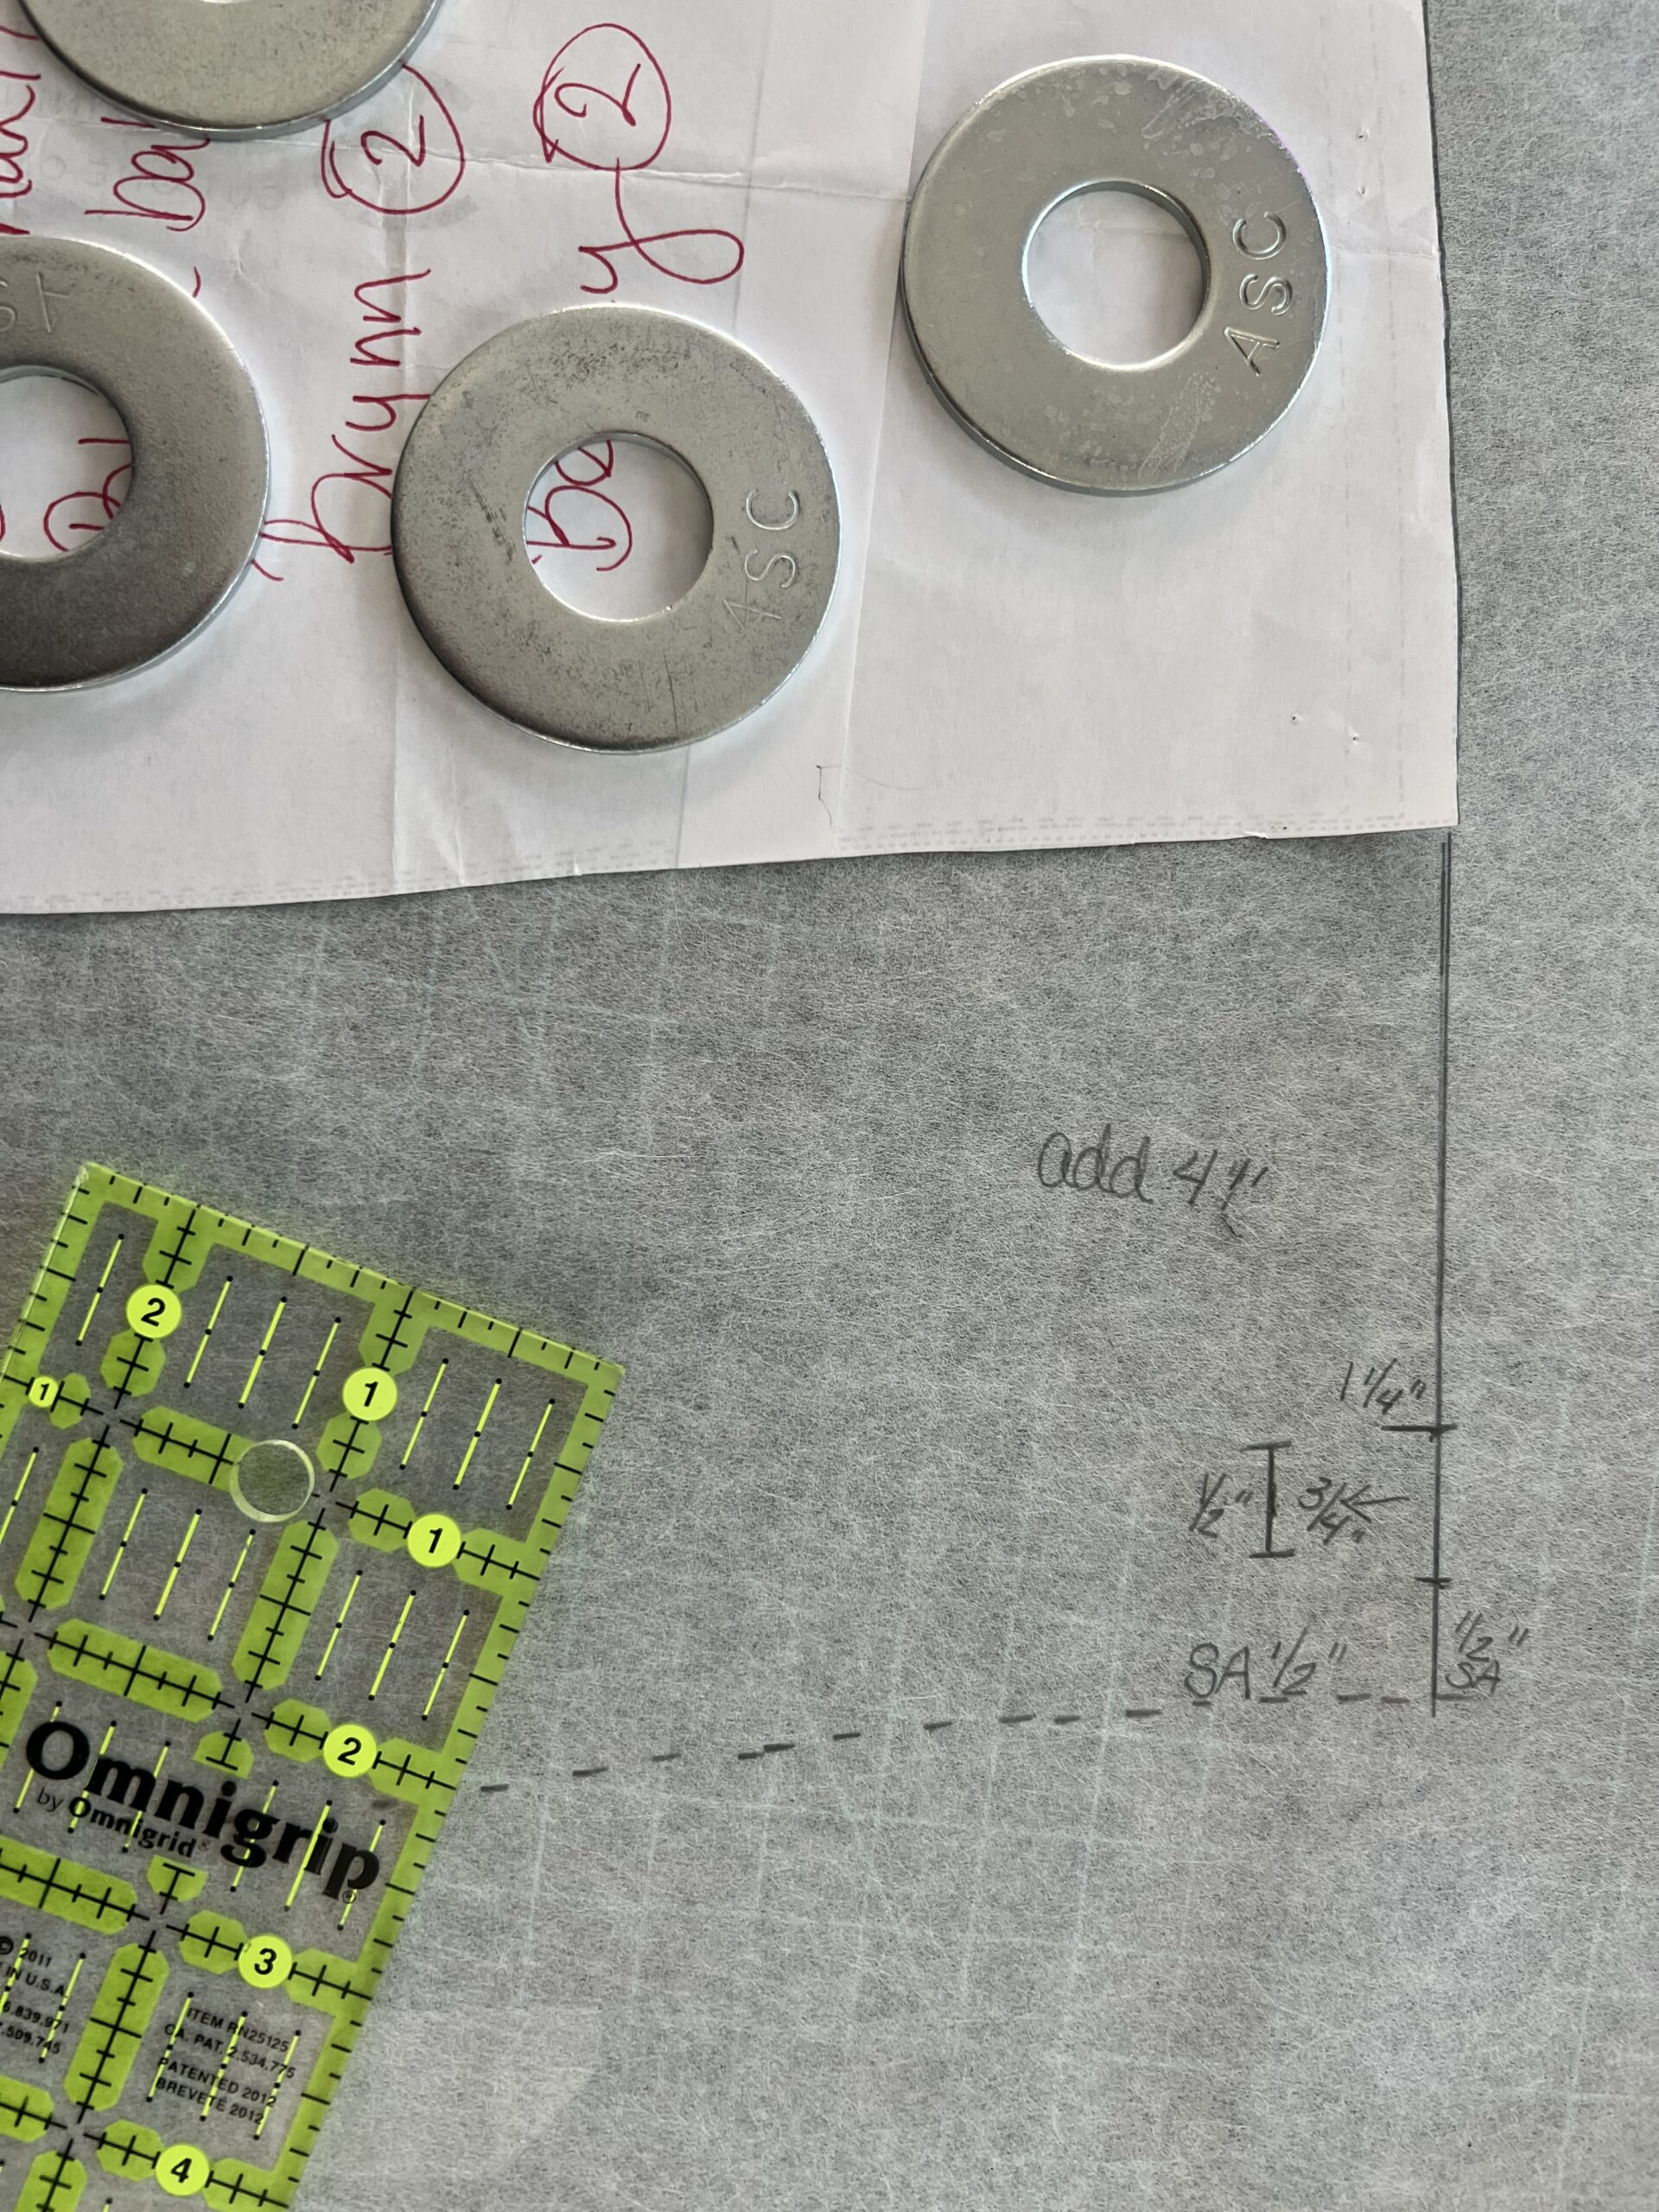
Buttonholes placement on the front and back pattern pieces: The buttonhole will be ½” tall. Measure 1 ¼” from the bottom edge and place a mark, this will be the top of the buttonhole. Next, measure ¾” in from the side seam, this will be the outside line of the buttonhole. Now measure 5/8” from the bottom edge, this will be the bottom edge of the buttonhole. We will be sewing the bodice hem at a ½” seam allowance.
NOTE: If you have the Grace pattern by Marsha Style you can use the button placement from the front and back bodice.
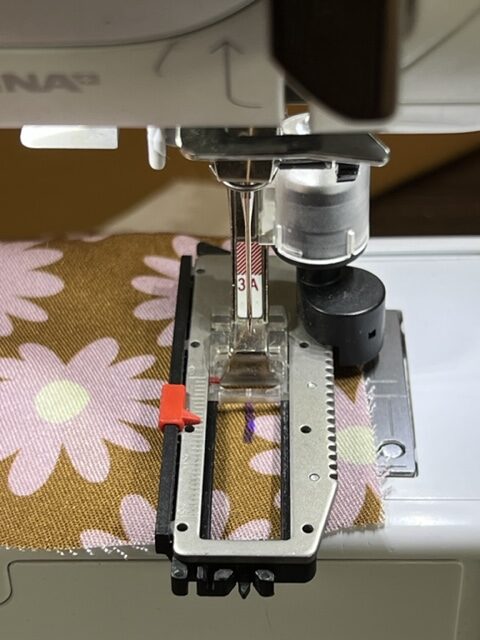
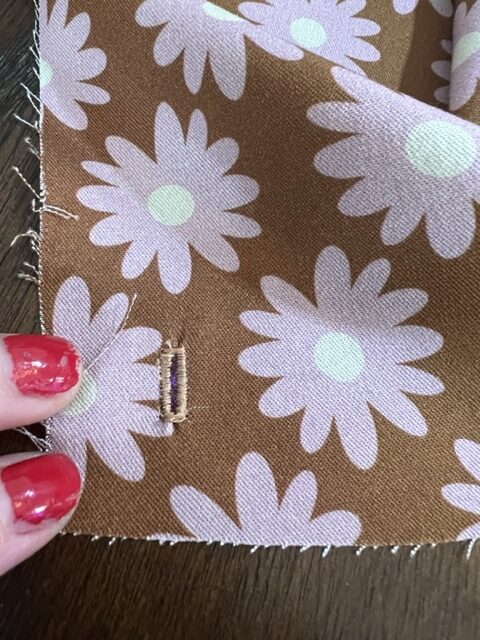
Step C:
Sew 2 buttonholes on the MAIN front bodice and 2 on the MAIN back bodice. Do not sew buttonholes on the lining. Apply Interfacing to the buttonholes once sewn. Open the buttonholes and use fray check.
Step D:
Sew everything per original instructions expect pin each strap to the top of the front and back bodice point. *This is only for straps tied along the shoulders.
Step E:
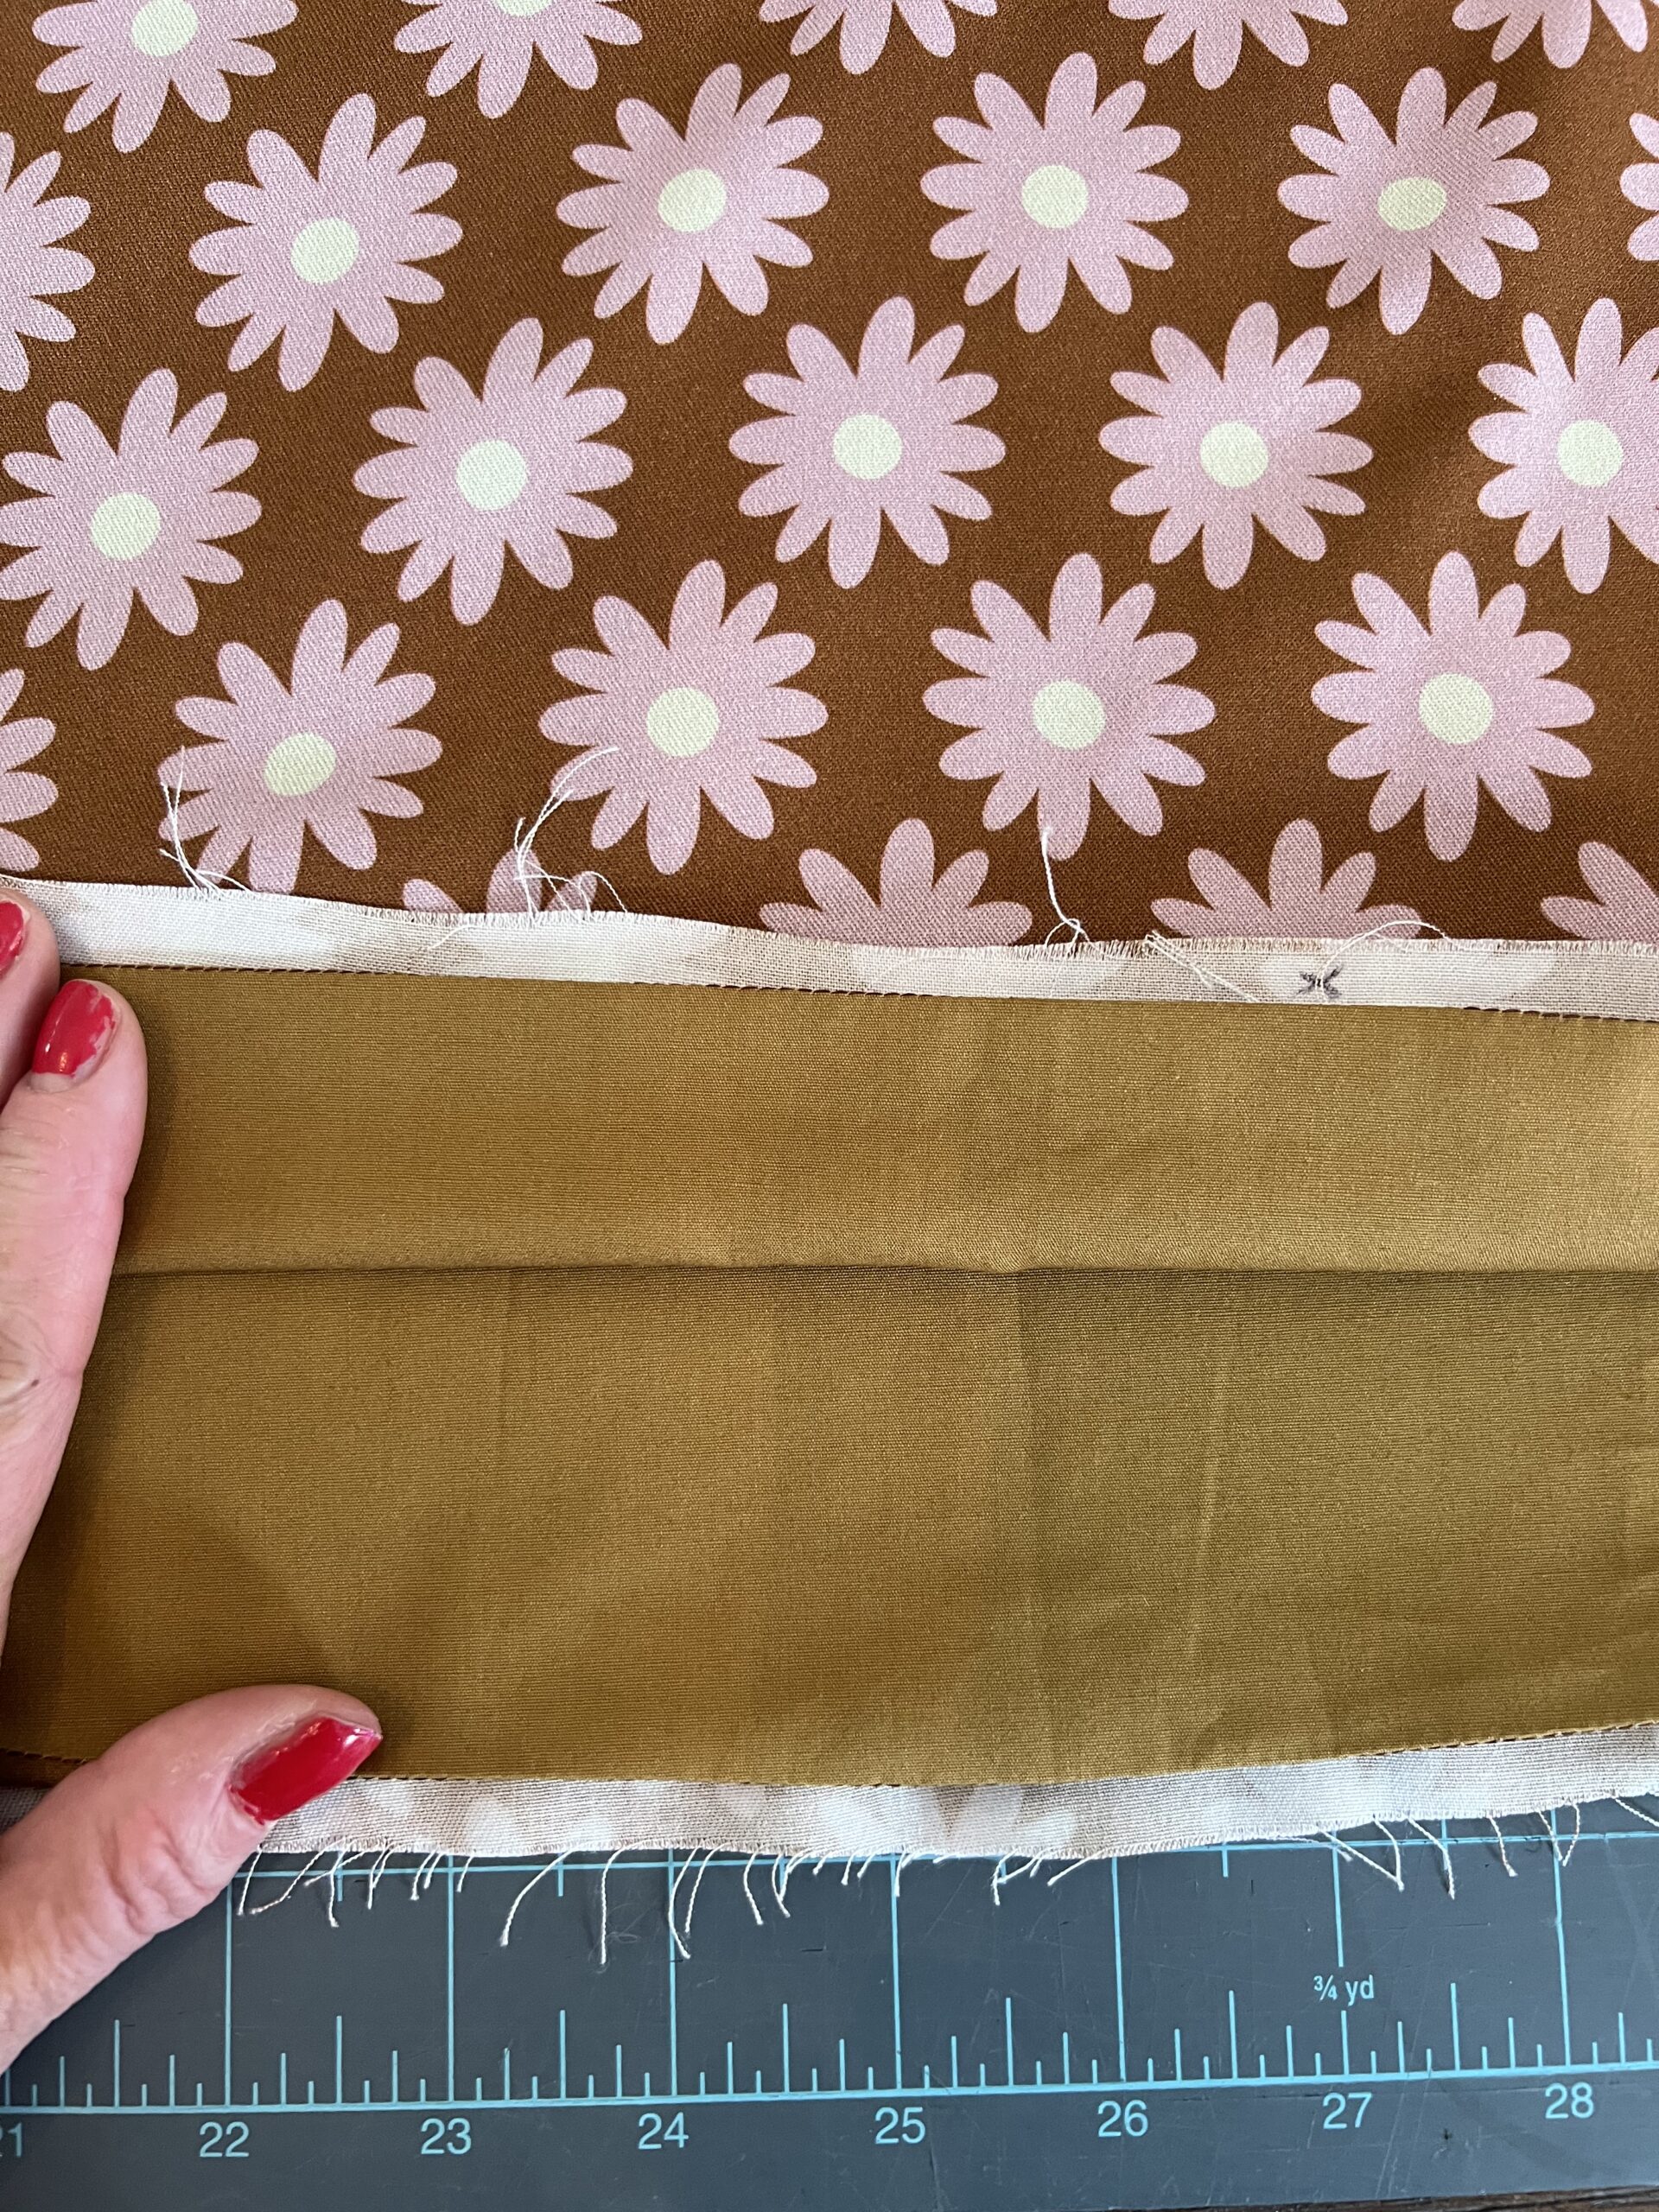
Once the bodice is sewn, fold the bodice lining up 3/8” towards to the wrong side of the fabric.
Step F:
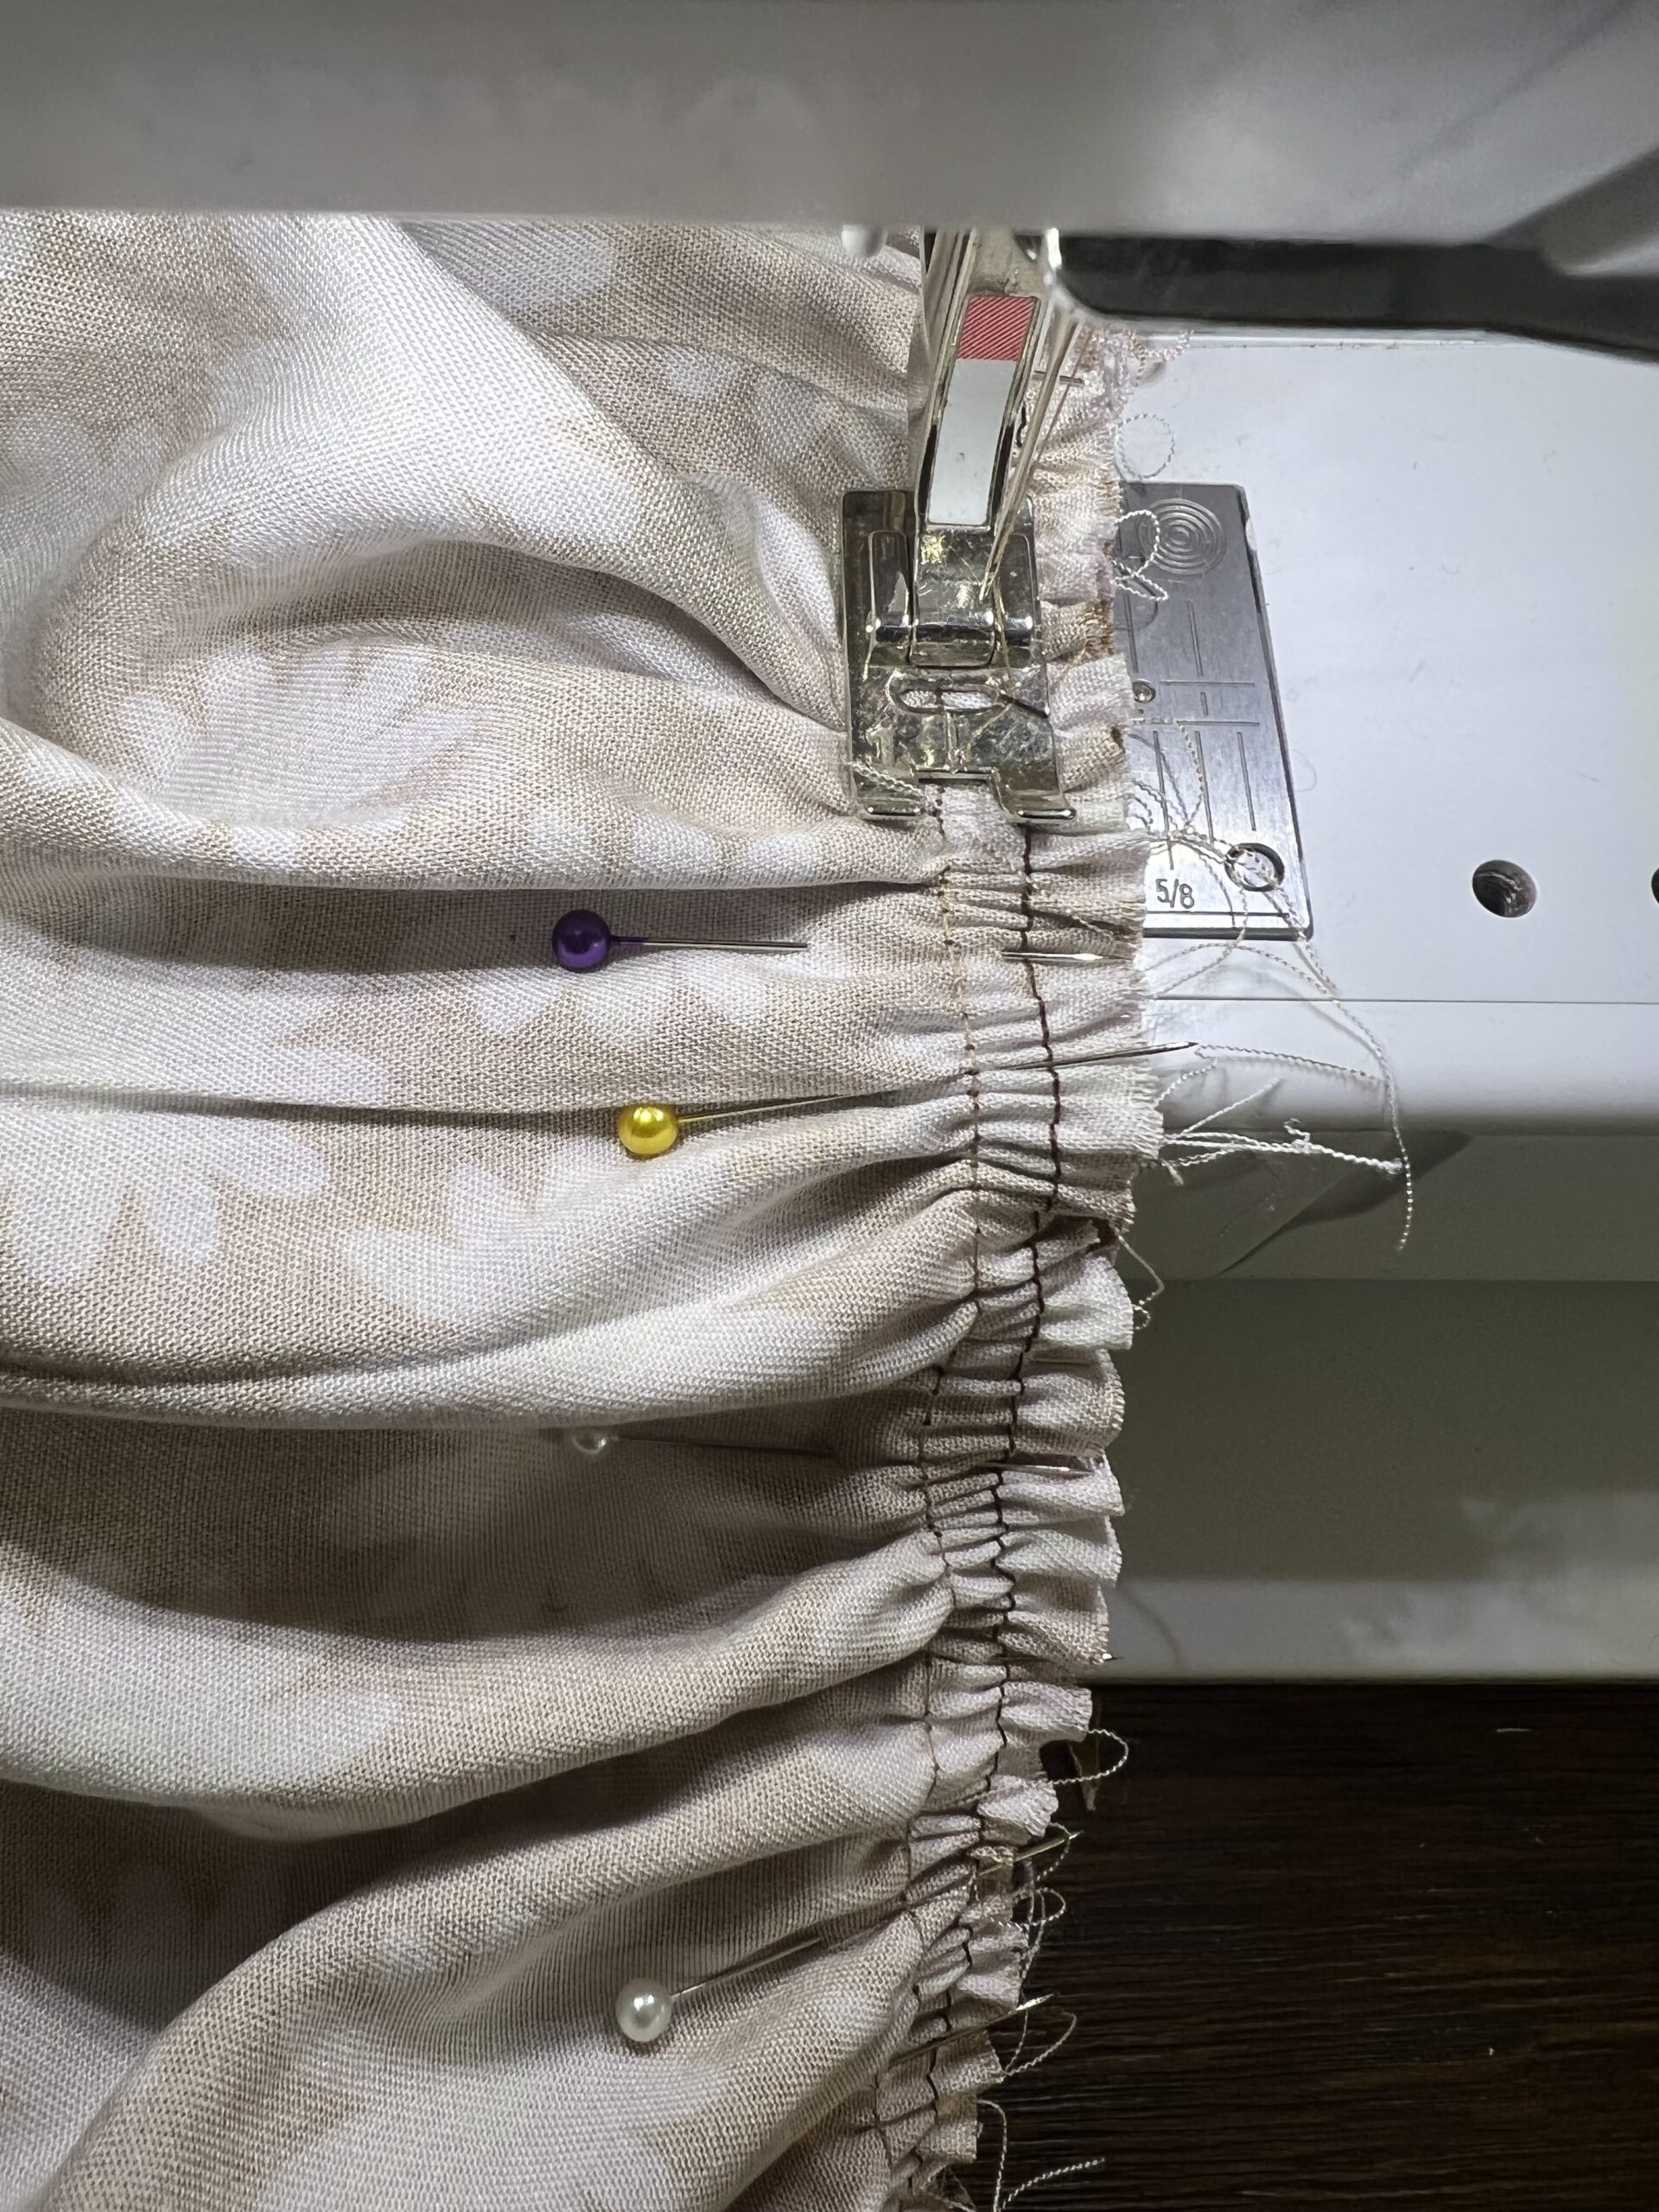
Sew the front and back skirt together along the side seam and then gather along the top of the skirt to the same width as the bodice.
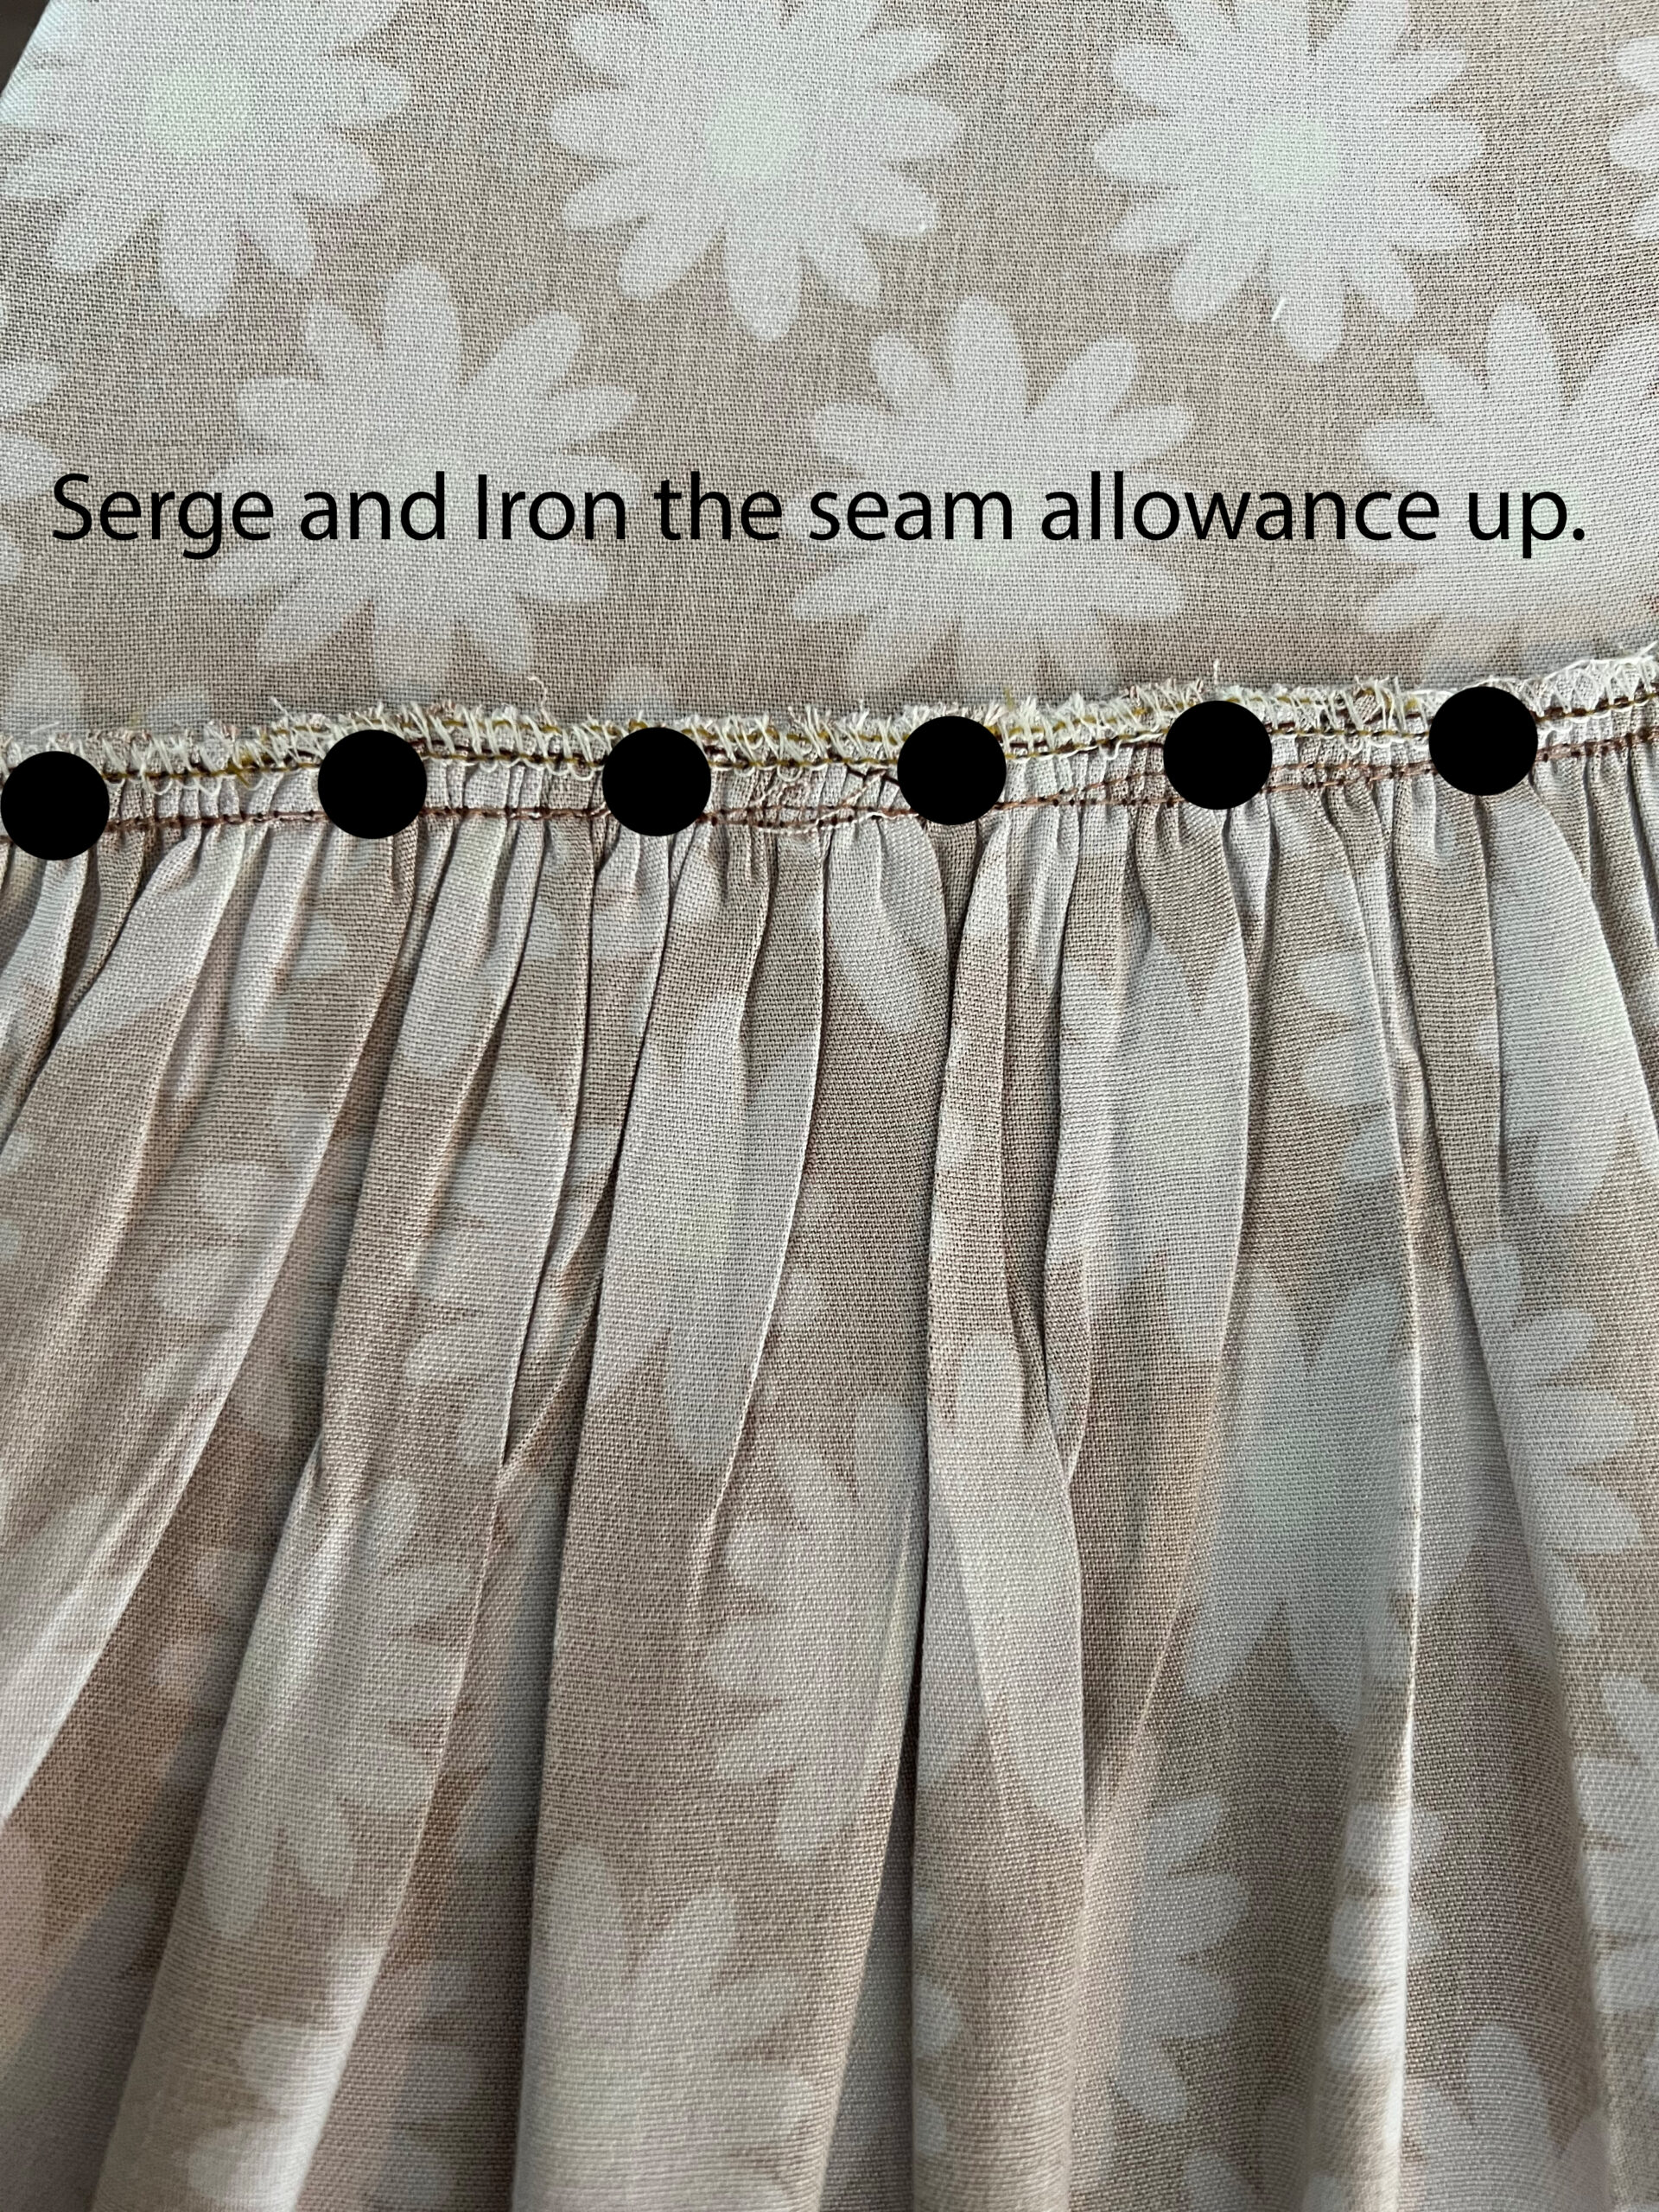
Step G:
Sew the gathered skirt to the main bodice, keeping the lining up and out of the way. Sew with a ½” seam allowance. Serge the seam allowance and iron up.
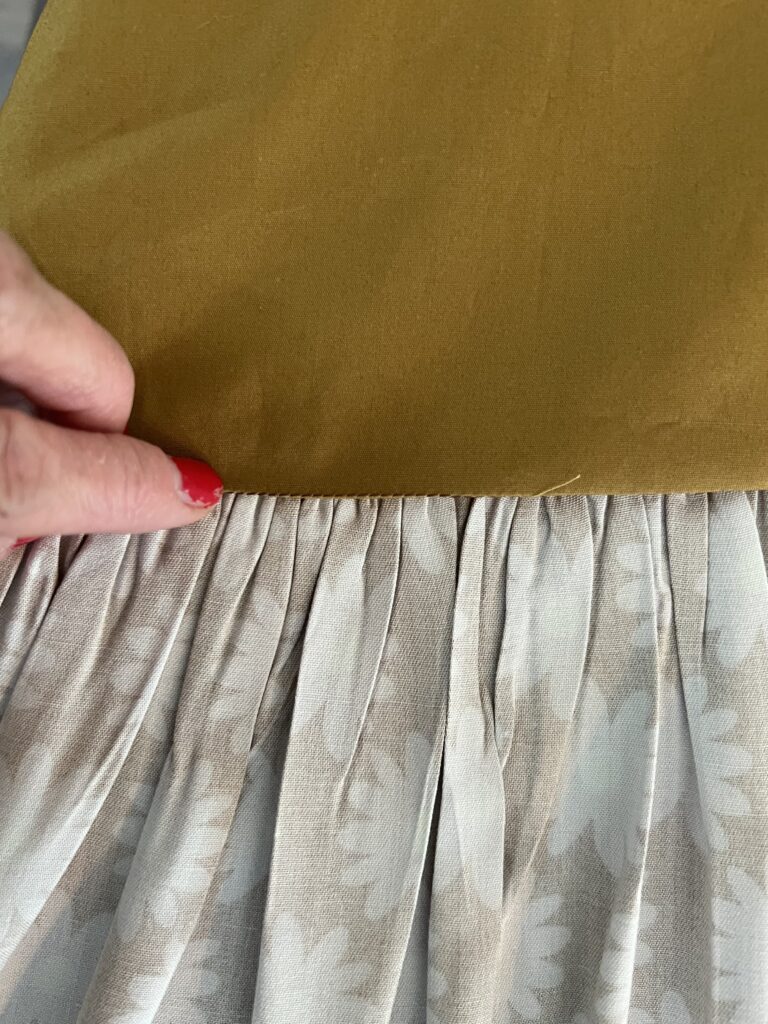
Step H:
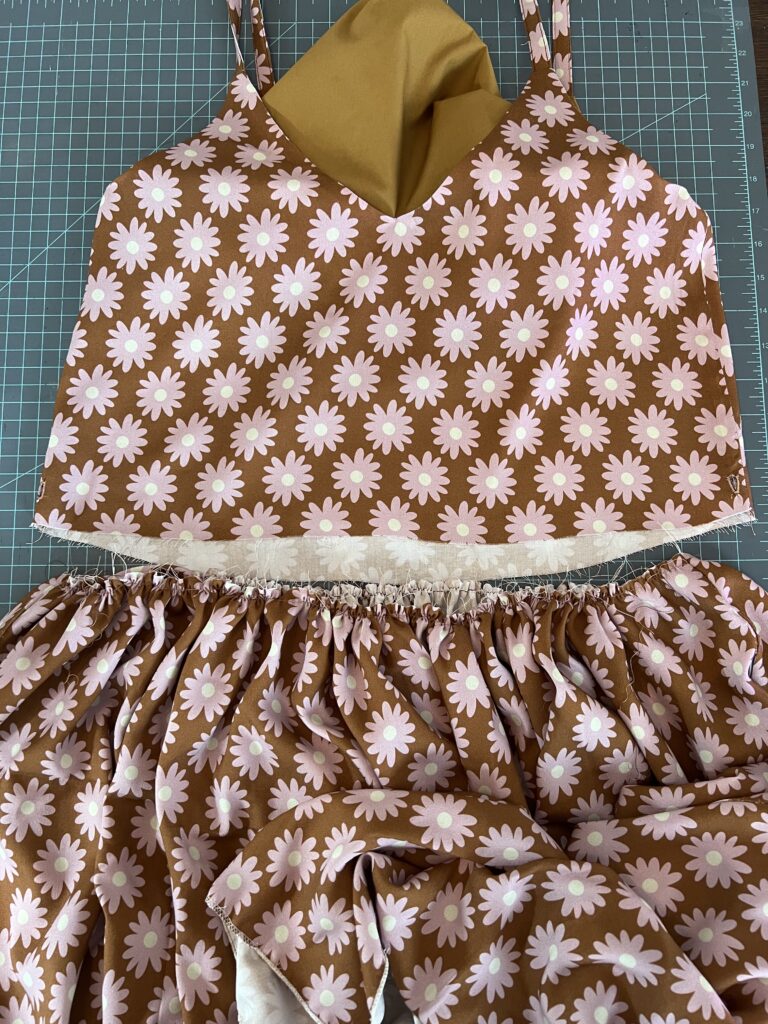
Place the lining down so that it covers the seam allowance and pin in place. Topstitch 1/8” above the seam, making sure to catch the lining.
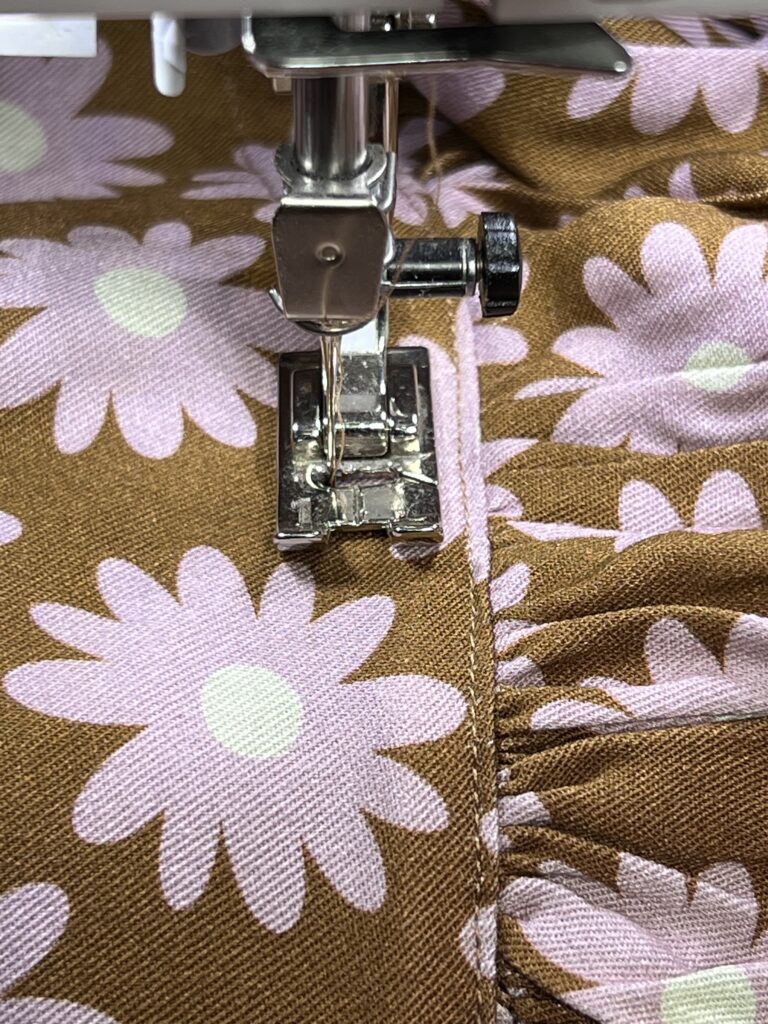
Step I:
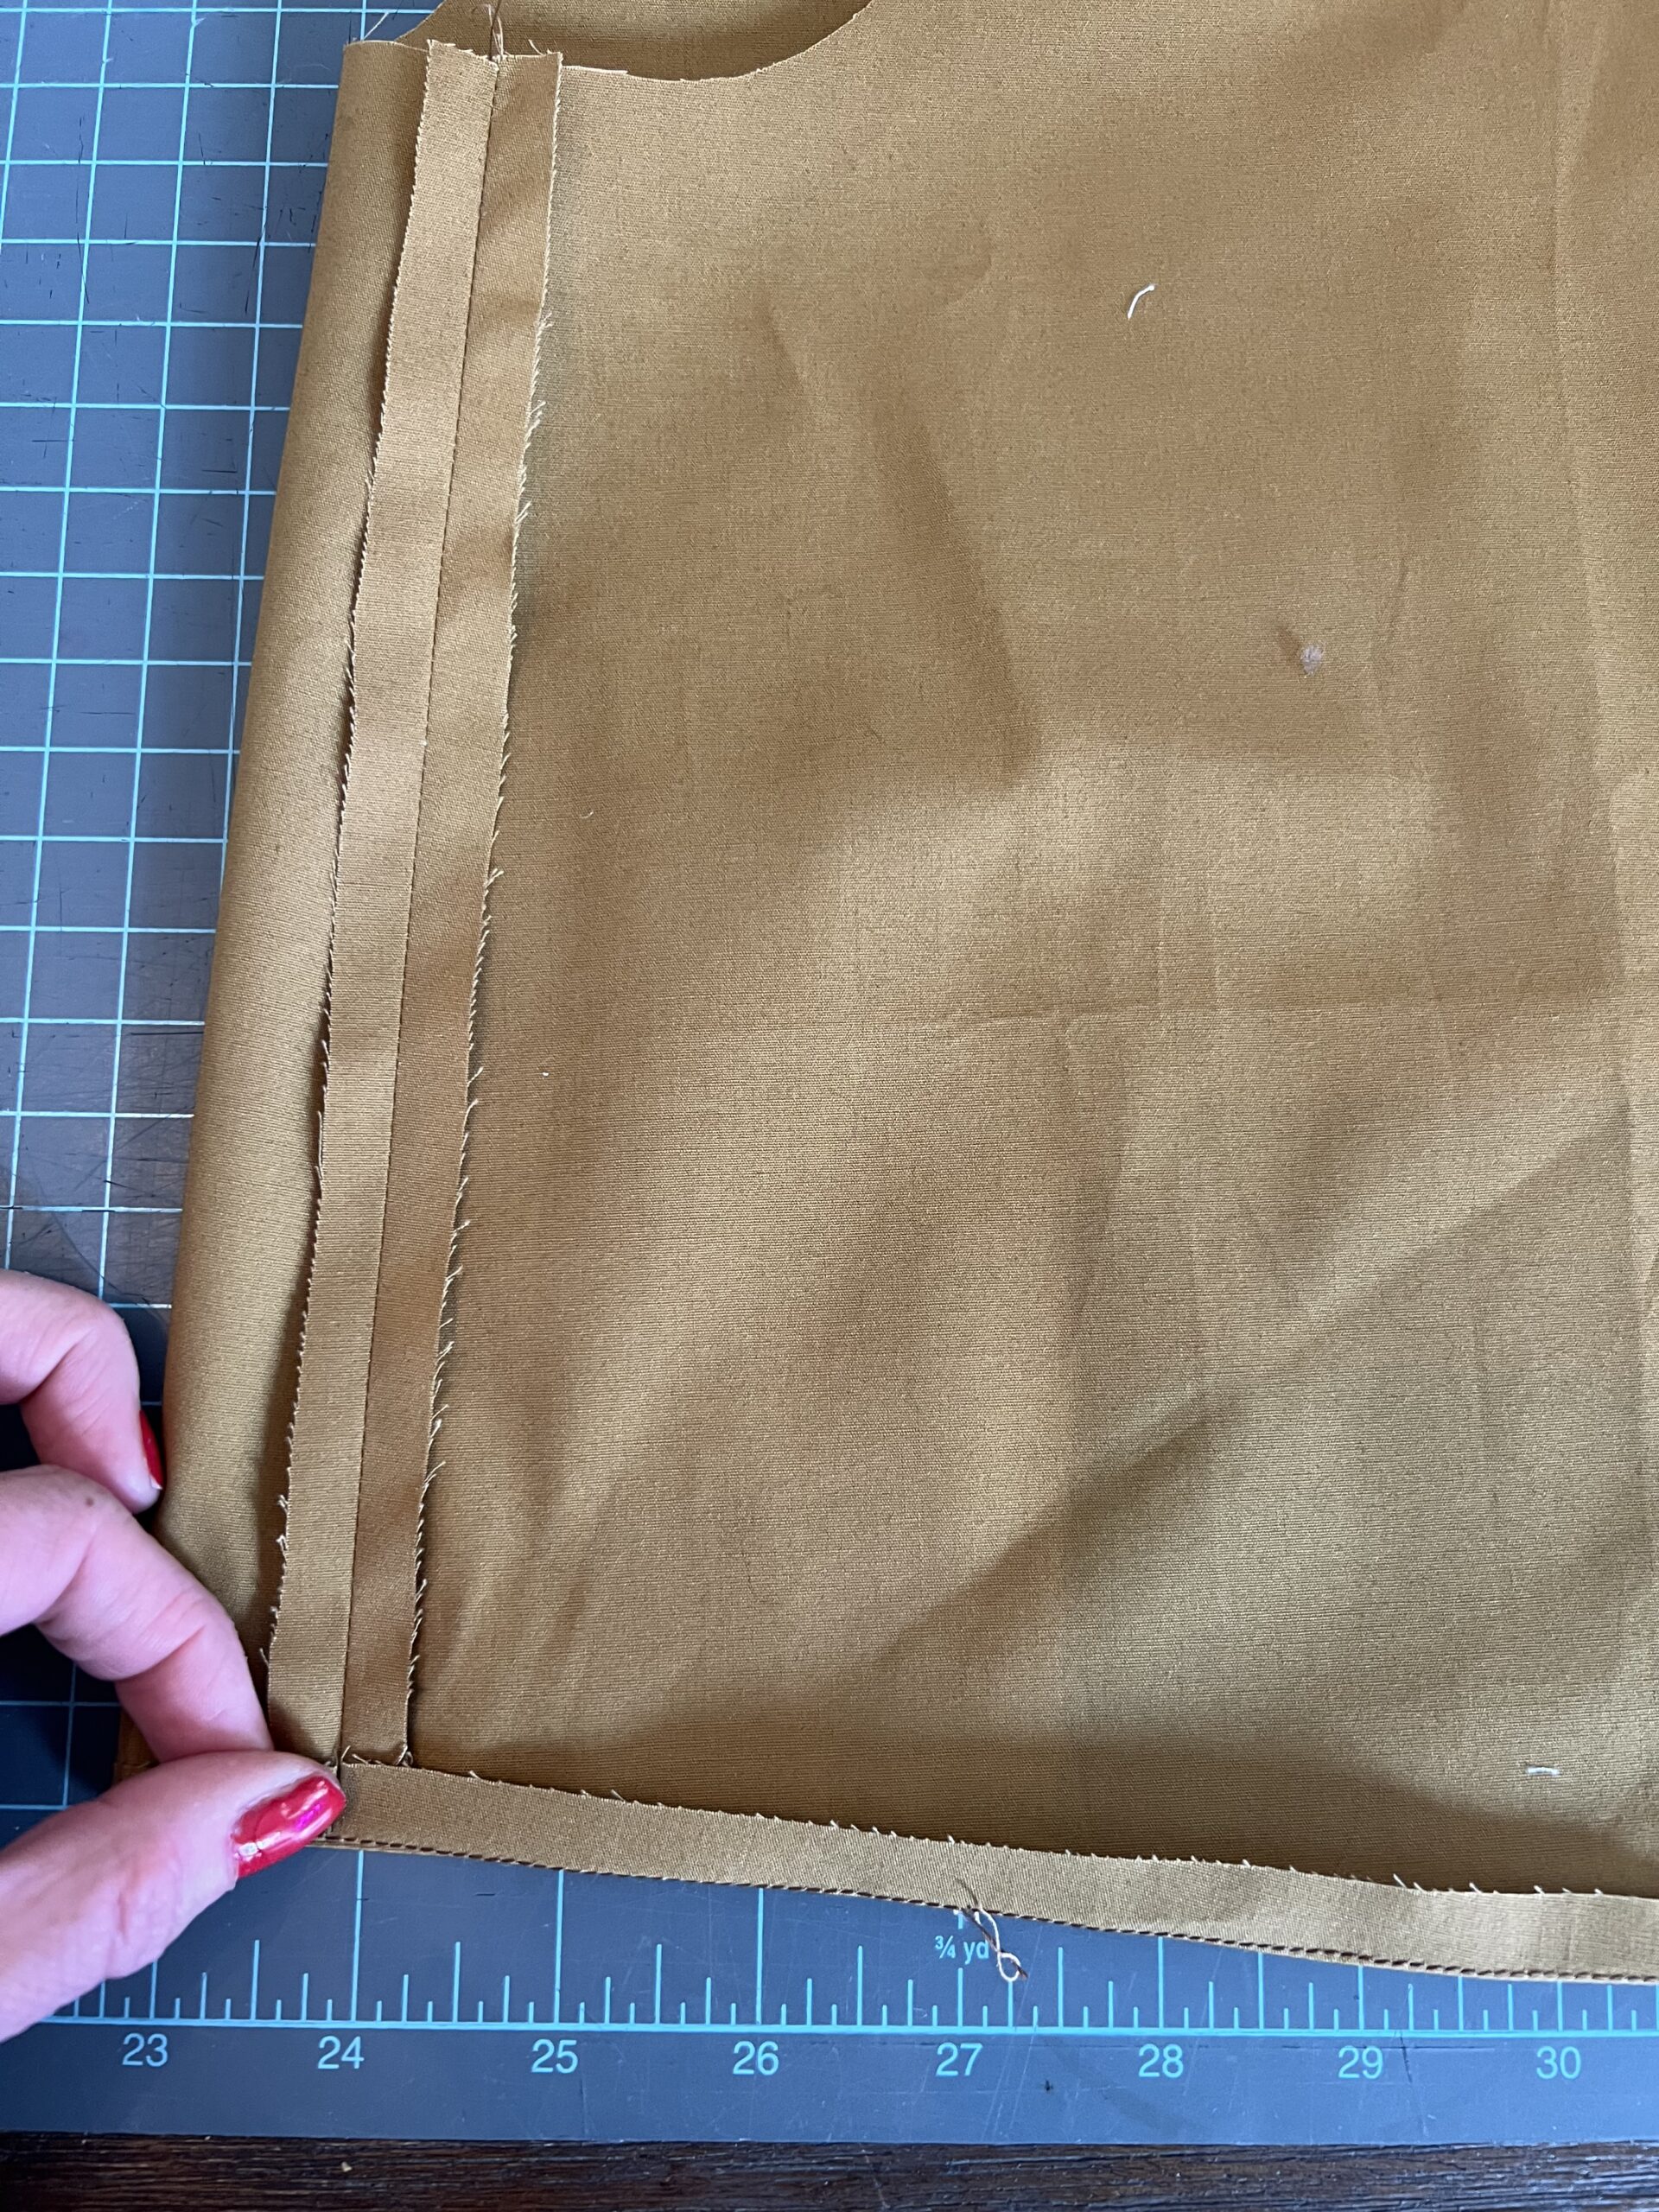
To create the casing for the ties, stitch 5/8” above the first stitching row all the way around.
Step J
Using a safety pin (or whichever tool you prefer) and feed the ties through one front bodice buttonhole to the other front buttonhole. Repeat with the bodice back.
Step K:
Hem the skirt- ¼” and another ¼” seam allowance.
All Done!
Here are the final photos…


Until next time…
Alexis