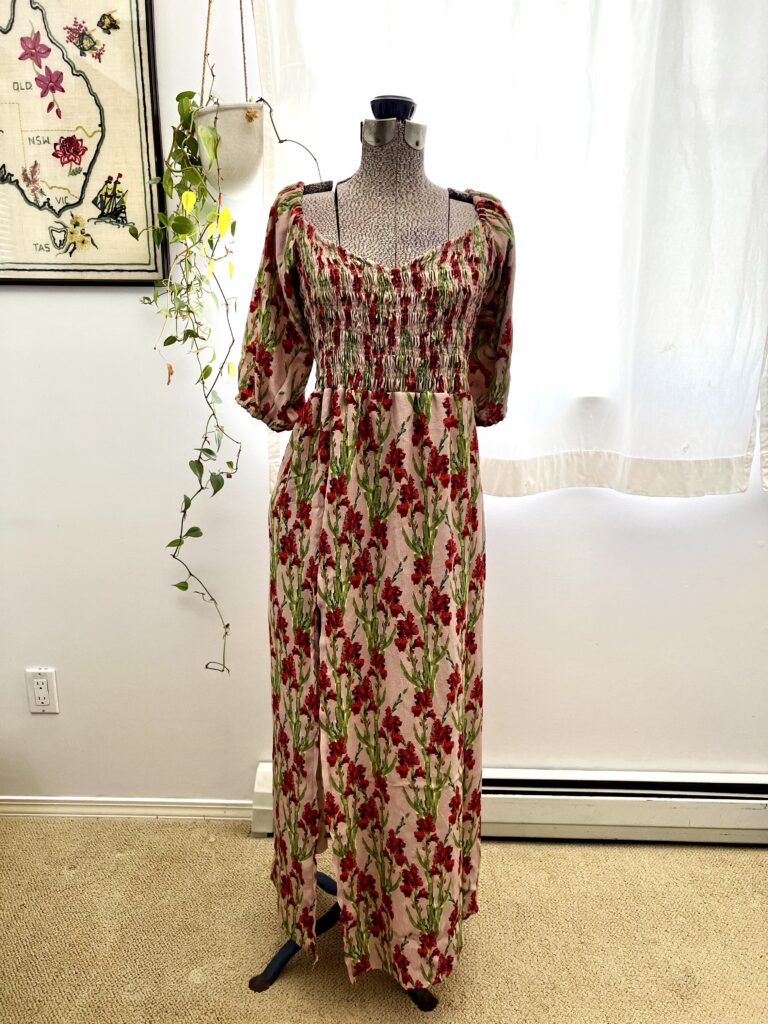
DIY Shirred Bodice Dress Hack

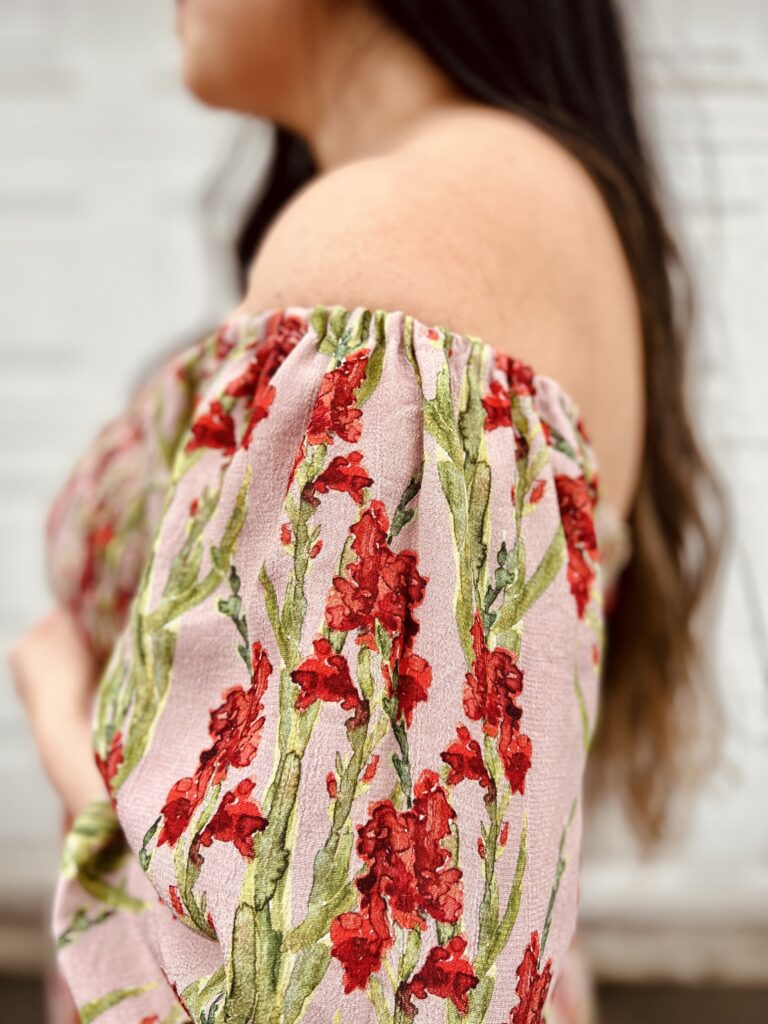
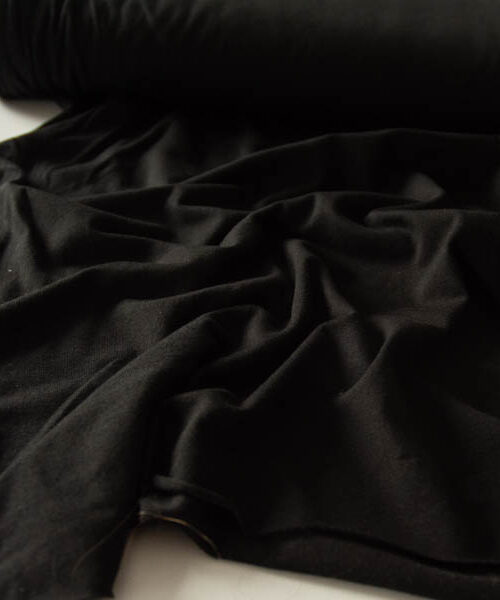
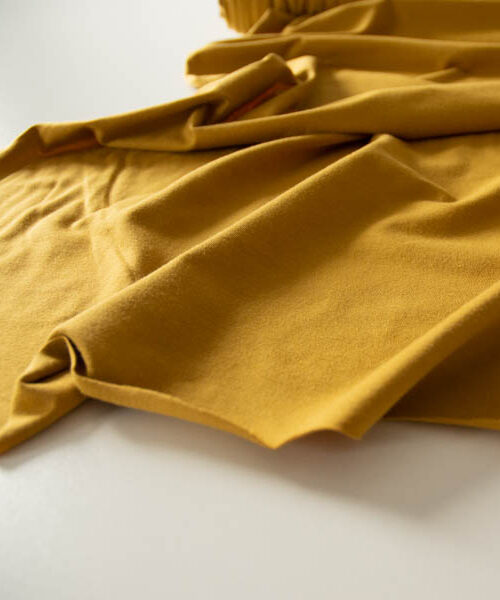
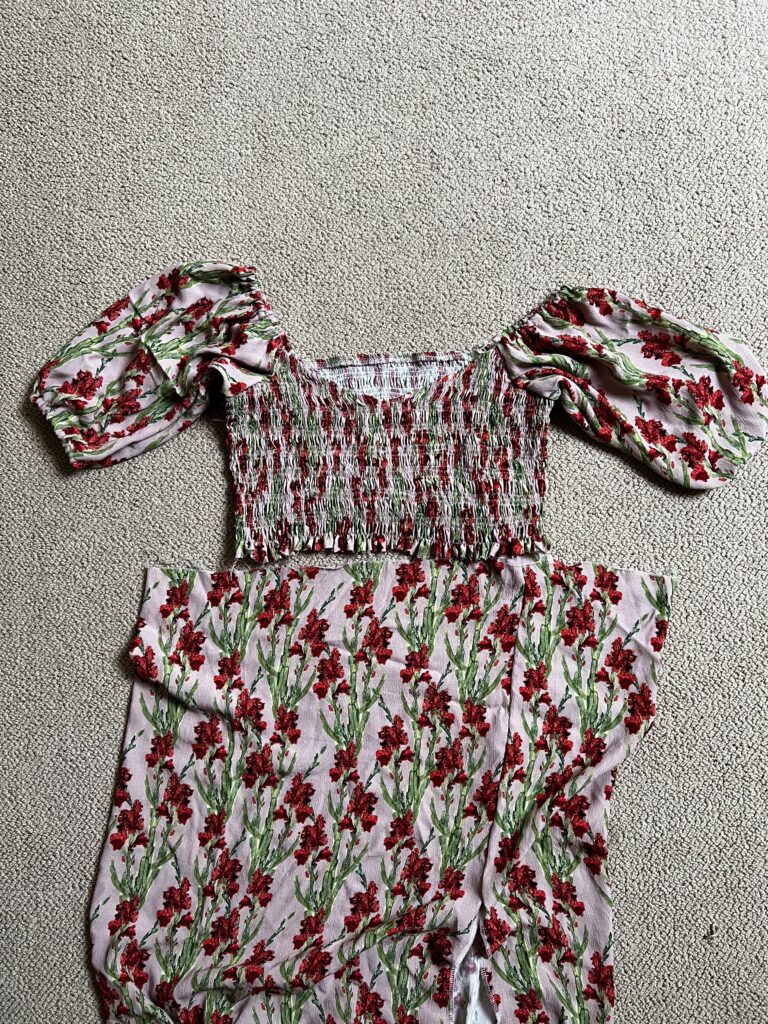
I have been wanting to create a fully shirred bodice for a dress for a while, and when I saw the beautiful Maker Studio Tori Crepe fabric, I knew it would be the perfect time to try it out. To do this hack, I fully shirred two pieces of fabric prior to cutting out my bodice pattern pieces, and it worked out really well!
I used the Tudor Blouse by Stitchwitch Patterns as a base, but you could use pretty much any bodice pattern to do this!
This fabric was perfect for the dress. It was easy to sew and press, and I love how the shirring looks with the floral print! It’s a lovely lightweight fabric that’s totally opaque, so no lining is necessary!


What you’ll need:
-a basic bodice or dress pattern- it can be sleeveless or have sleeves (knit or woven will work)
-an extra yard of fabric more than what the pattern suggests
-shirring/elastic thread
This was done by a bit of trial and error, so I pivoted when necessary, but here are the basic steps!
Assembly
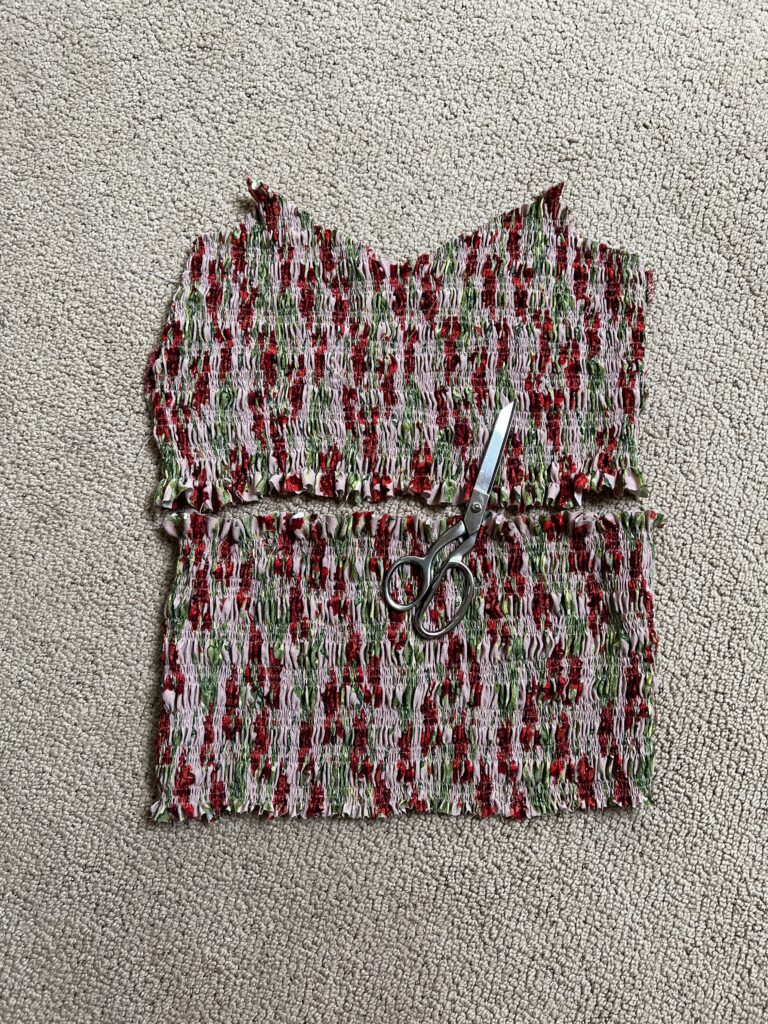
Step 1: I laid my pattern pieces on my fabric, and marked roughly how long the front and back bodice length would be on the fabric, and then shirred lines across the entire width of the fabric until I reached the length that I needed.
The fabric shrunk up a bit more than I had anticipated, but it was fine as the pattern I was using is for woven fabrics, and the newly shirred fabric had a lot of stretch, so I just cut it a bit smaller at the side seams. The pattern piece also had darts, which I had planned to sew, but since the shirred fabric is so stretchy, I just skipped sewing them, and straightened out the side seam.
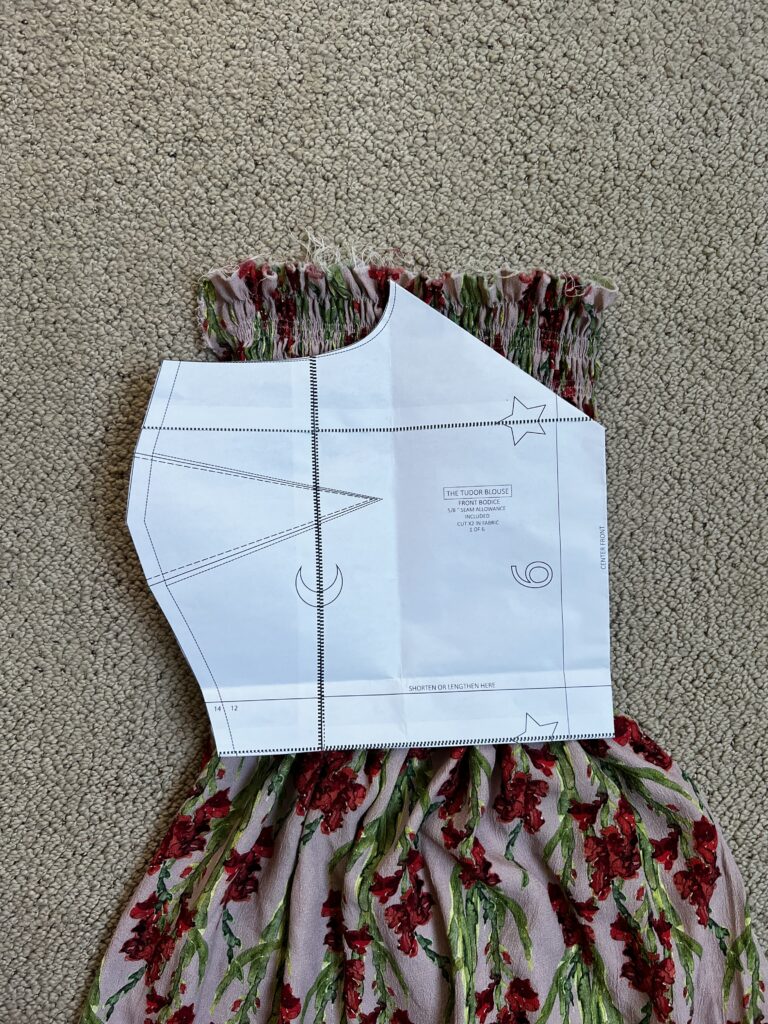
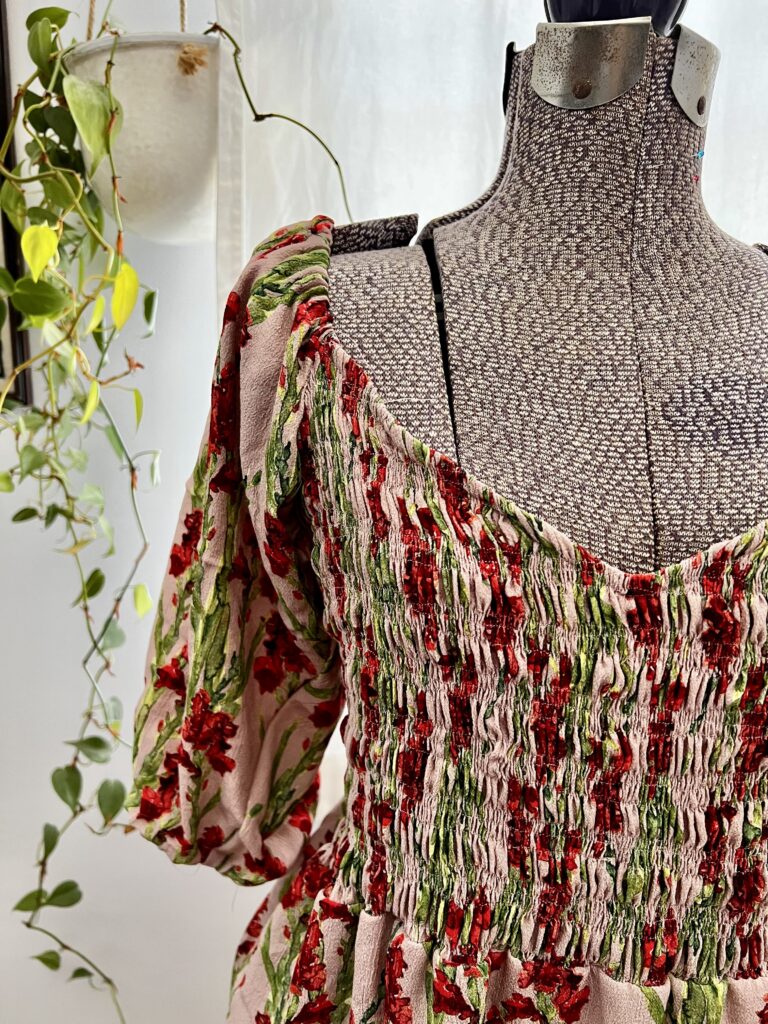
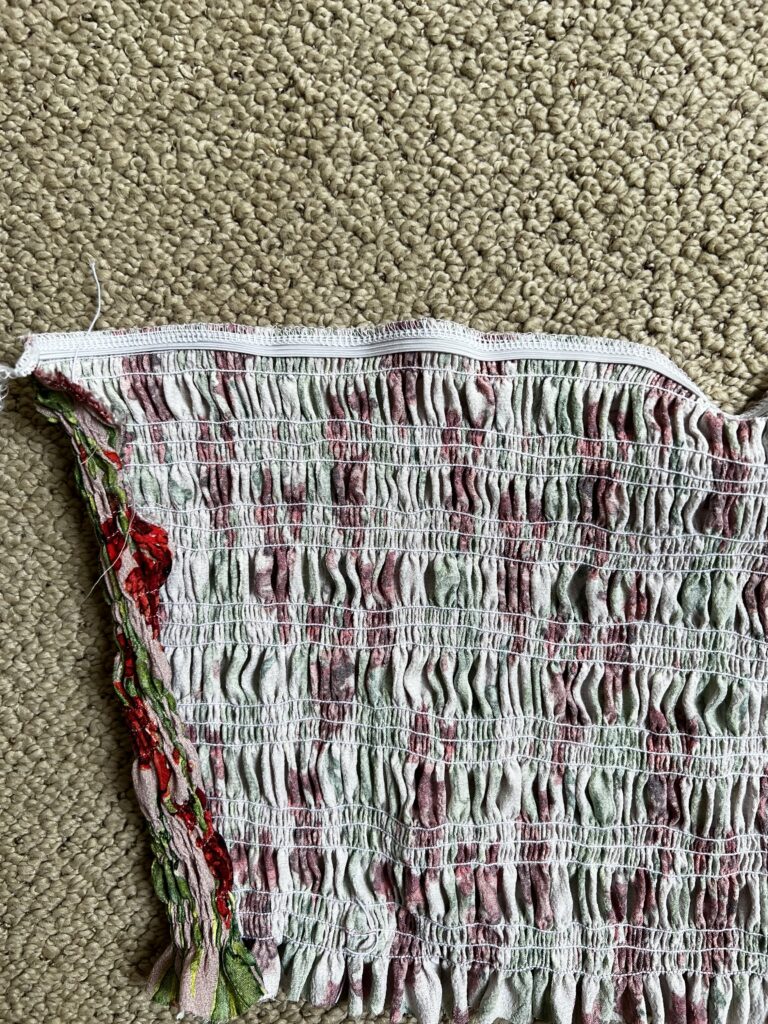
Step 2: Cut your front and back bodice pieces from the shirred fabric. I was worried that the shirring would unravel, but it was totally fine! I wouldn’t tug on the pieces, but the elastic held in place even after cutting. I hacked the neckline of the Tudor slightly by adding a V neck- I just folded the pattern piece down to approximately where I wanted the V neck to hit at Centre Front (See above photo).
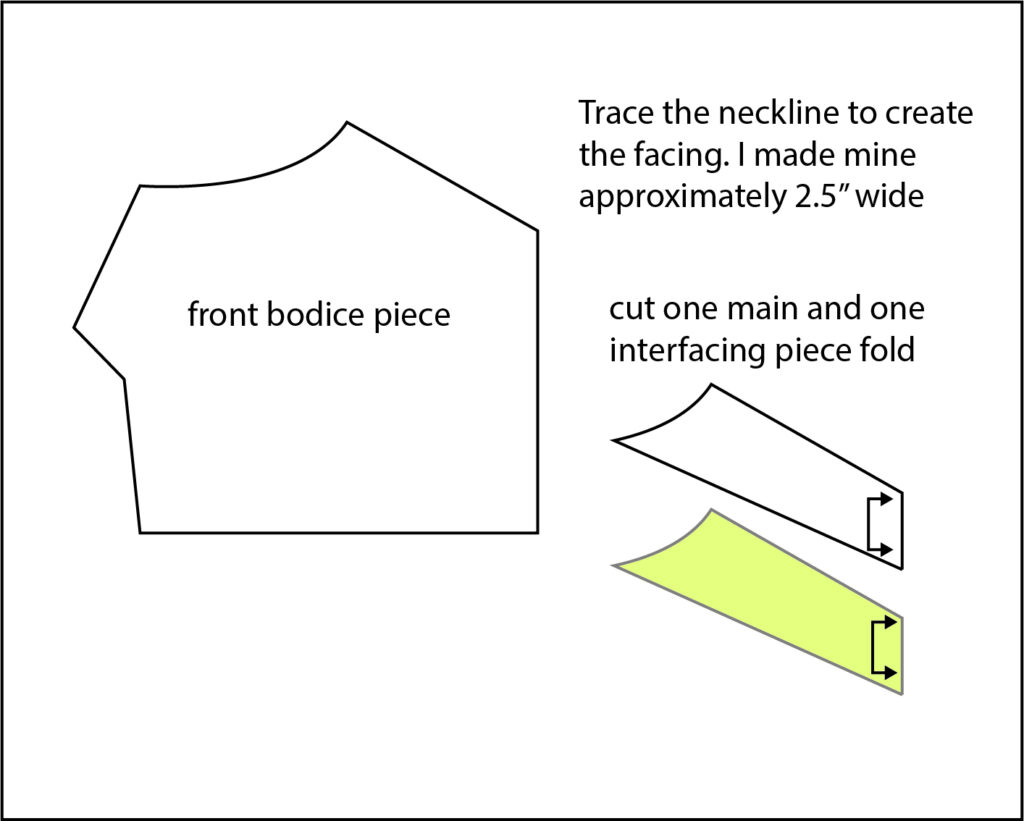
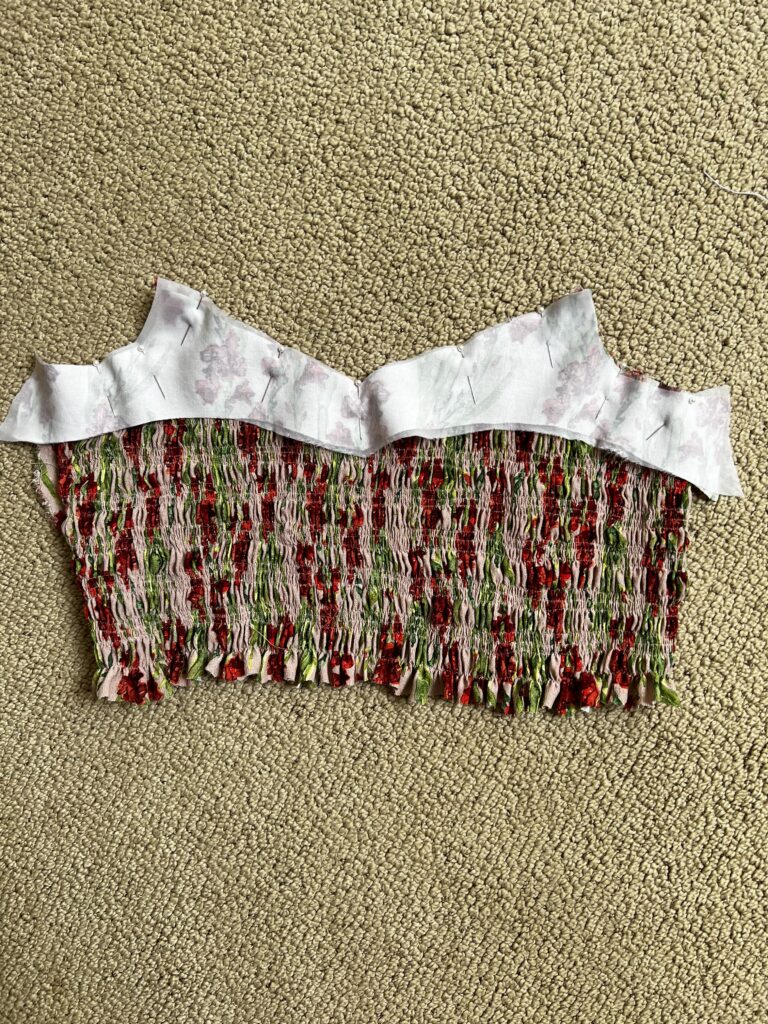
Step 3: To finish the front neckline edge of my bodice, I traced the neckline of the pattern piece to create a facing and cut the facing out of the fabric, and also cut a matching piece of interfacing. In the second photo below, I extended the facing to the armscye, but after sewing, realized I didn’t need it to extend to the armscye, as this pattern has sleeves. Here’s an illustration of the shape you’d need for your facing if you’re using the Tudor Blouse pattern, or a pattern with sleeves:
Step 4: Prep your facing by applying the interfacing to the wrong side, and serging the bottom edge. To sew the facing on, place it right sides together with the bodice piece, and sew at your intended seam allowance with a straight stitch. Press to the inside of the bodice.
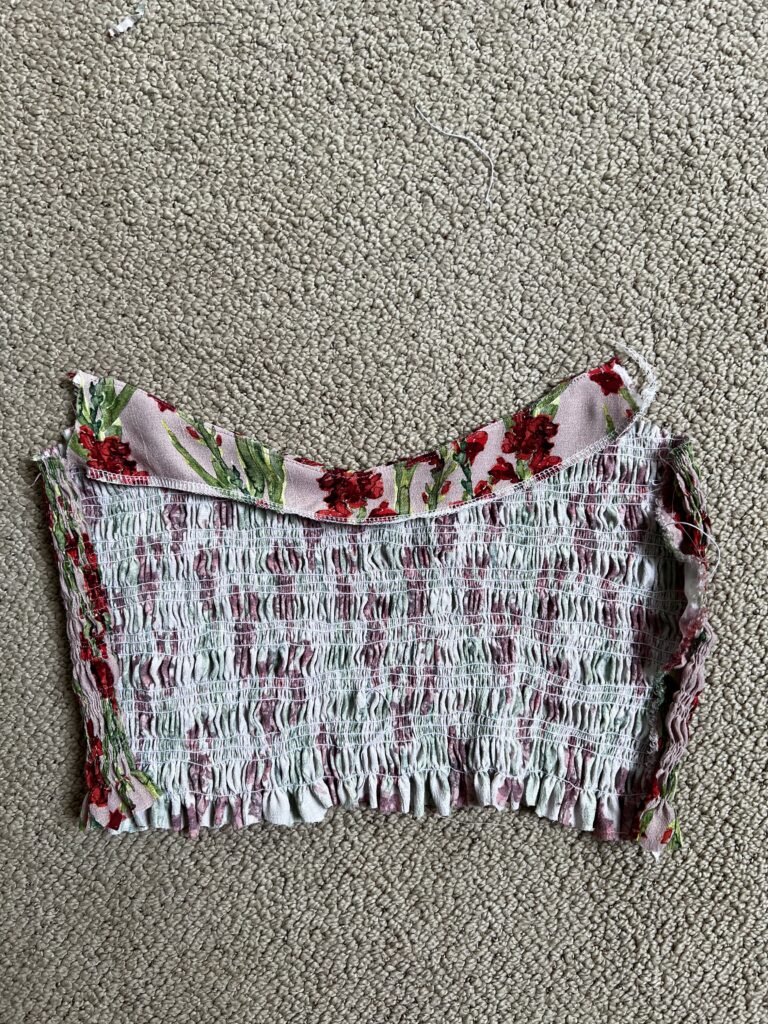
Step 5: Understitch the seam allowance to the facing so that it doesn’t flip out. I also topstitched 1/4″ from the edge to secure it even more as it was flipping out slightly.
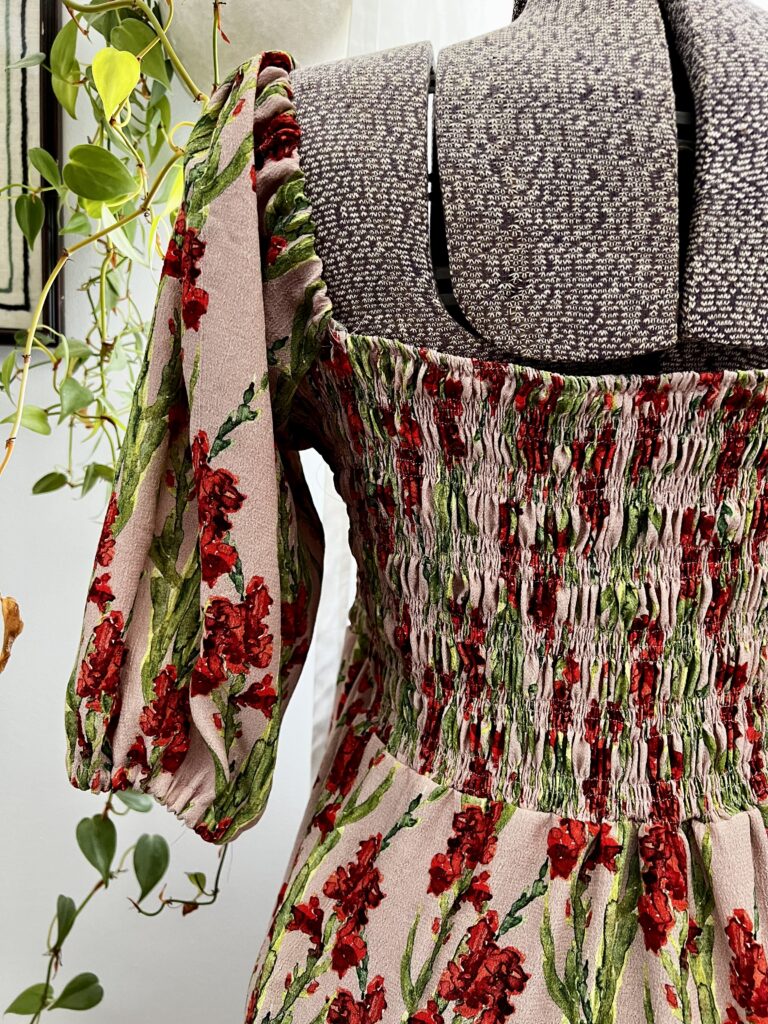
Step 6: To finish the top edge of the back bodice piece, I serged a piece of 1/4″ elastic to the top, then folded it down, and zig zagged it to secure and finish the raw edge.
Step 7: I then basted the front and back bodice pieces to check the fit (you may need to take some width out of the side seams as the shirring will make it very stretchy). I took it in by about an inch on each side, and would probably take out more if I were my normal size (currently 7 months pregnant!). I sewed it with a straight stitch once I had decided on the fit, and then serged the seam allowance together.
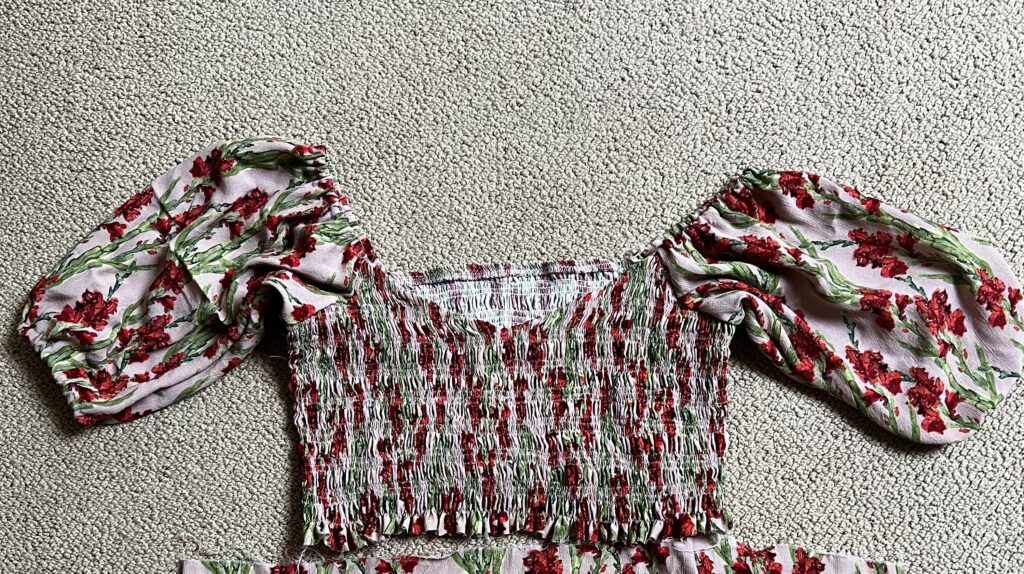
Step 8: From there, I cut the sleeves and followed the instructions of the Tudor blouse to sew and attach them.
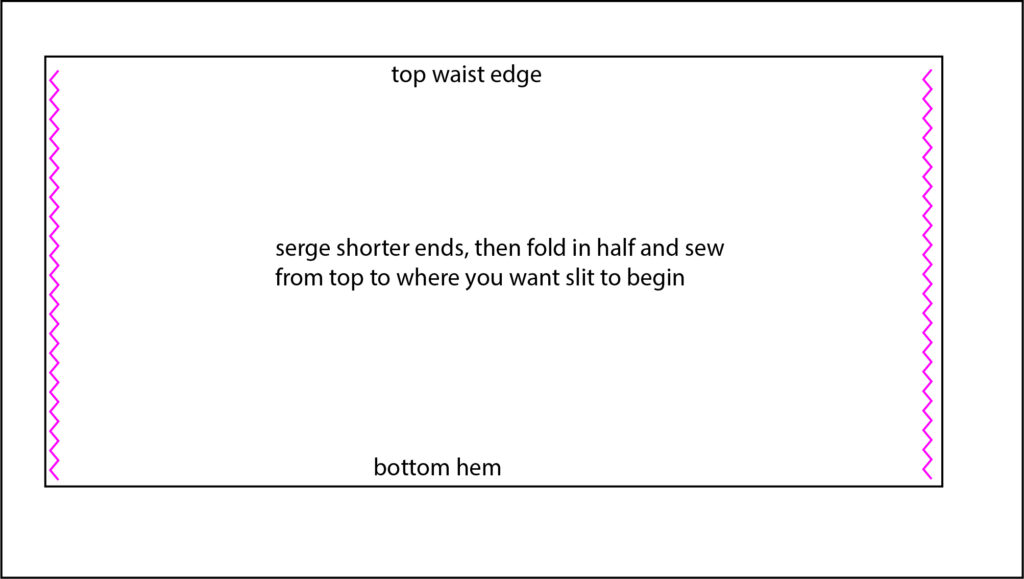
Step 9: To conserve fabric, the bottom portion of the skirt is a simple rectangle that is the width of the fabric. For the length, I held it up to the bodice while wearing it and marked where I wanted the hem to hit (maxi length in this case). I decided that I wanted a slit, so I serged the ends of the fabric, then sewed the rectangle together from the top down to where I wanted the slit to begin.
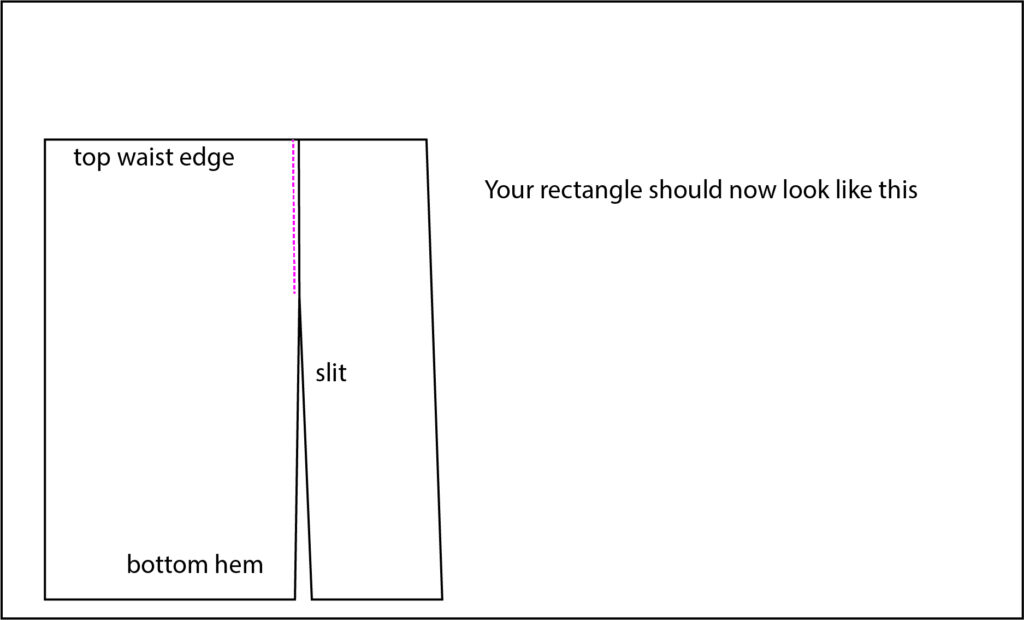
Step 10: I then decided where I wanted the slit to fall- I chose for it to fall on the right side of the dress, a few inches from the center.
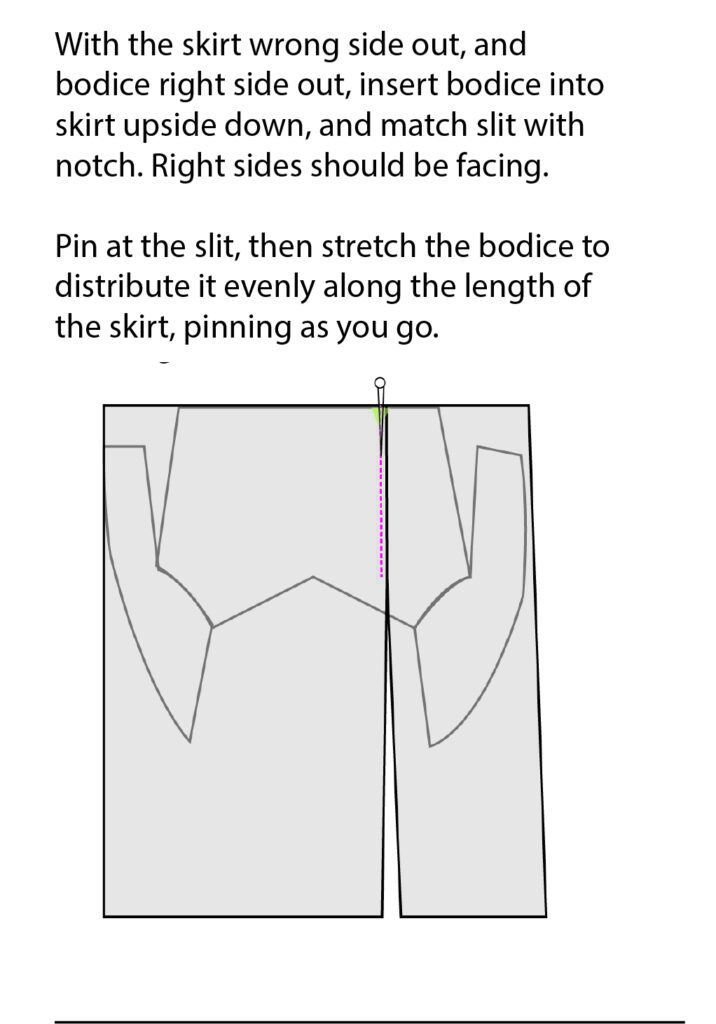
To sew the skirt to the bodice, I turned the skirt wrong side out, and placed the bodice inside the skirt, right side out, matching the right sides of the bodice and skirt. I pinned the slit location first, then evenly distributed and pinned the rest of the skirt to the bodice, stretching as I went to match the bodice to the skirt. I sewed them together with a straight stitch, and then finished the seam with my serger.

Step 11: The last steps were to hem the slit and the bottom hem, and that was it!
You can use pretty much any bodice pattern with this shirring hack- it may take a little basting to figure out the fit, but I love how it allows you to add a different shape to the basic shirred rectangle bodice!