Choose Your Own Adventure:Precious Cargo
Learn how to add cargo pockets to any garment!

Hello! Mandy, here, with HandmadeMandy– coming at you with a fun tutorial. Cargo pants are back in fashion’s good graces and adding the eponymous pockets is a pretty easy way to give new life to a TNT pattern. This is also a great way to minimize waste but using up some of those odd-sized leftover scraps from cutting out most pant patterns. I have created a Pinterest board here, if you need a little inspiration.
We are going on a “Choose-your-own-adventure” cargo pocket edition! You can choose from three aesthetic styles– a box pleat, an inverted pleat or just a simple patch pocket. Then, you can decide whether you’d like your pocket to be lined or unlined and finally– you can opt for a pocket flap (lined or unlined) or leave the pocket open at the top. If all of this is sounds like a lot—fear not! I’ve included patterns and worksheets to make it very easy to design your own very own pocket(s). It’s set up in a modular fashion. Simply make one choice from each category and use the corresponding step to put your design together.
+ The Lola top pattern from fellow contributor, Candice, of Staystitch Pattern Co.
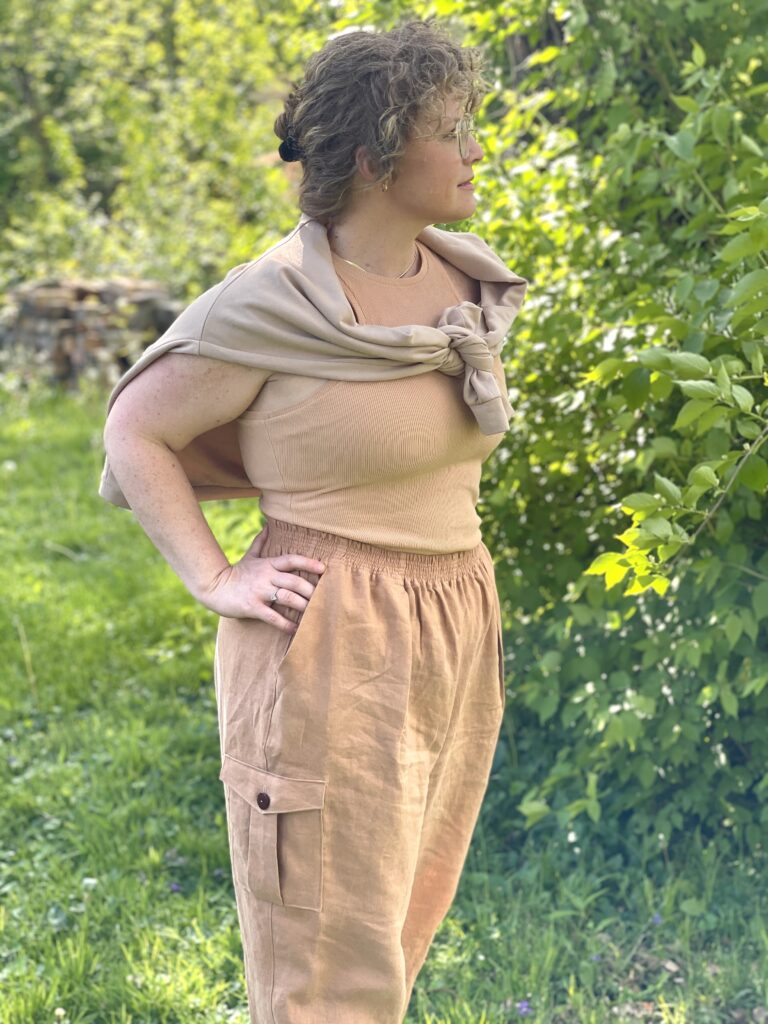
Hacking your patterns to add pockets should work with most pants patterns. To make things very easy, choose a pattern with a traditional outseam (side seam running from the waistband to hem) to use as a placement guide. I’ve made mine up using the beginner-friendly Paper Theory Miller Trousers. Really, you can add these pockets to anything. (pants, shorts, skirts, shirts, bags, rags… and there I went from practical to poetry again.) A sewing friend of mine mentioned that they’d look great on a shirt– and now I want to try this, too. (Hi, Amanda!)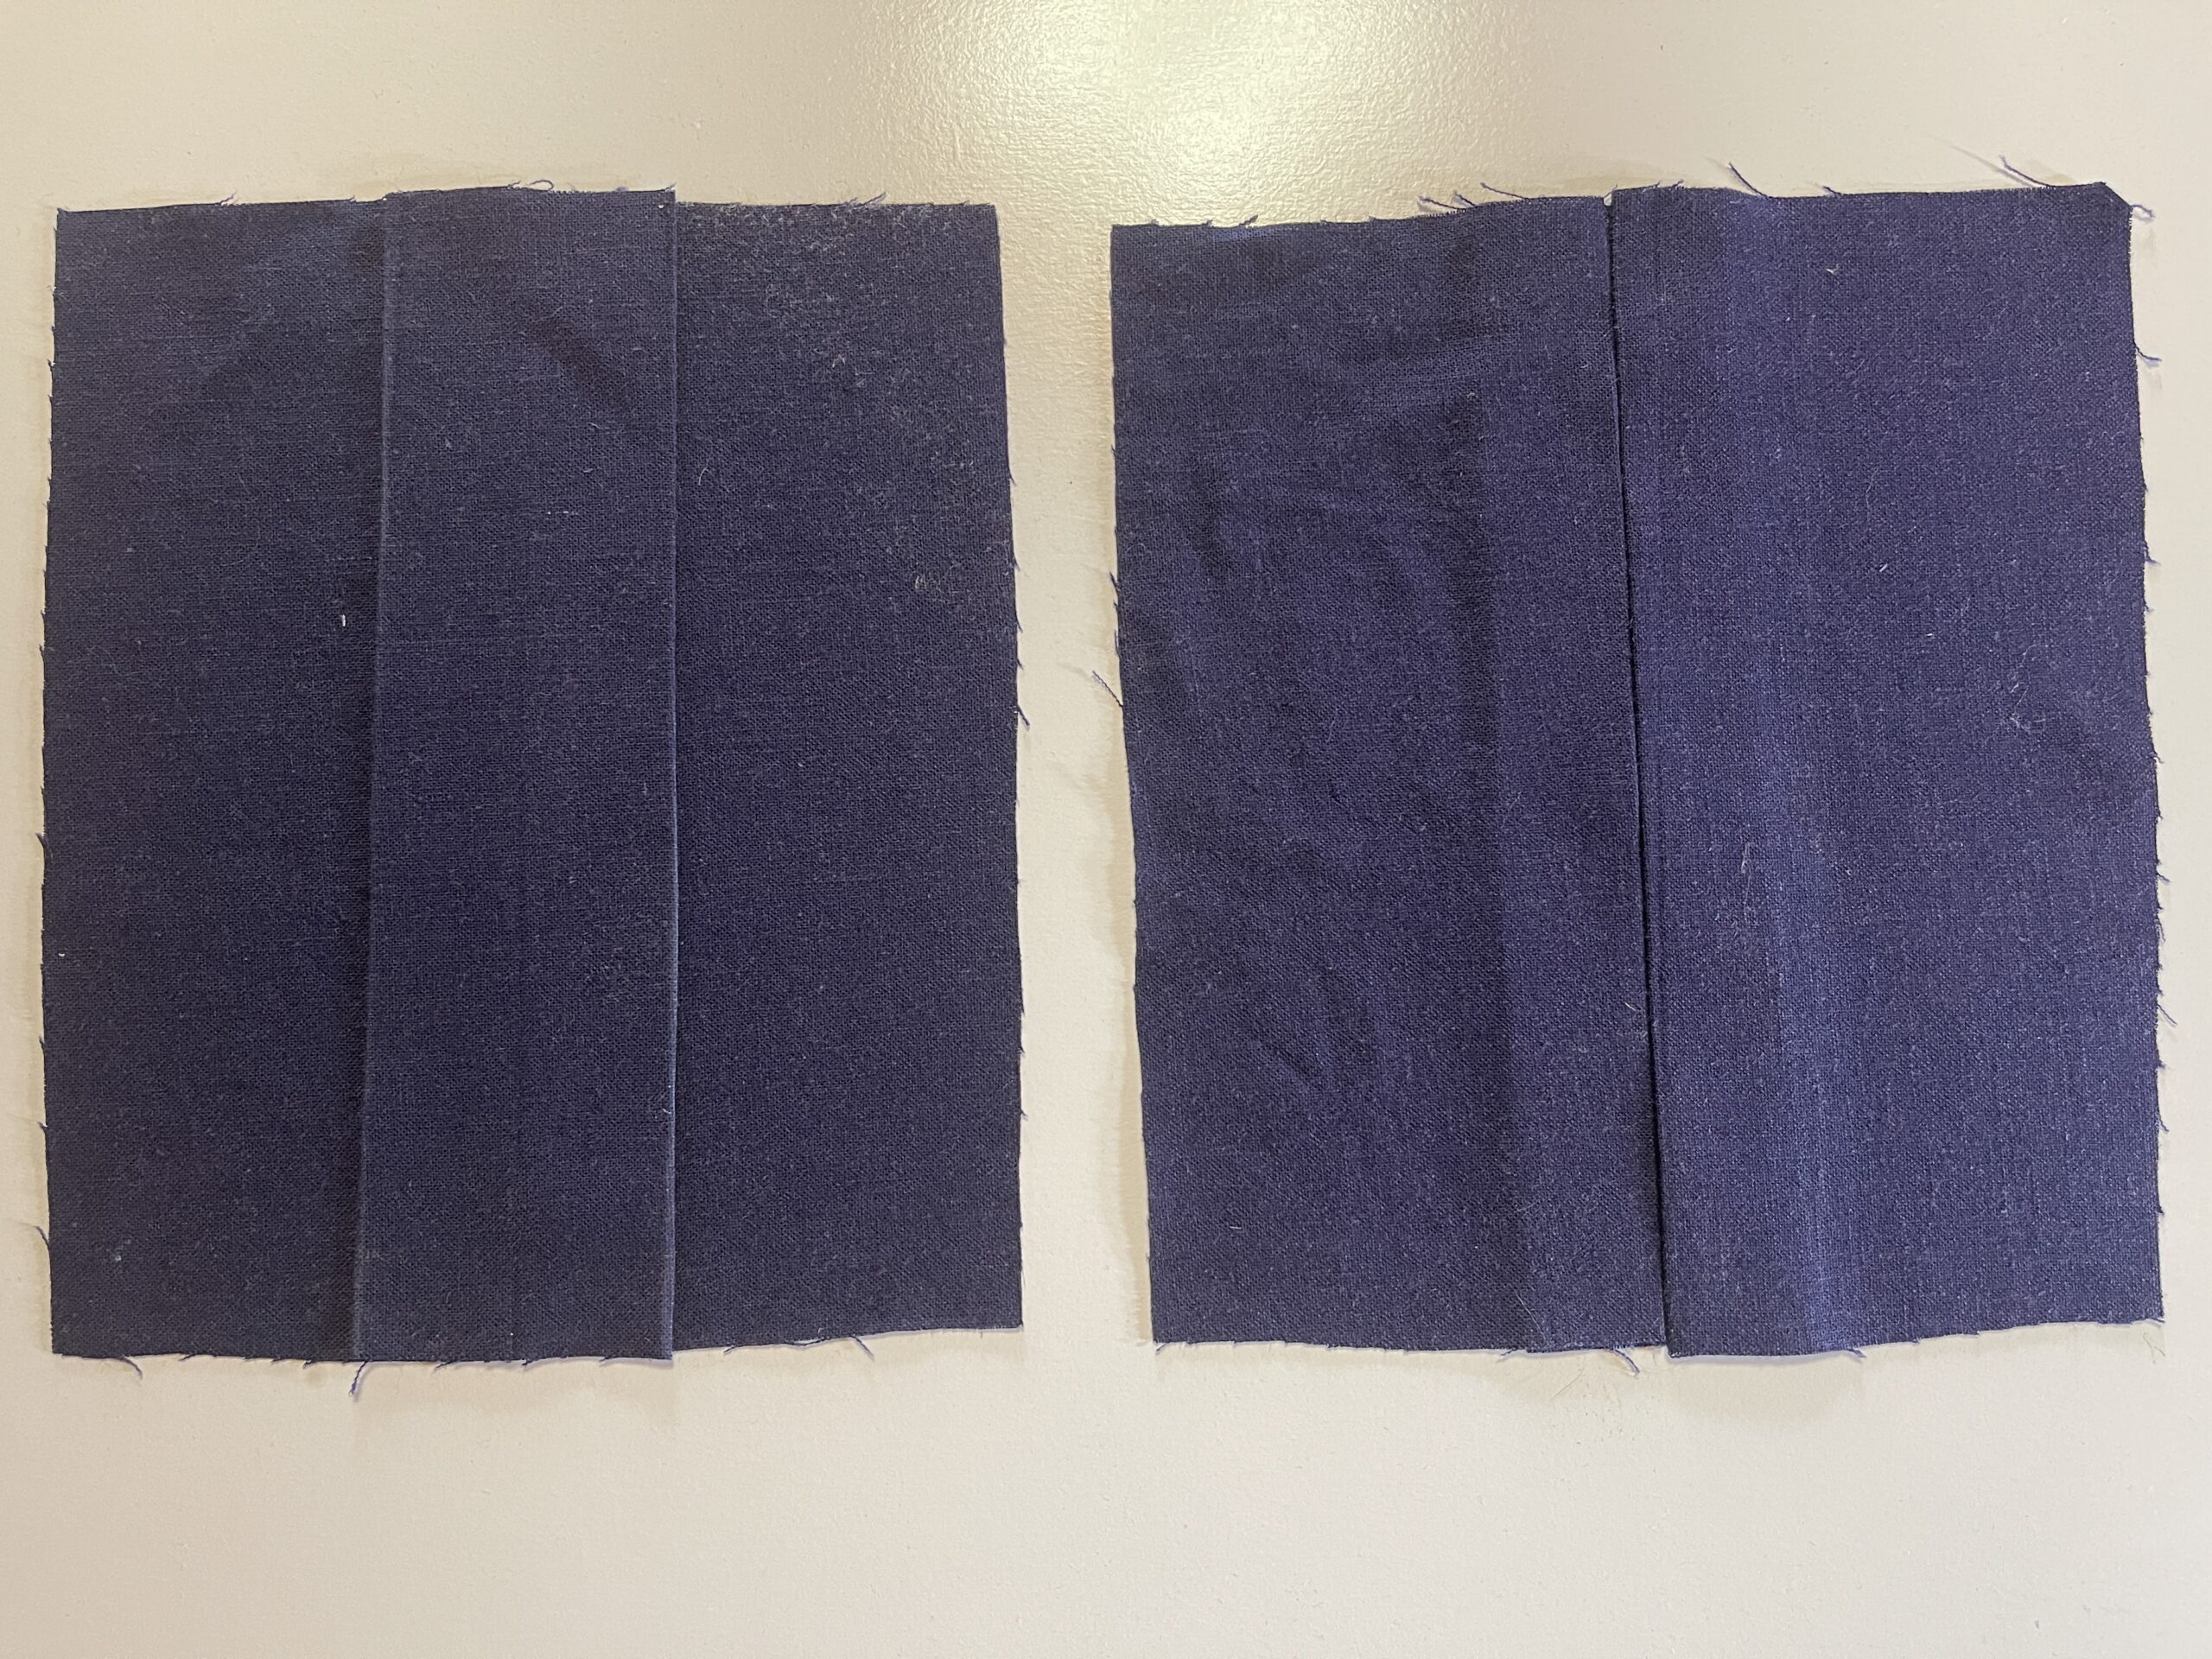
Let’s talk terminology. For the pleated pocket options, “inverted pleat”, and “box pleat” refer to two sides of the exact same technique. If you are a knitter—it’s like the difference between a knit stitch and a purl stitch. By utilizing this one technique, you have the option for two pocket styles! I’m nothing, if not efficient (that previous sentence is likely to provide hilarity to you in direct proportion to how close you are to me, as a person.)
You’ll need:
*A pants pattern (I have used the Paper Theory, Millers)
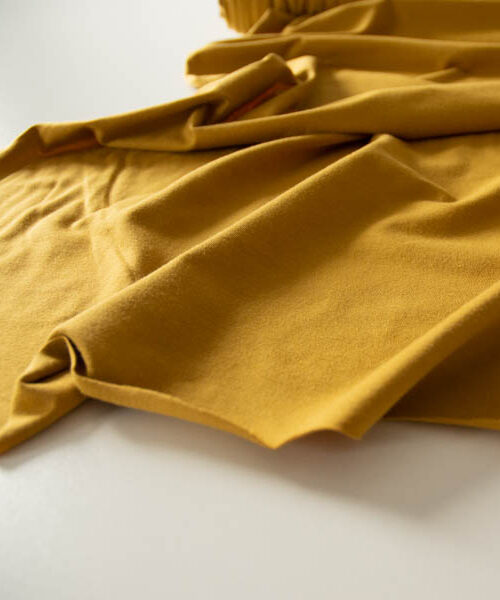
*Fashion fabric (The navy is a rayon-linen blend from my stash and the caramel color is the stunning Vivaldi Linen in Clay. Anything that will take a good press is a good option. As far as yardage, you can most likely squeeze these pockets out of scraps but if you need to, 1/4 yard/meter should be plenty.
*The usual sew-spects (scissors, thread, sewing machine, marking tools, a hot iron, Kaiser Sew-sei, etc.)
*A printout of the pocket pattern & worksheet, or you can draft your own! Dimensions are listed on the pattern pieces. Just add your 3/8” seam allowance.
*Optional: Lining fabric (fashion fabric can be used if it isn’t too heavy)
*Optional: A button if you’d like a closure

Before we begin: Notate within your pattern instructions when you will prep and later add the pockets. That way, when you’re in the groove of making, you don’t forget. For my example with the Miller Trousers, I’ve made a note at the very beginning of the construction notes section to “Prep Patch Pockets”, and then at step 5 in the instructions about closing the legs, I’ve noted “Outside leg, add patch pocket, continue with the rest of the instructions.”
To design your pocket, you’ll want to choose one from each of the following categories: Each element is numbered. That number (1-8) indicates where, within the blog post, you can find the instructions for that step.

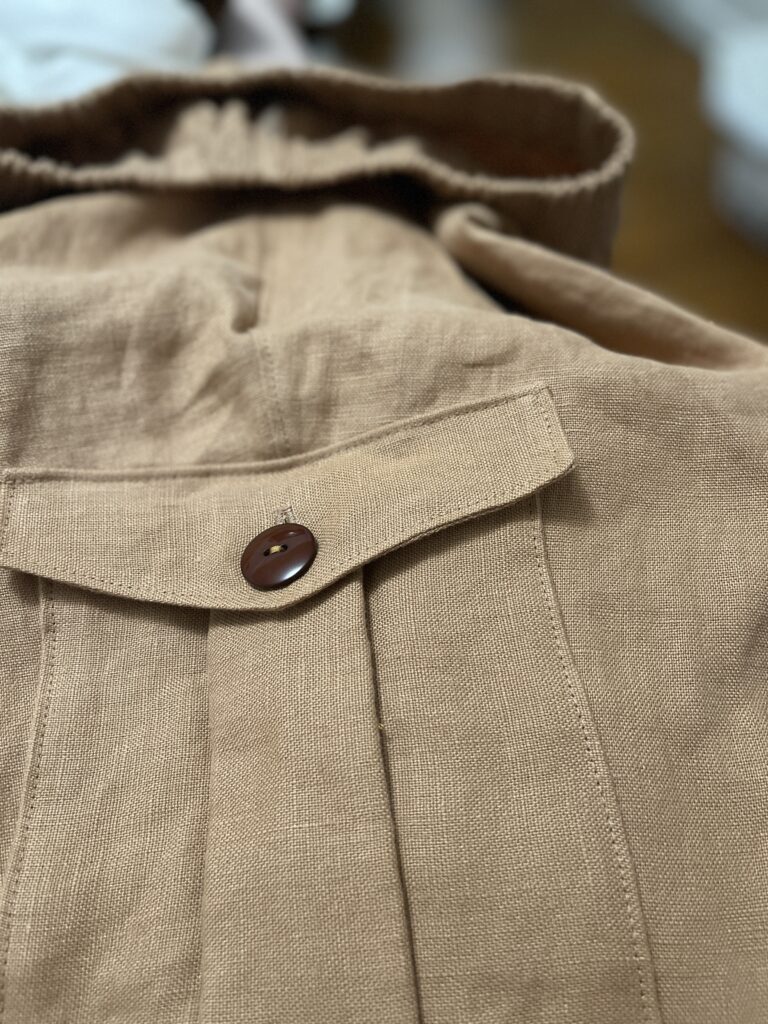
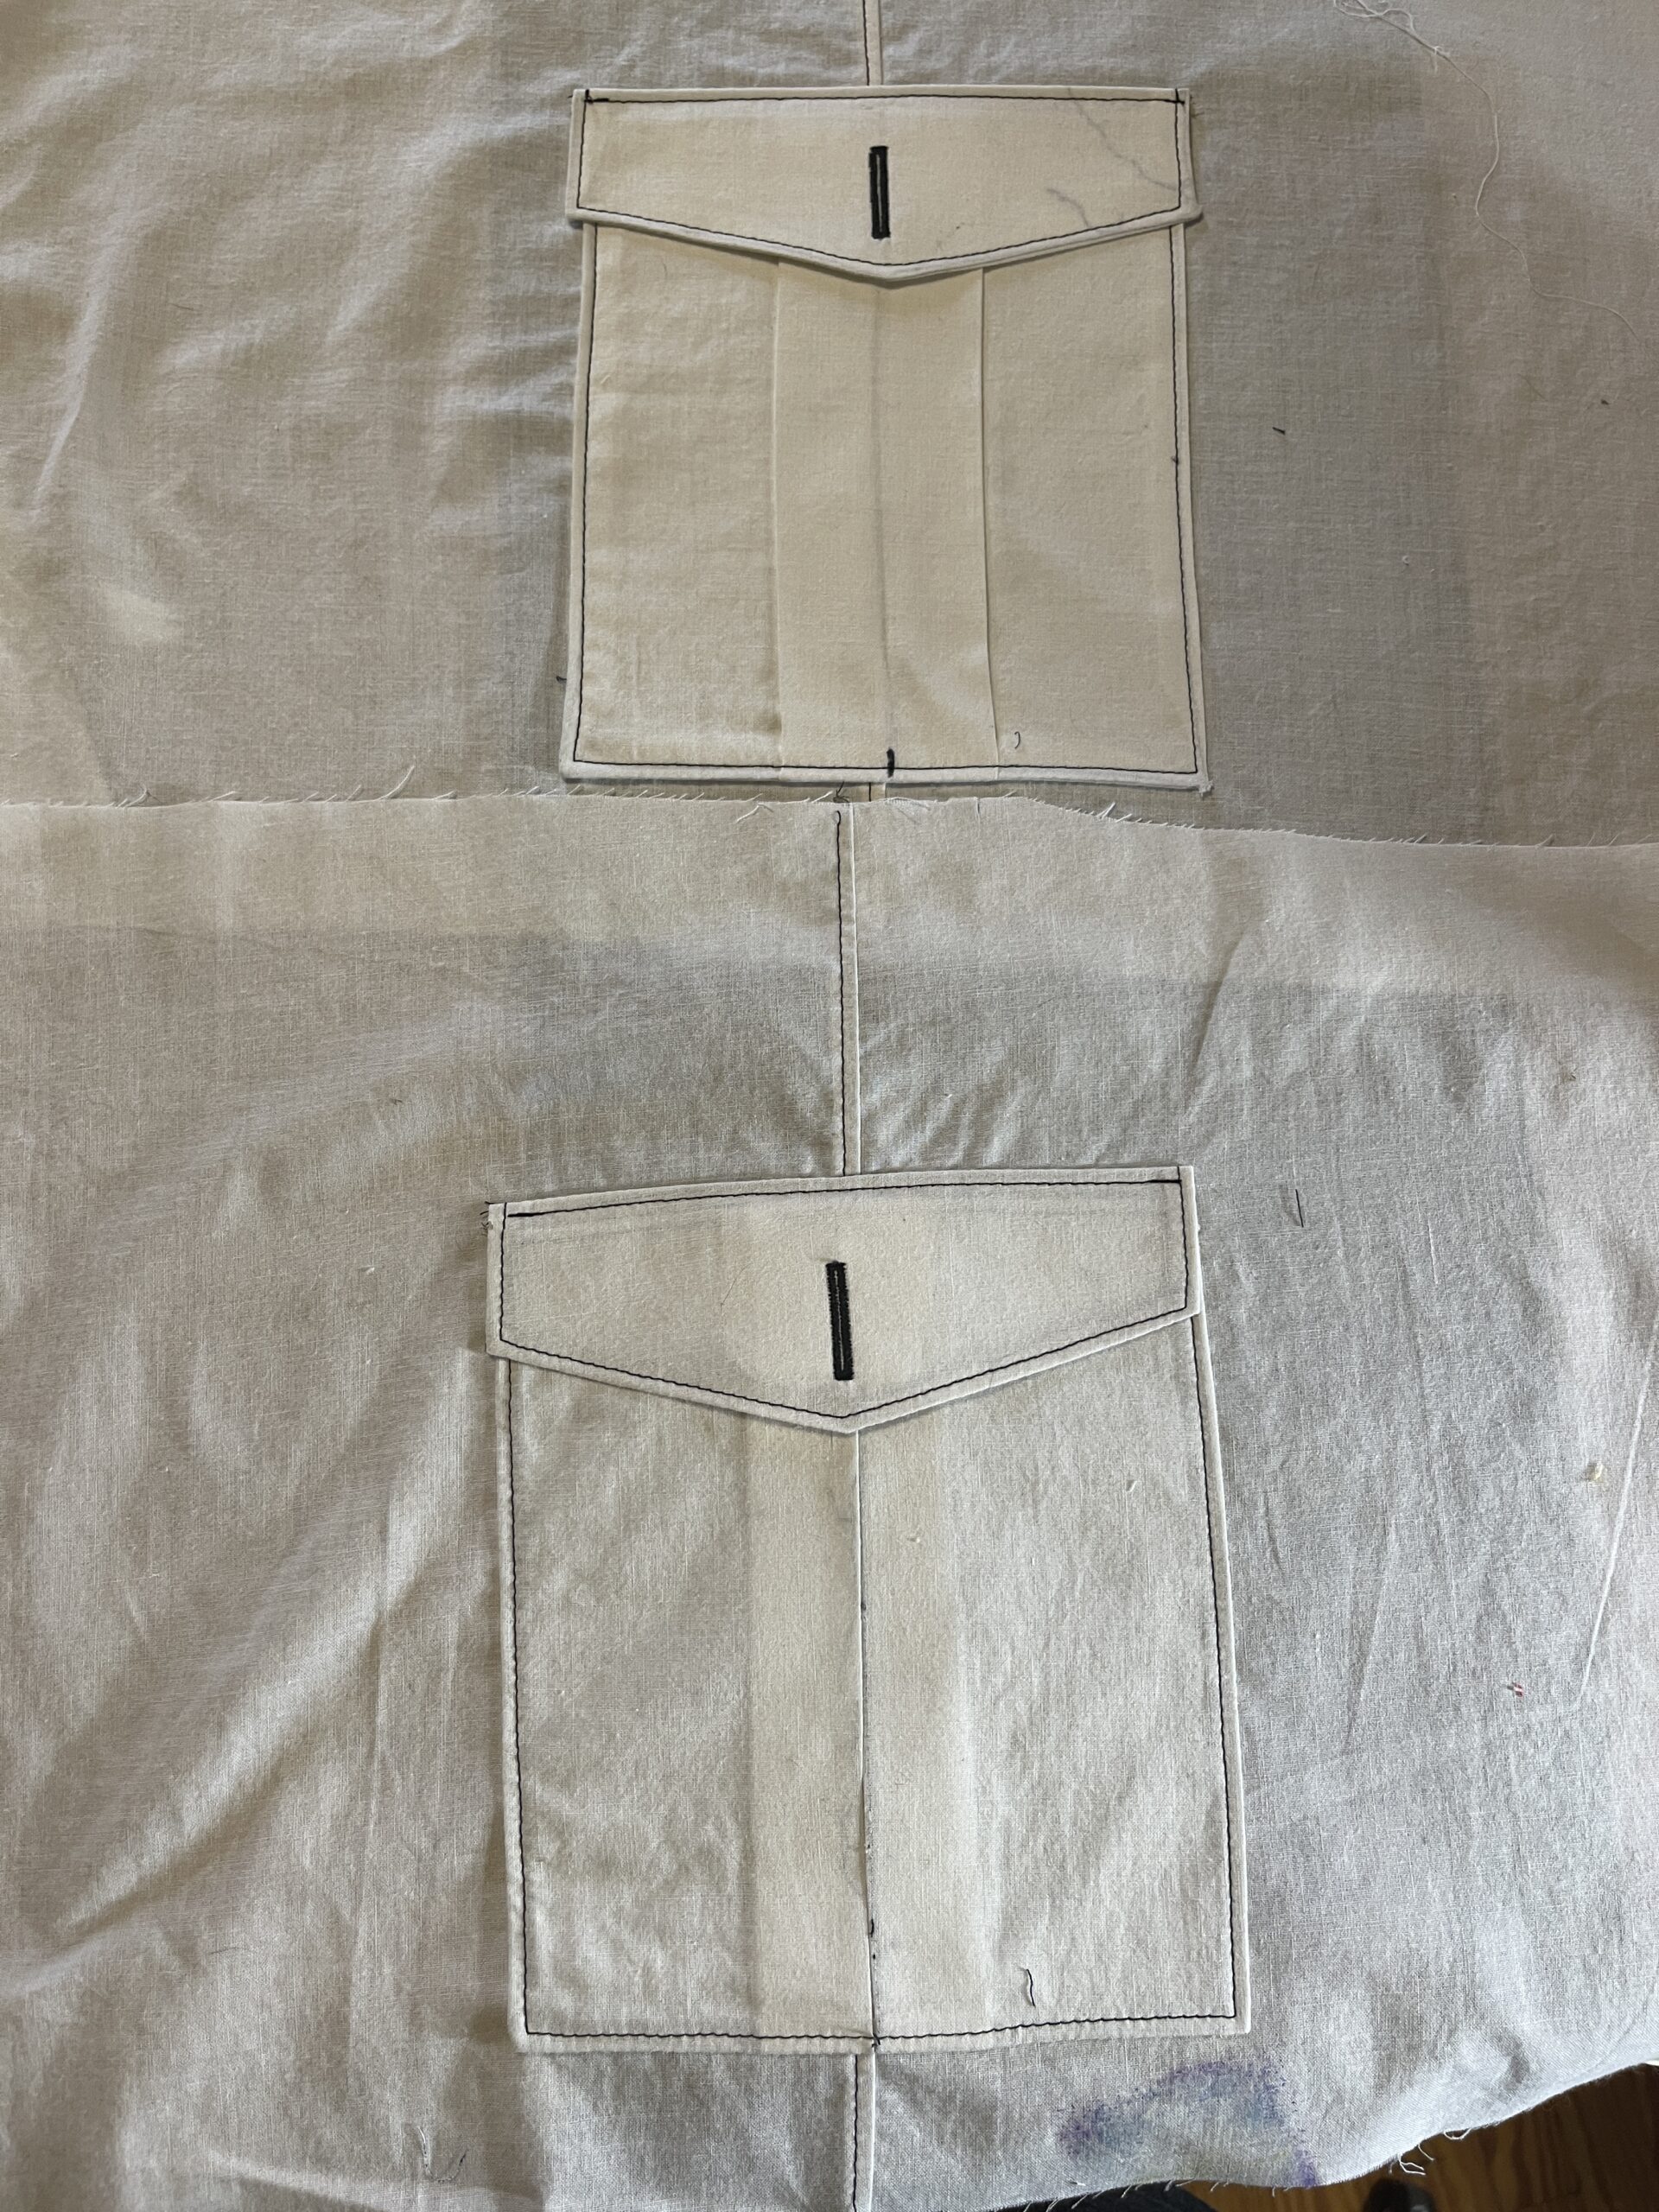
Bottom: Inverted pleat with pocket flap
Step 1: Pocket Style
1. Inverted Pleat (Pattern Piece 1)
2. Box Pleat (Pattern Piece 1)
3. Simple Patch Pocket (Pattern Piece 2)
Step 2: Pocket Finish
4.Lined (Pattern Piece #2)
5.Unlined (No additional piece)
Step 3: Pocket Closure
6. Lined Pocket Flap (Pattern Piece #3 x 2)
7. Unlined Pocket Flap (Pattern Piece #3)
8. No Pocket Flap
Guidance: The lined option works well with lighter and drapier options, in my opinion and has a really nice, clean finish. The unlined option is nice for stiffer and bulkier fabric. If you want to make the lined version with a bulkier fabric, you can use a lighter lining fabric– bear in mind that this could be very subtly visible around the edges. Don’t worry too much about getting it perfect, though. This is low stakes; I was easily able to squeeze my samples out of the preexisting yardage for my pants.
Once you’ve made your choices, you can use the worksheet to determine what pieces you need to cut. (You will find there, the pattern pieces and quantities are indicated for each selection).
Pocket Prep:
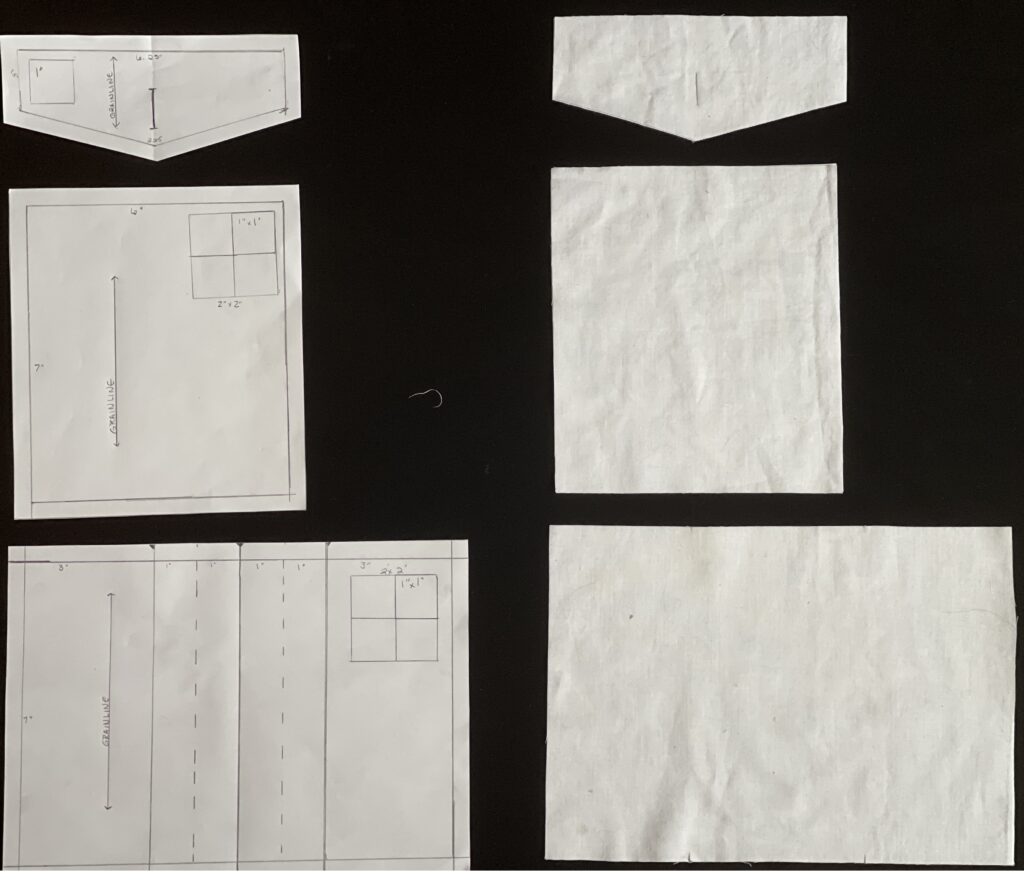
Pocket Flap #3, Basic Patch/Lining #2, Pleated Pocket #1
Cut out the pattern pieces in the quantities that you identified on your worksheet, and mark any notches (notches are only on the pleated views).
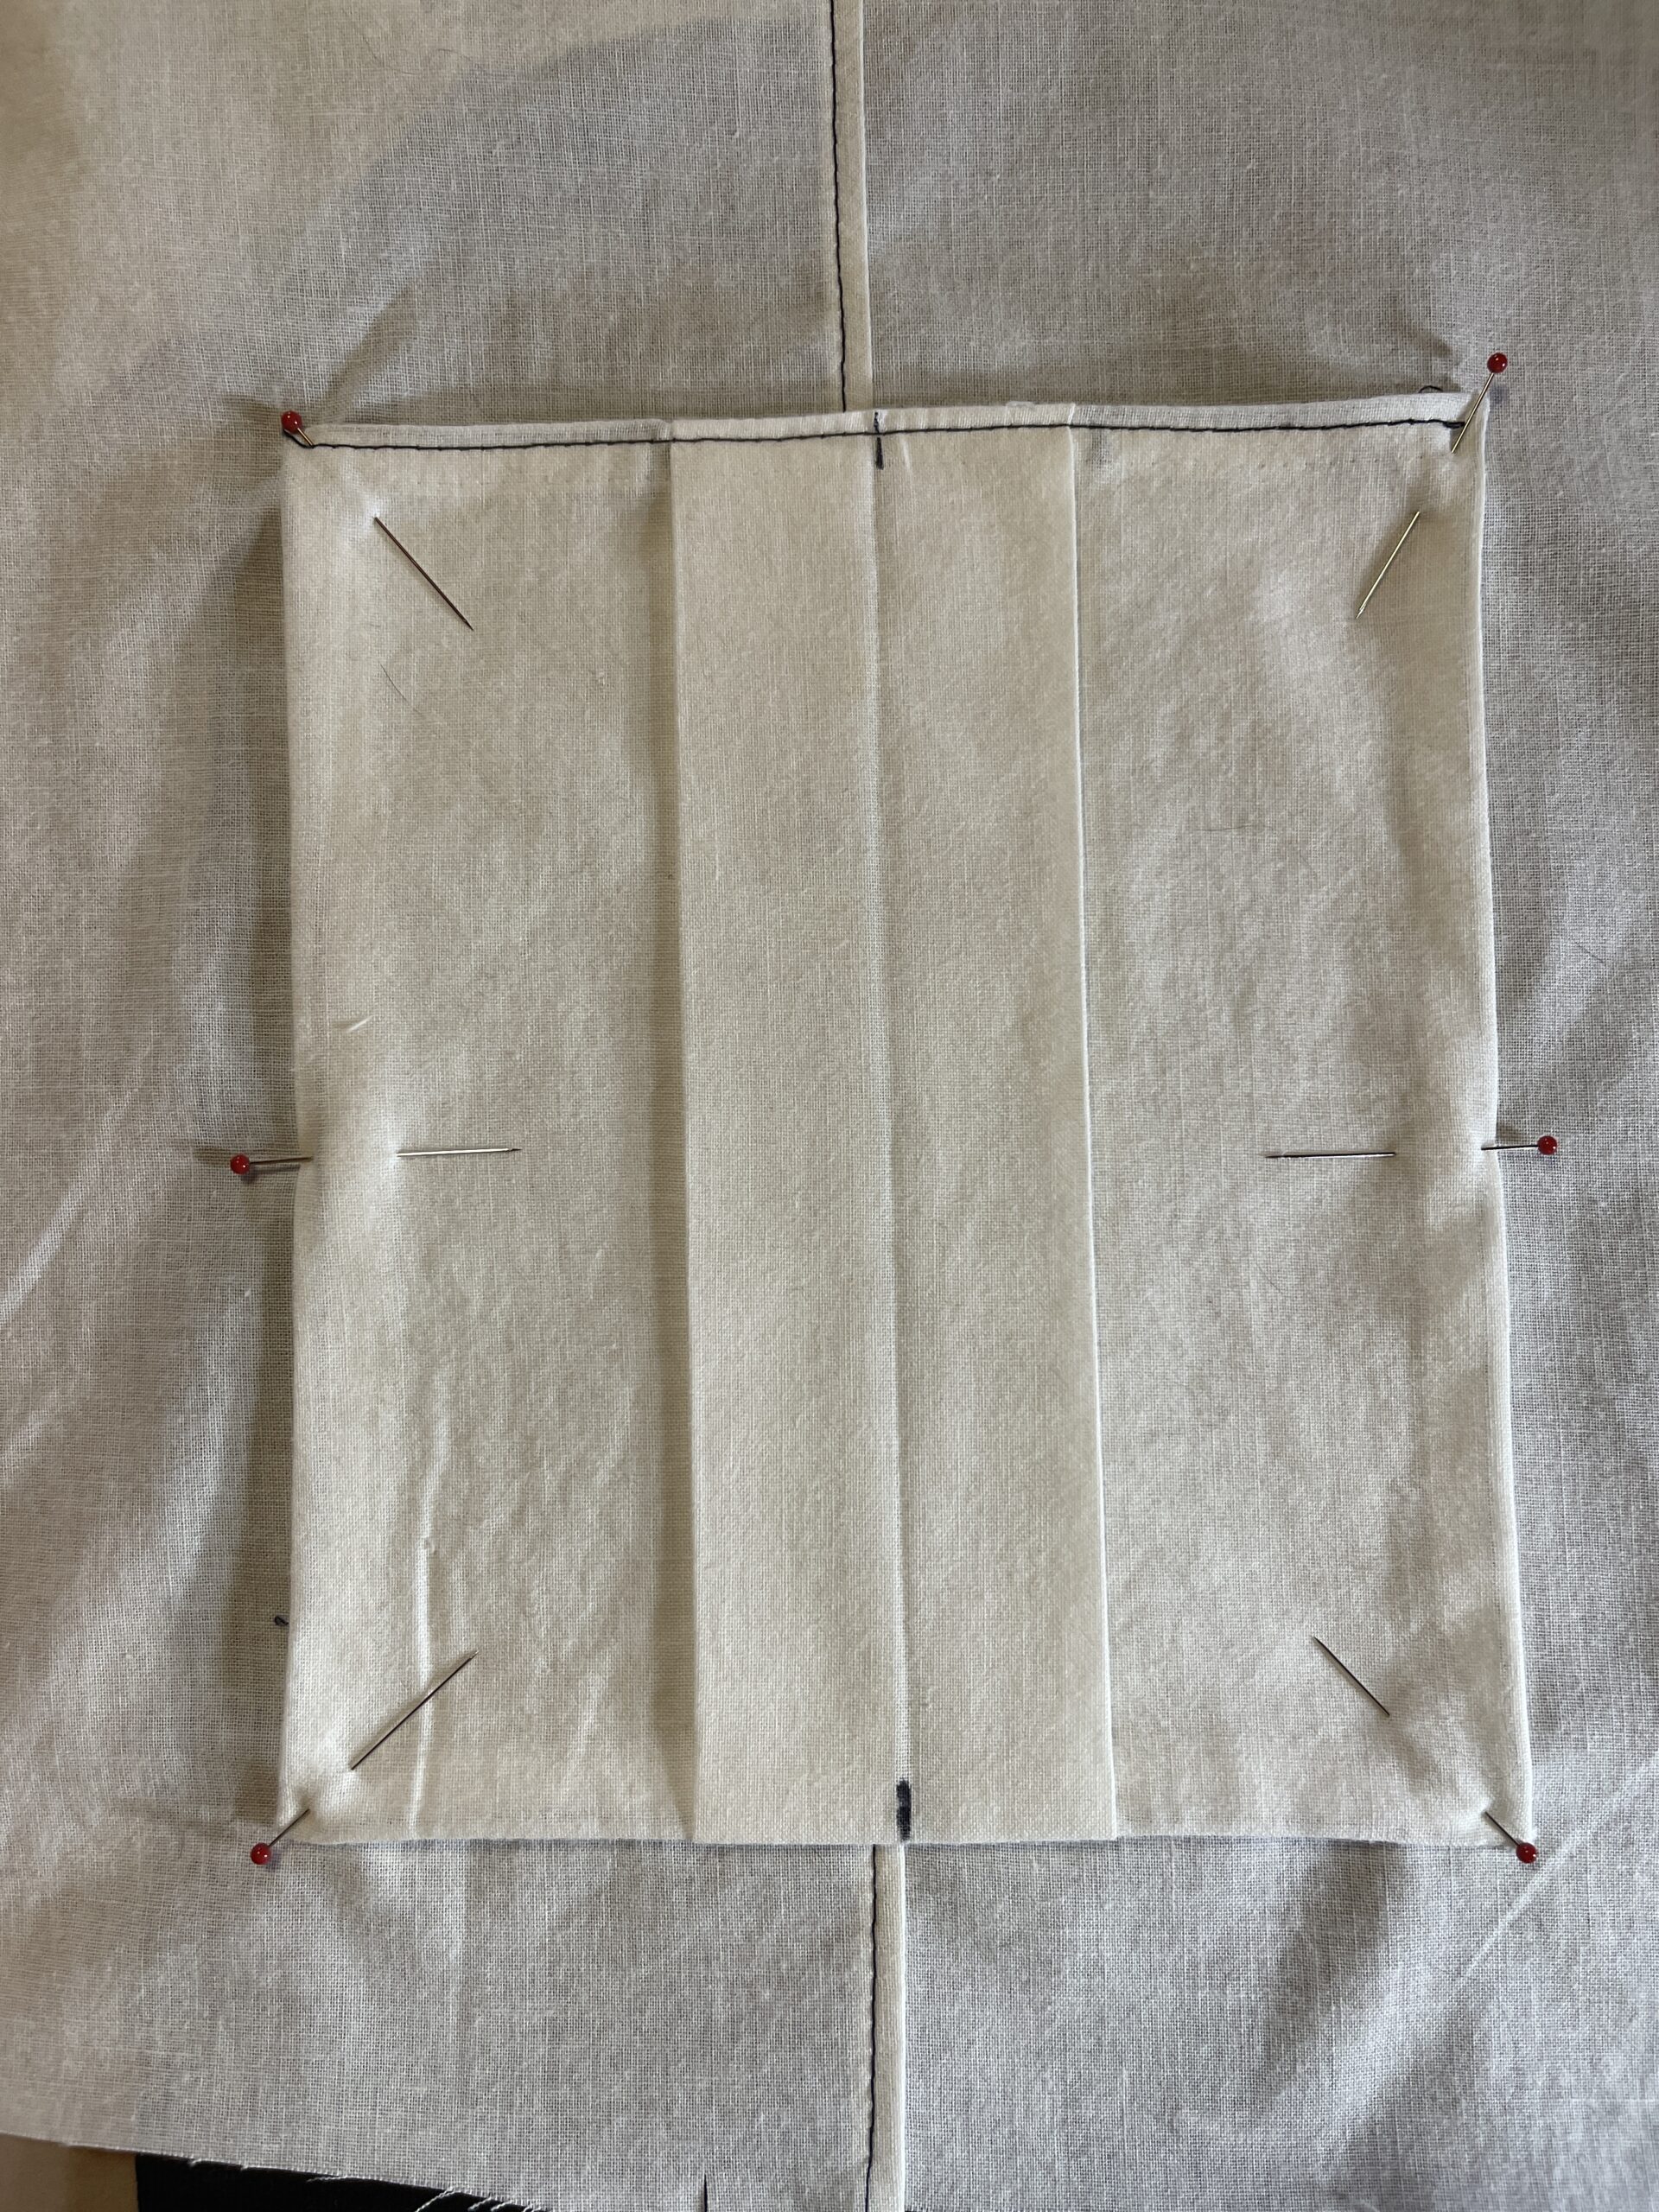
STEP ONE: (Choose 1, 2 OR 3)
- Box Pleat: Begin with pattern piece #1
a. Fold #1 in half, matching the short ends. To check your work, the notches should align 2 inches away from the fold.
b. Press to make a sharp crease, which will serve as a guideline in a subsequent step. Keep folded.
c. Connect the notches in a straight line that runs 2 inches away from and parallel to the fold.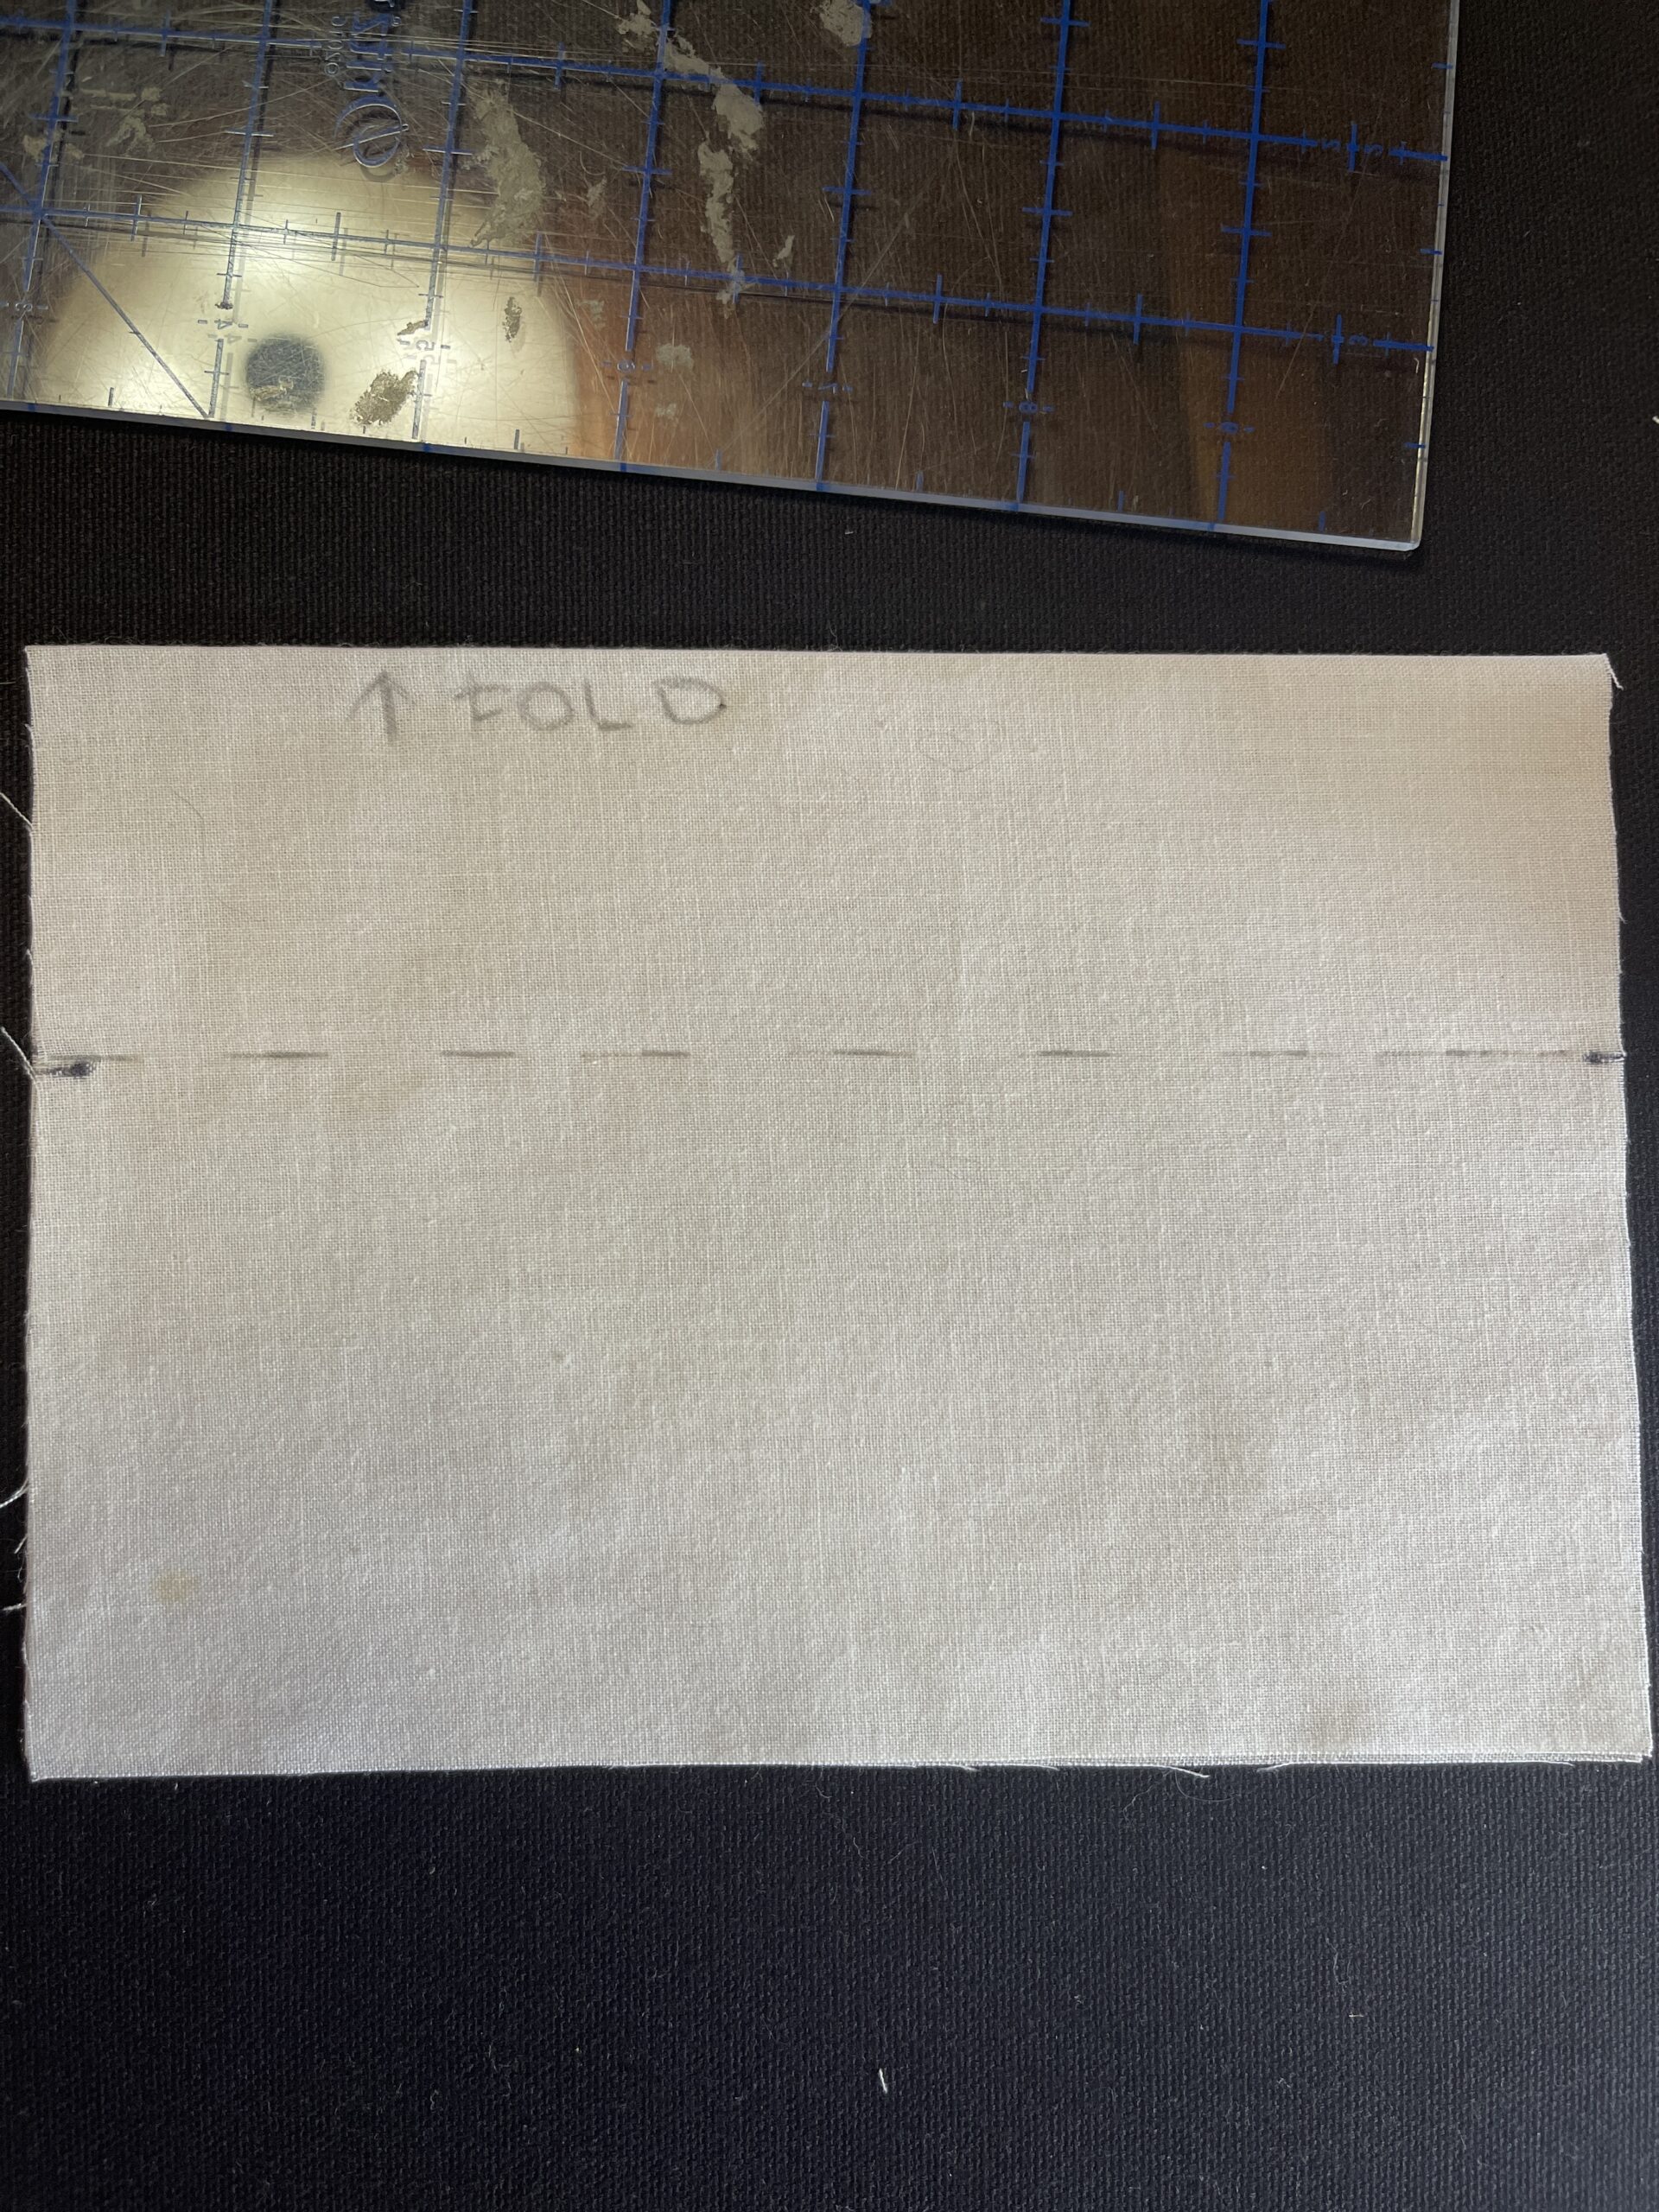
d. Adjust your sewing machine for basting. I like to loosen my tension and lengthen my stitch to 4.5.
e. Baste the line that you just marked, 2” away from the fold. Leave long tails for removal later.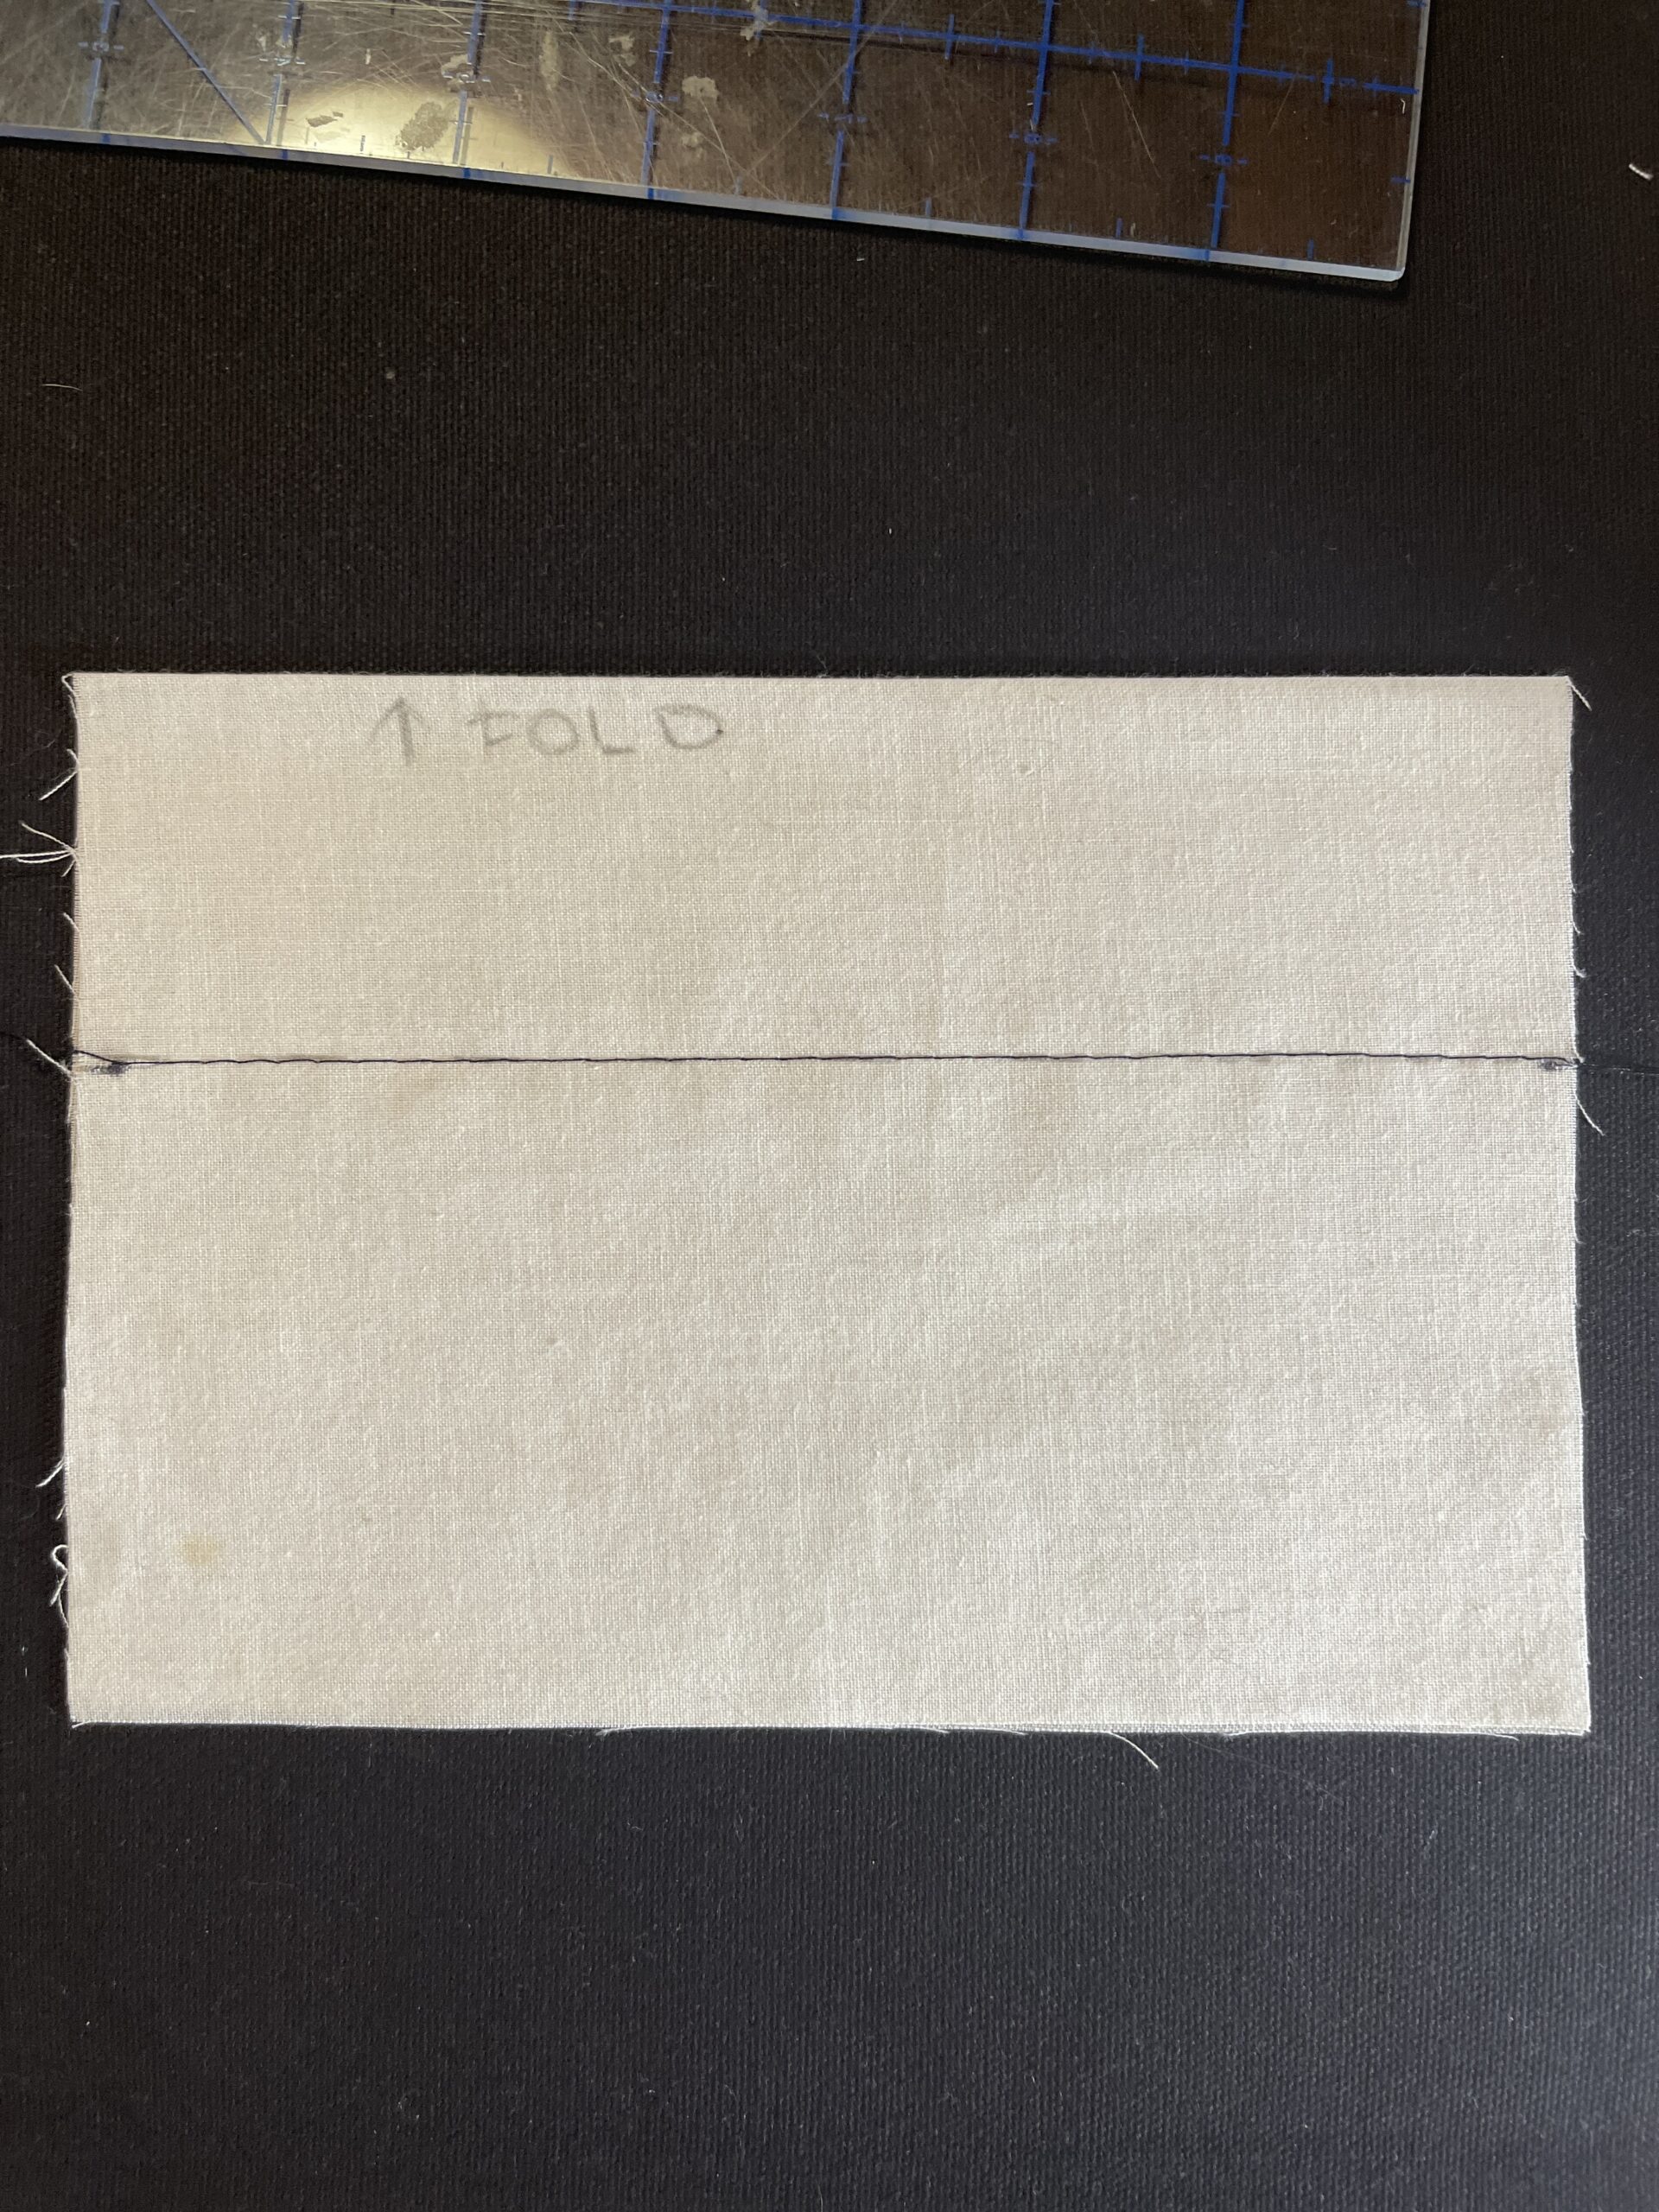
f. Take your piece to the ironing board and iron as-is to lock your stitches.
g. Pull apart the open edges, like a book, and place them face-down on your ironing surface. You’ll have a weird little tubular bubble bopping around—and that is what we want! You’re doing great.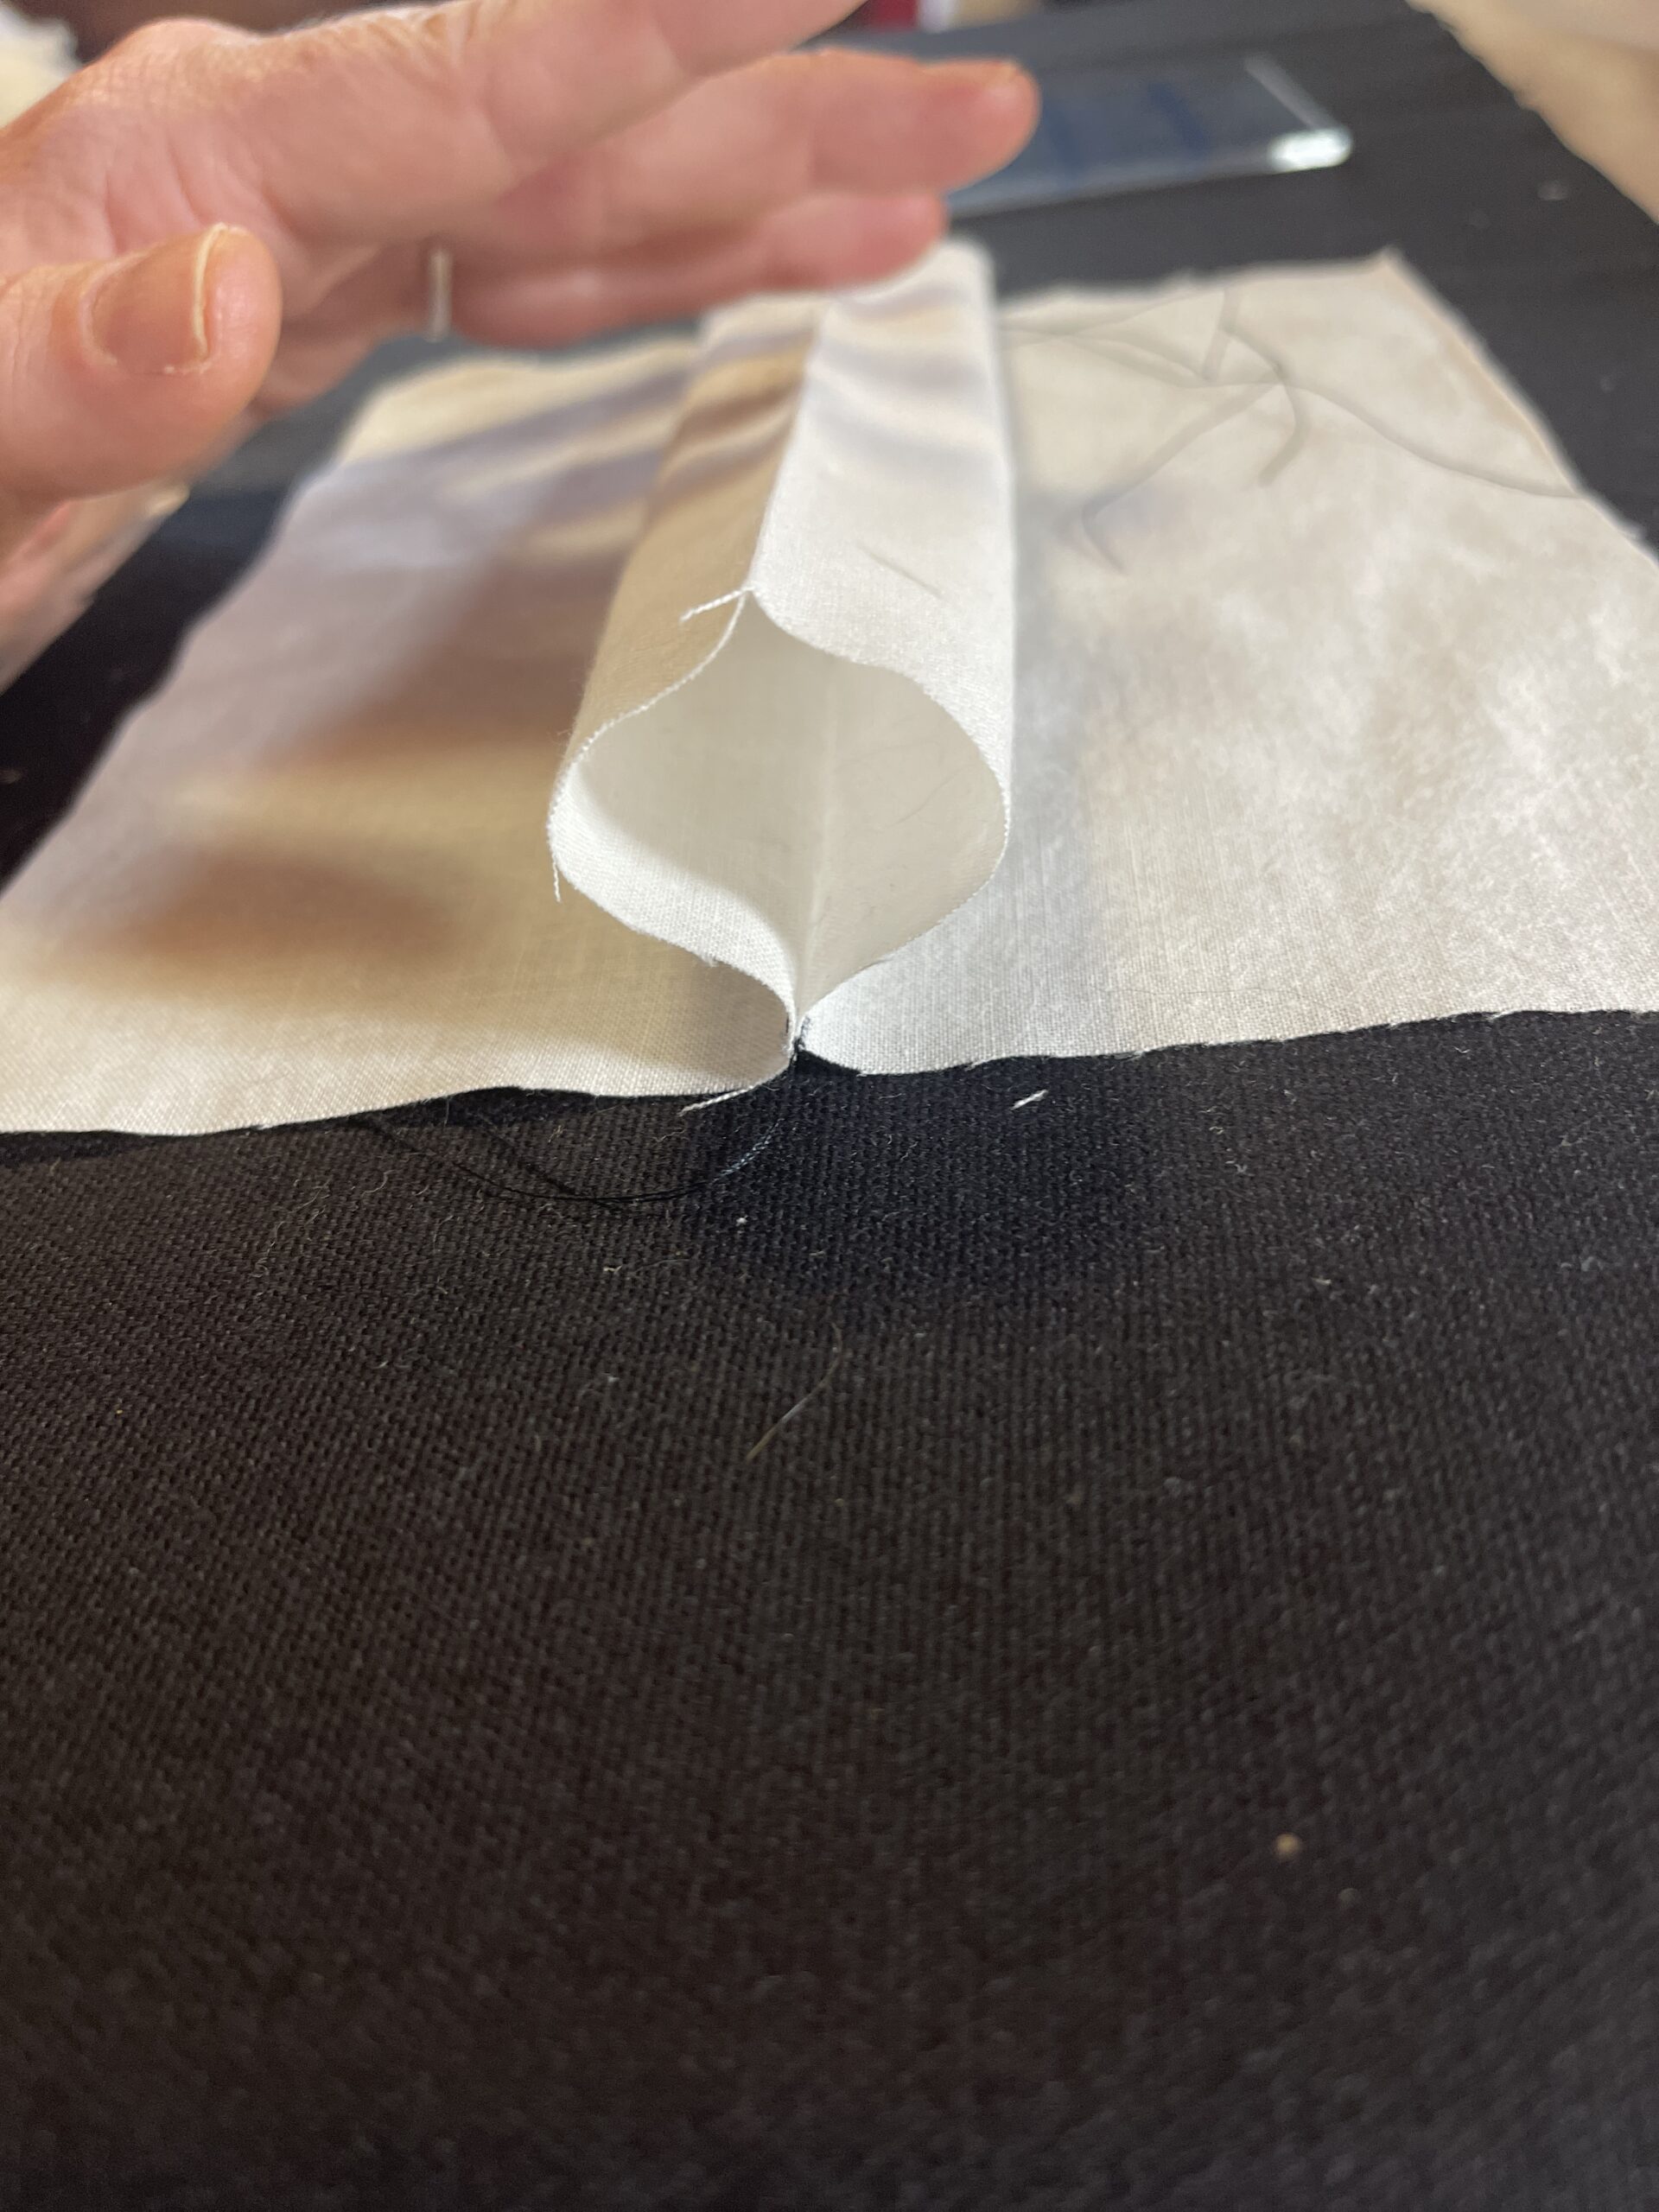
h. You should still have a crease down the lengthwise center of your bubble, and we are going to match that crease, straight down to meet the basting stitches below. It’s a bit of a smoosh action (I like using technical terms, what can I say?) Got everything aligned and pretty? (The edges of your smooshed bubble should each be approximately 1” equidistant from your lengthwise crease guideline.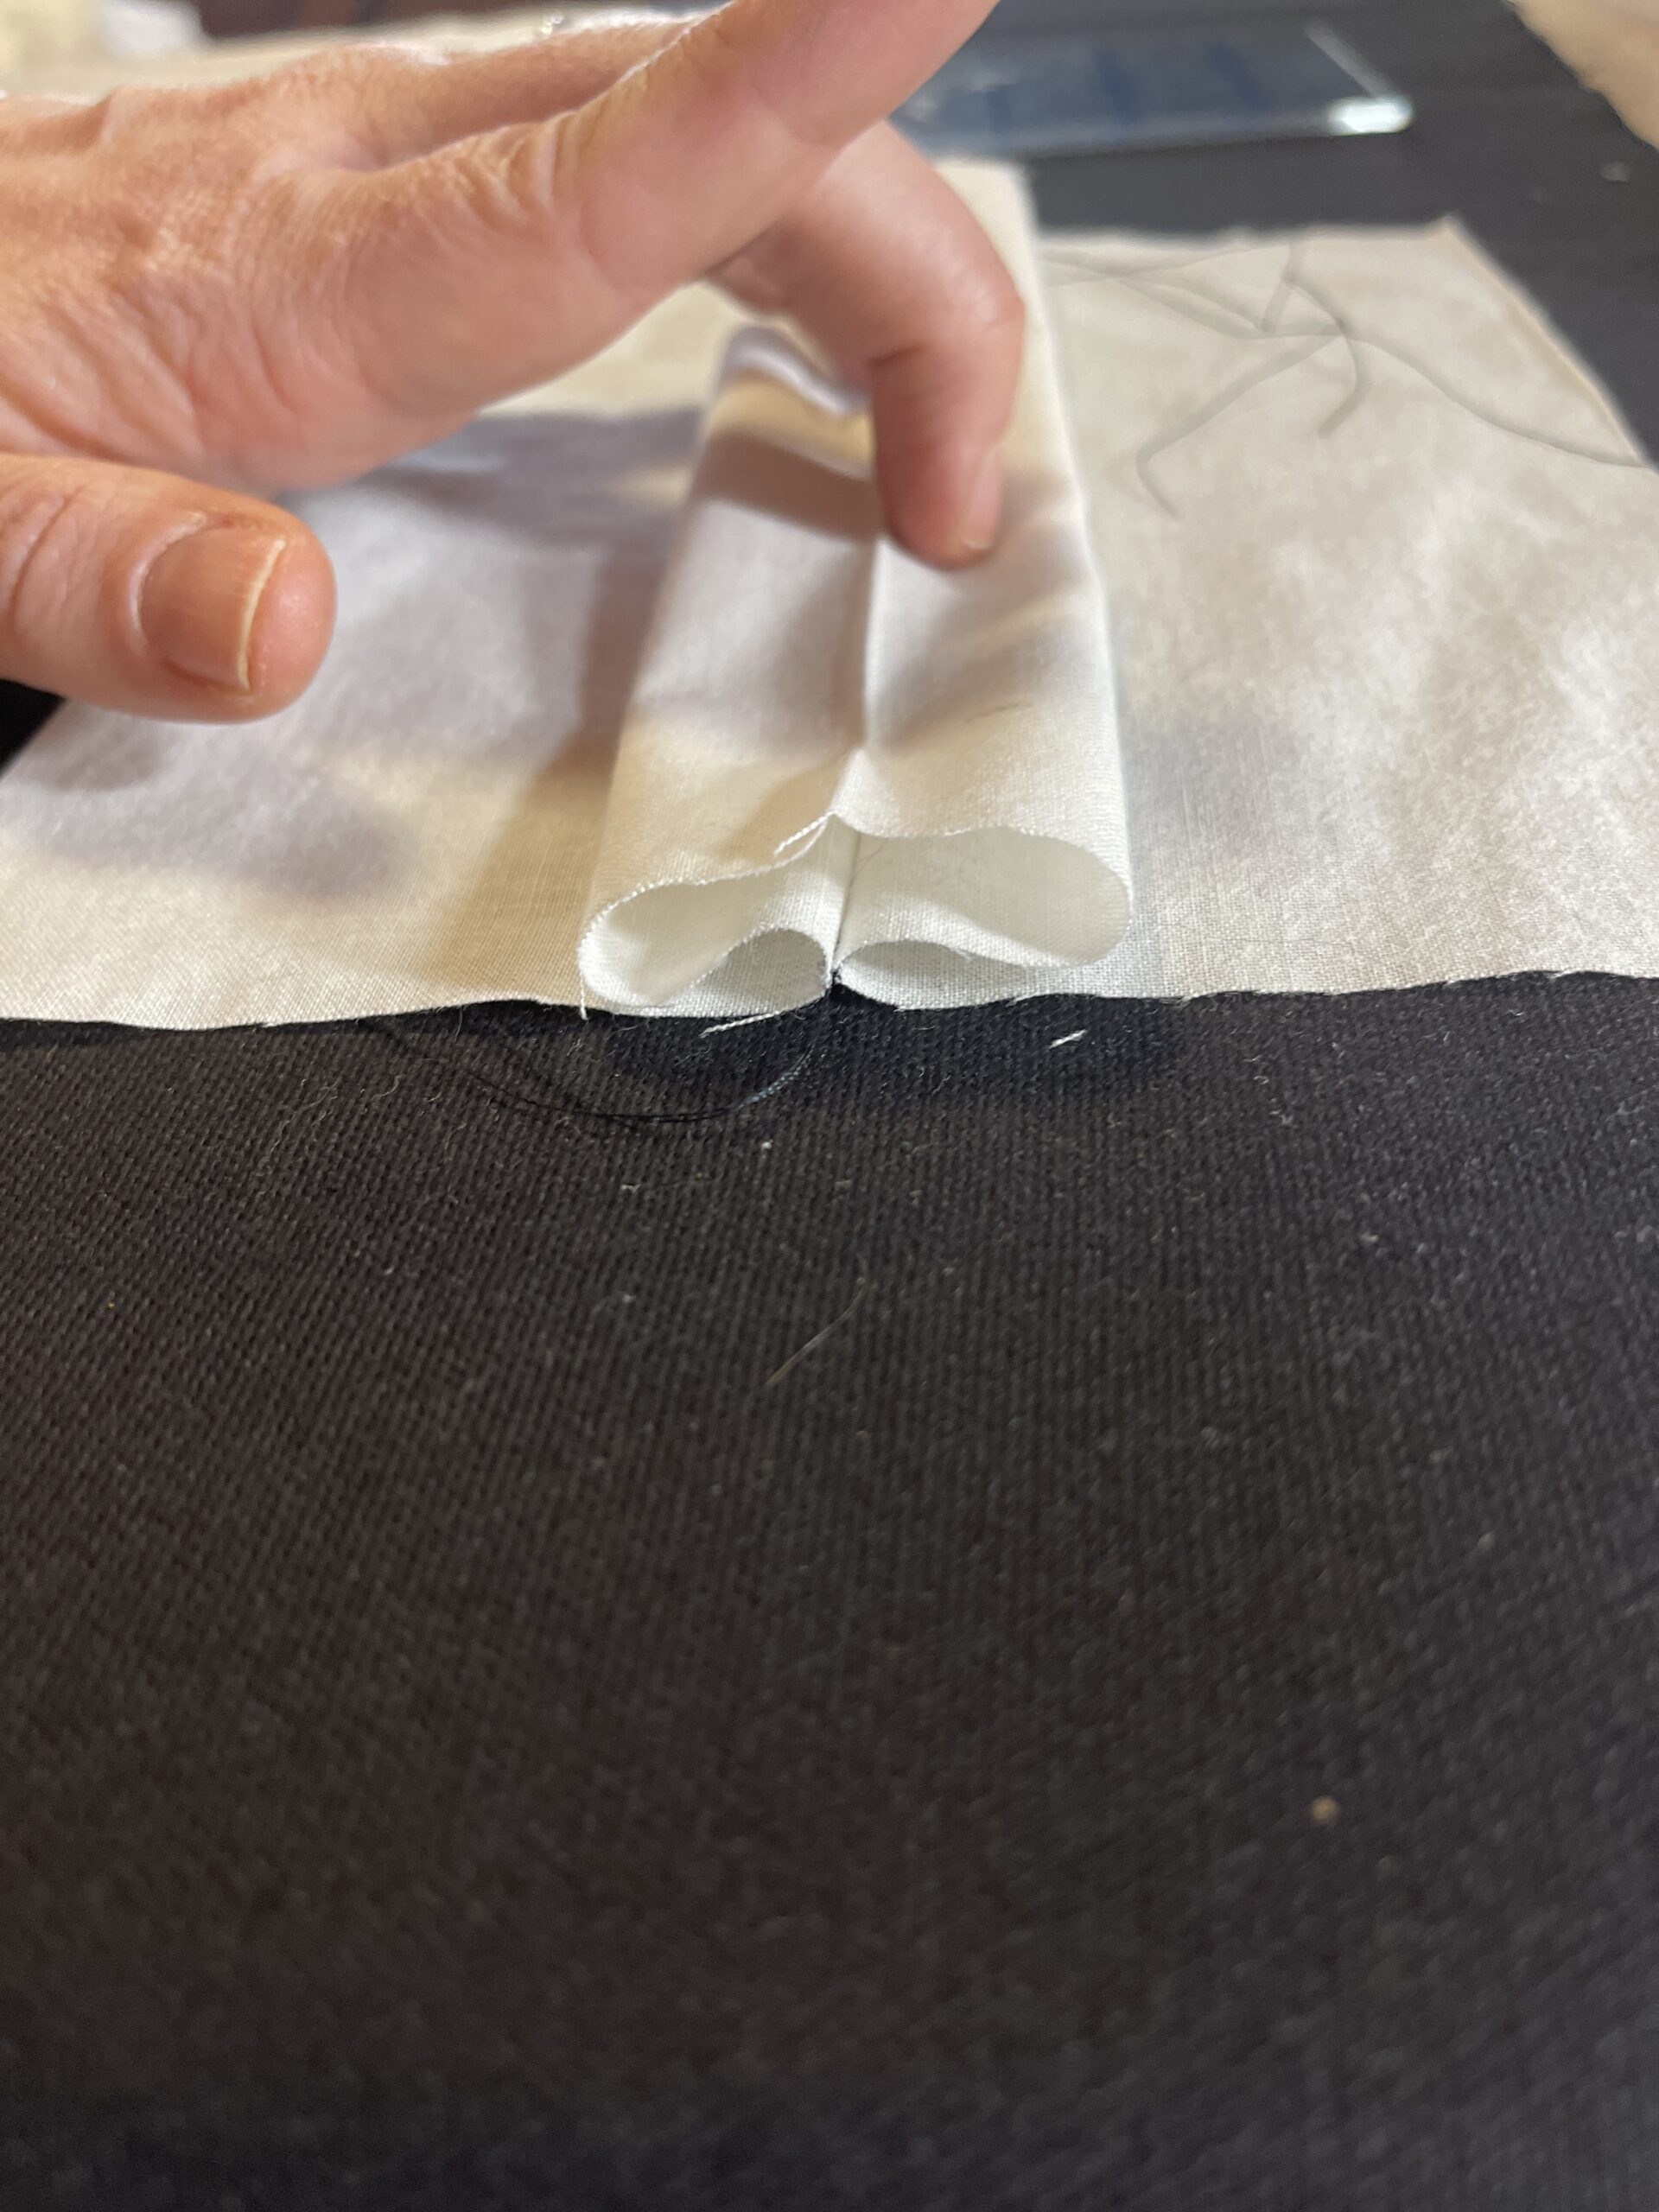
i. We are ready to perma-smoosh. Press your pocket so that the bubble becomes flat and looks like a column down the center of the pocket.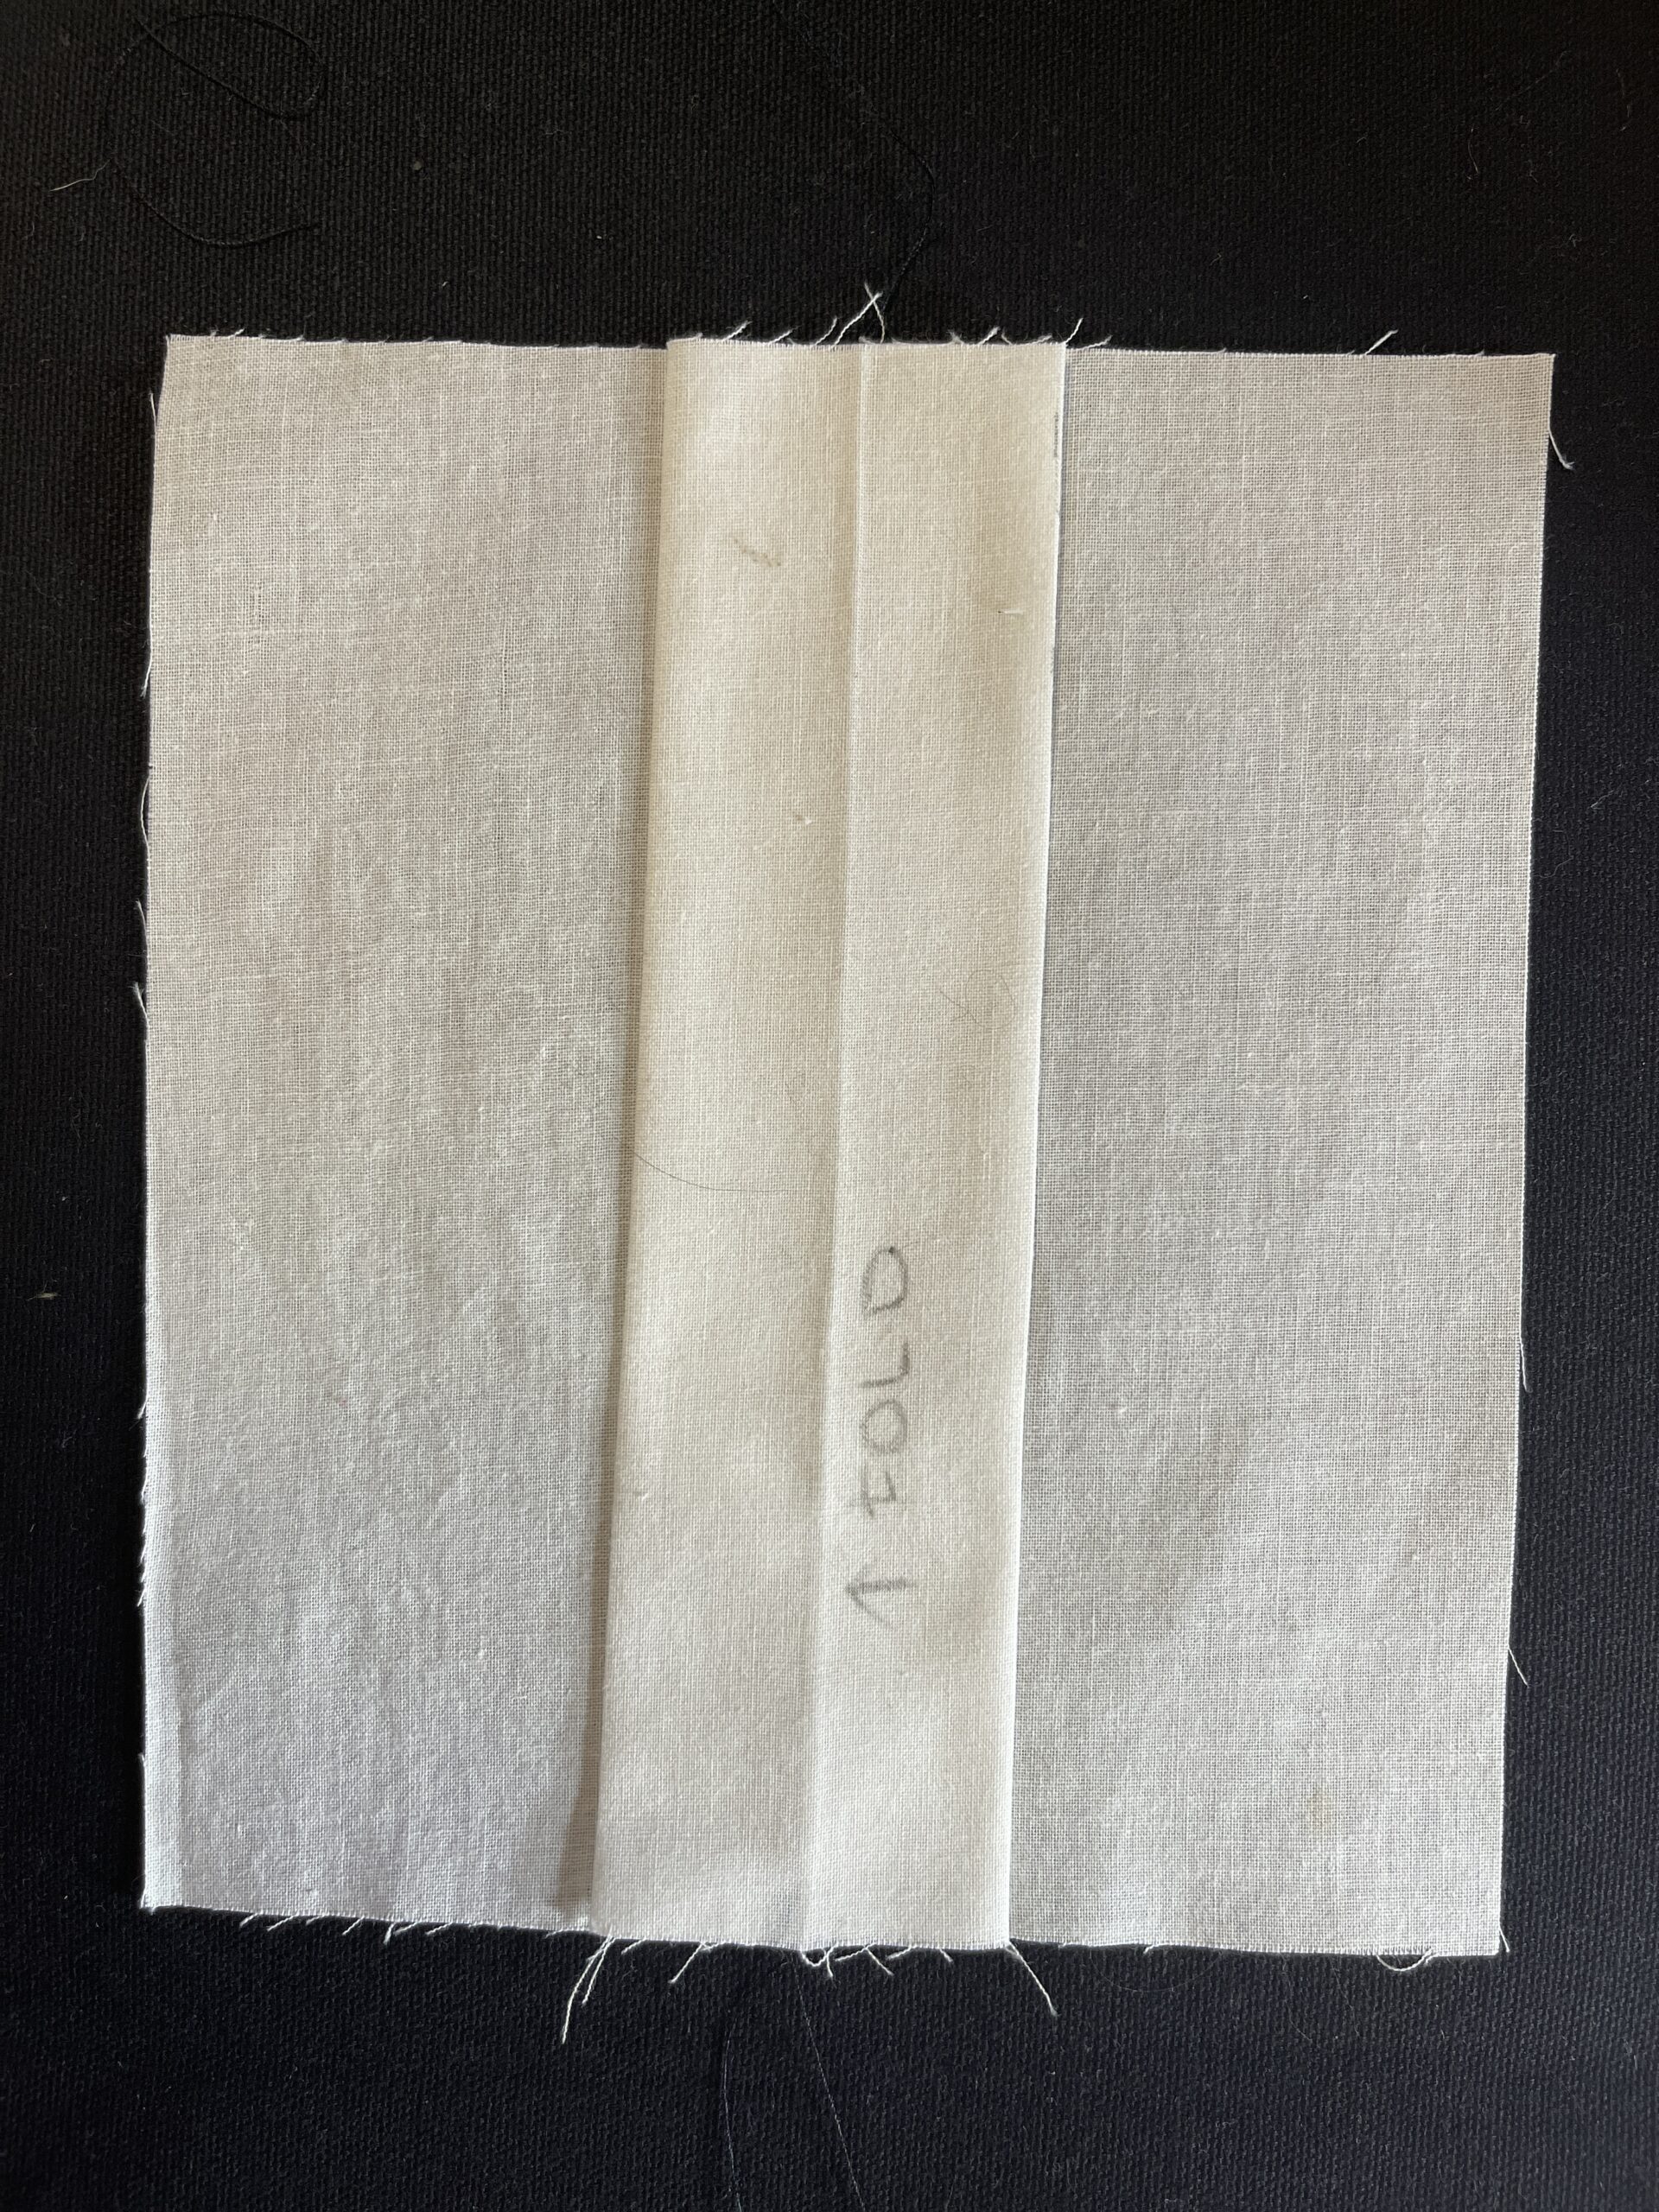
j. That thing you’re looking at right now—that’s a box pleat that you just created, Wahoo!
k. If a box pleat is your chosen pocket style, you are now looking at your pocket’s right side. Drink some water, take a break, and come back when you’re ready to tackle your STEP 2.
NOTE: It may be helpful to take a moment and throw some masking or washi tape to mark your pocket’s right side. - Inverted Pleat:
a. Complete steps a-j under step 1-Inverted Pleat,and return here.
It should look something like this:
Got it? Well done!
b. Take that box pleat that you’re looking at, and flip it over so that you see one narrow line where the pleat folds meet in the center of your pocket. What you’re looking at there—that’s an inverted pleat. If this is your chosen style, you are now looking at your pocket’s right side.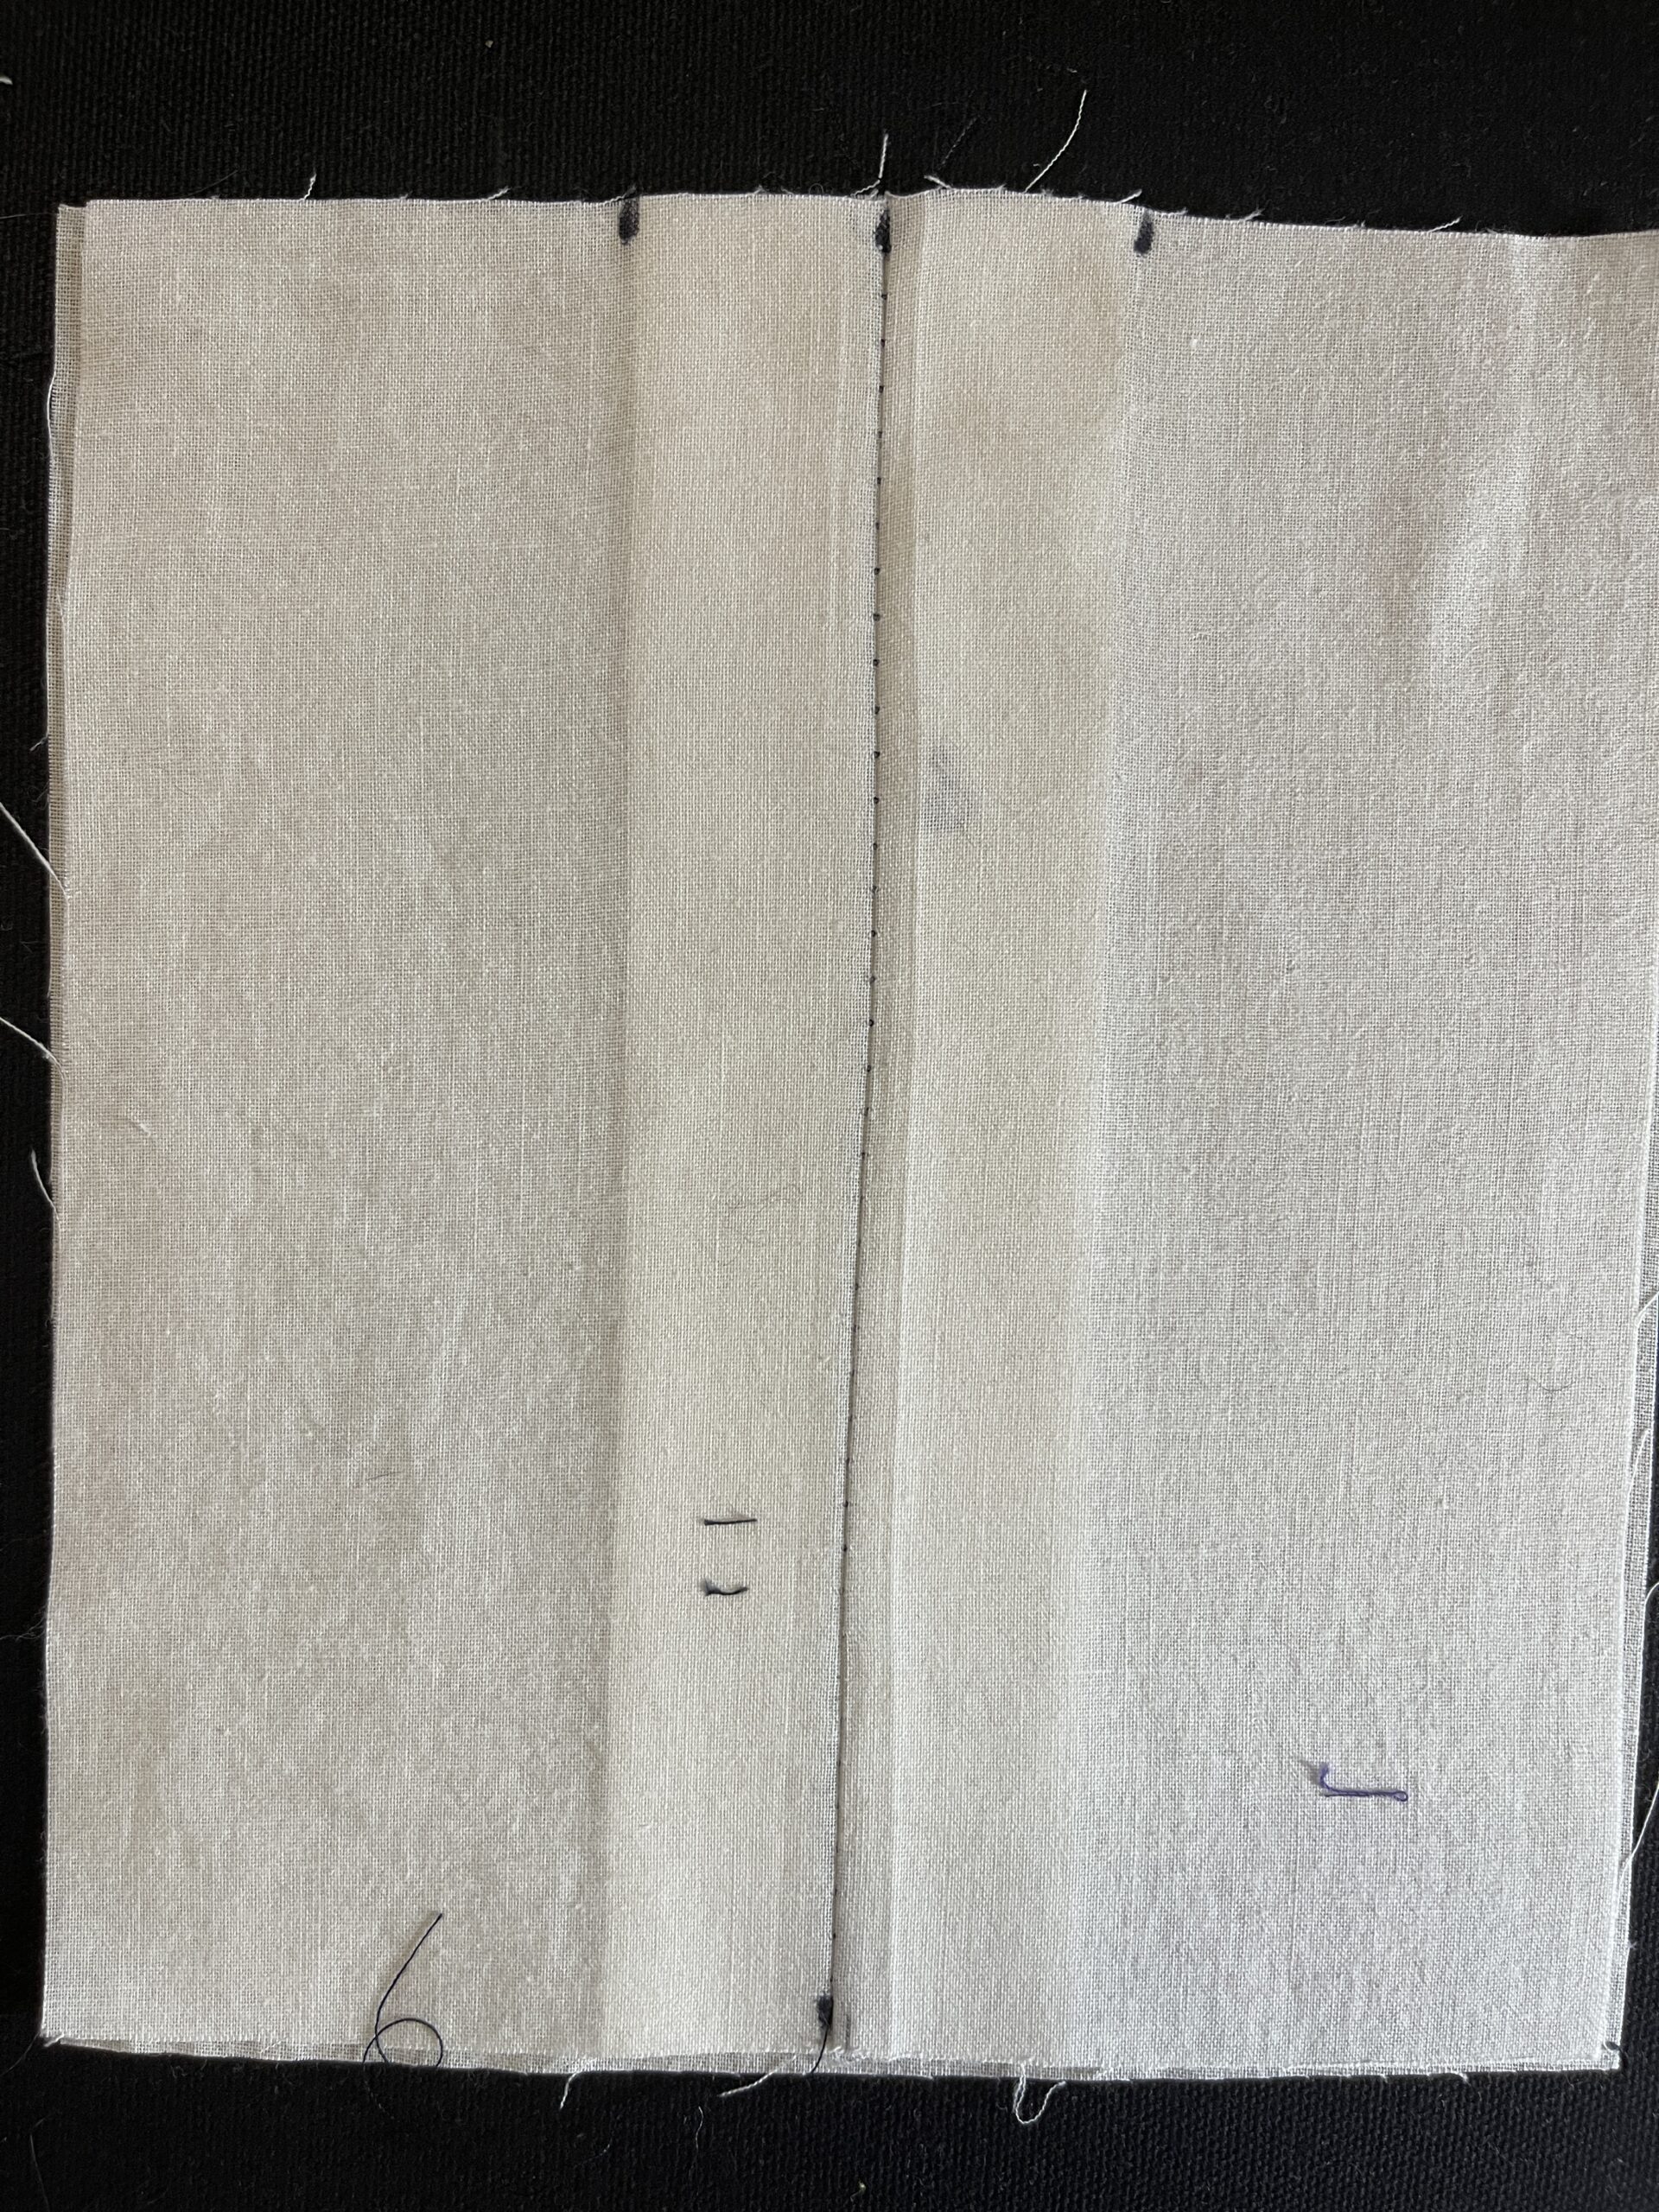
- Unpleated Patch Pocket: Did you cut out pattern piece number 2? You’re golden. Move on to your STEP 2. If your fabric has a right and a wrong side that are hard to differentiate, it might be helpful to mark that now.
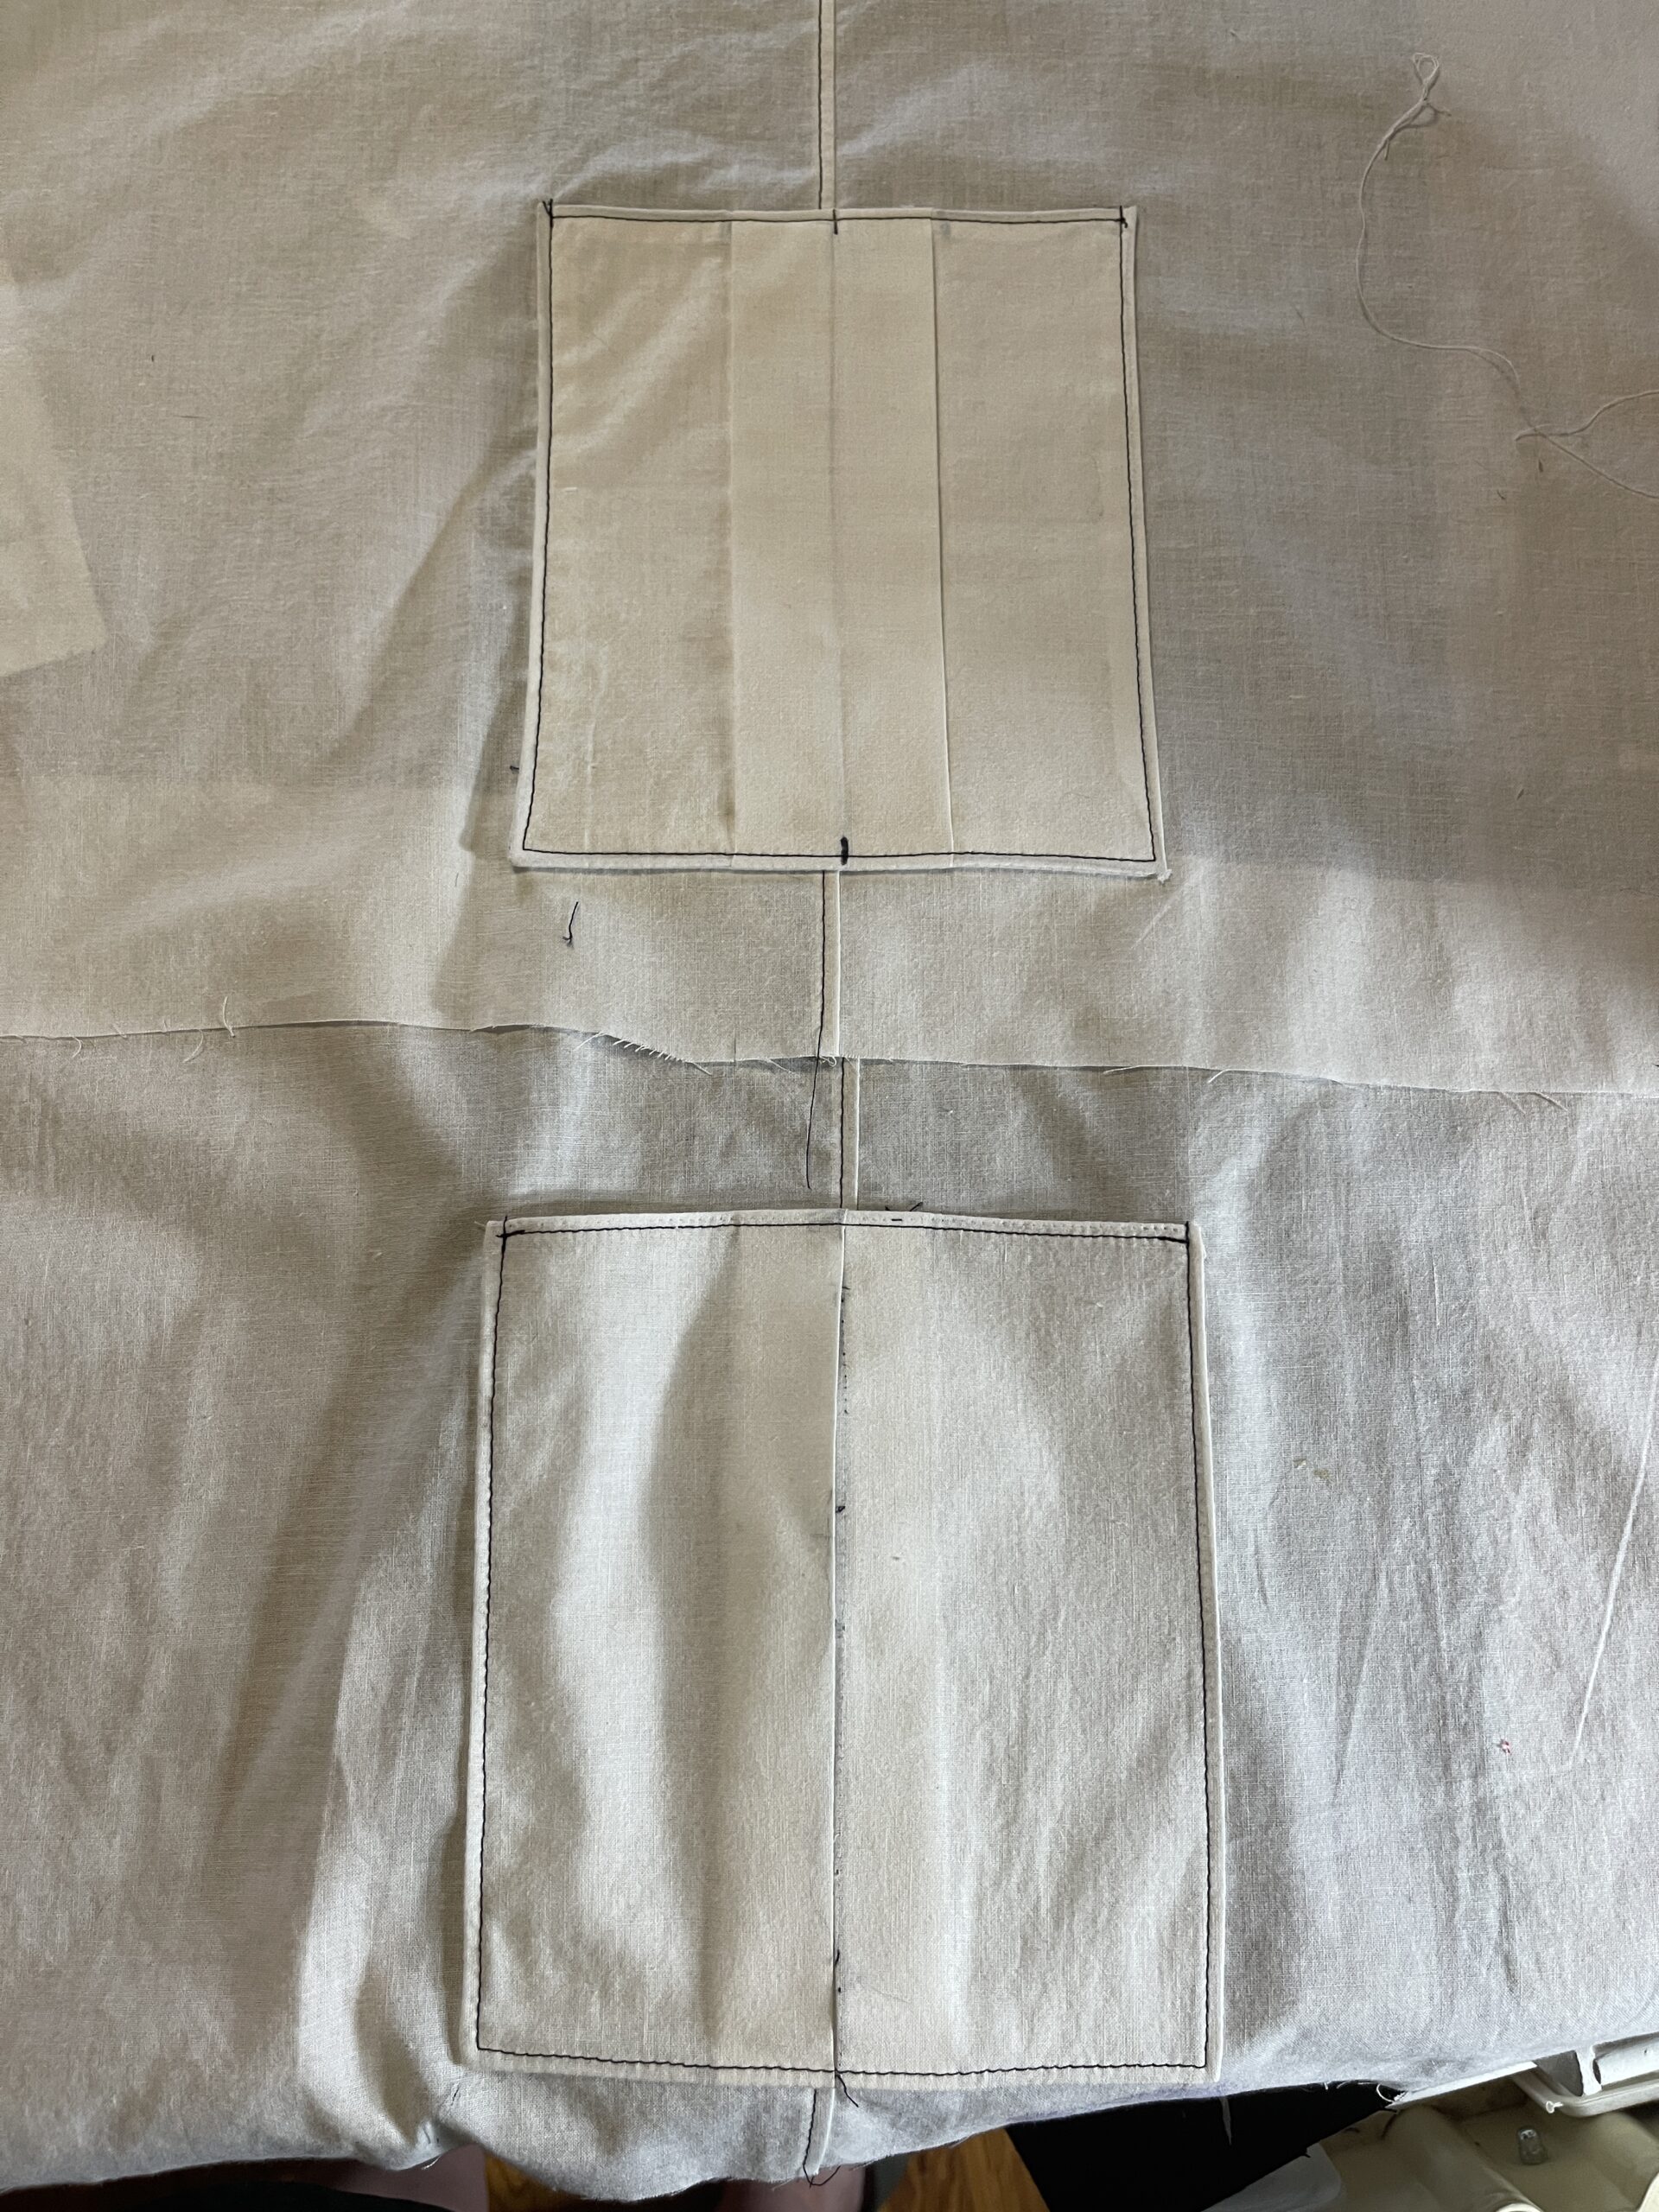
STEP 2: POCKET FINISH (Choose 4 OR 5) - Lined Pocket
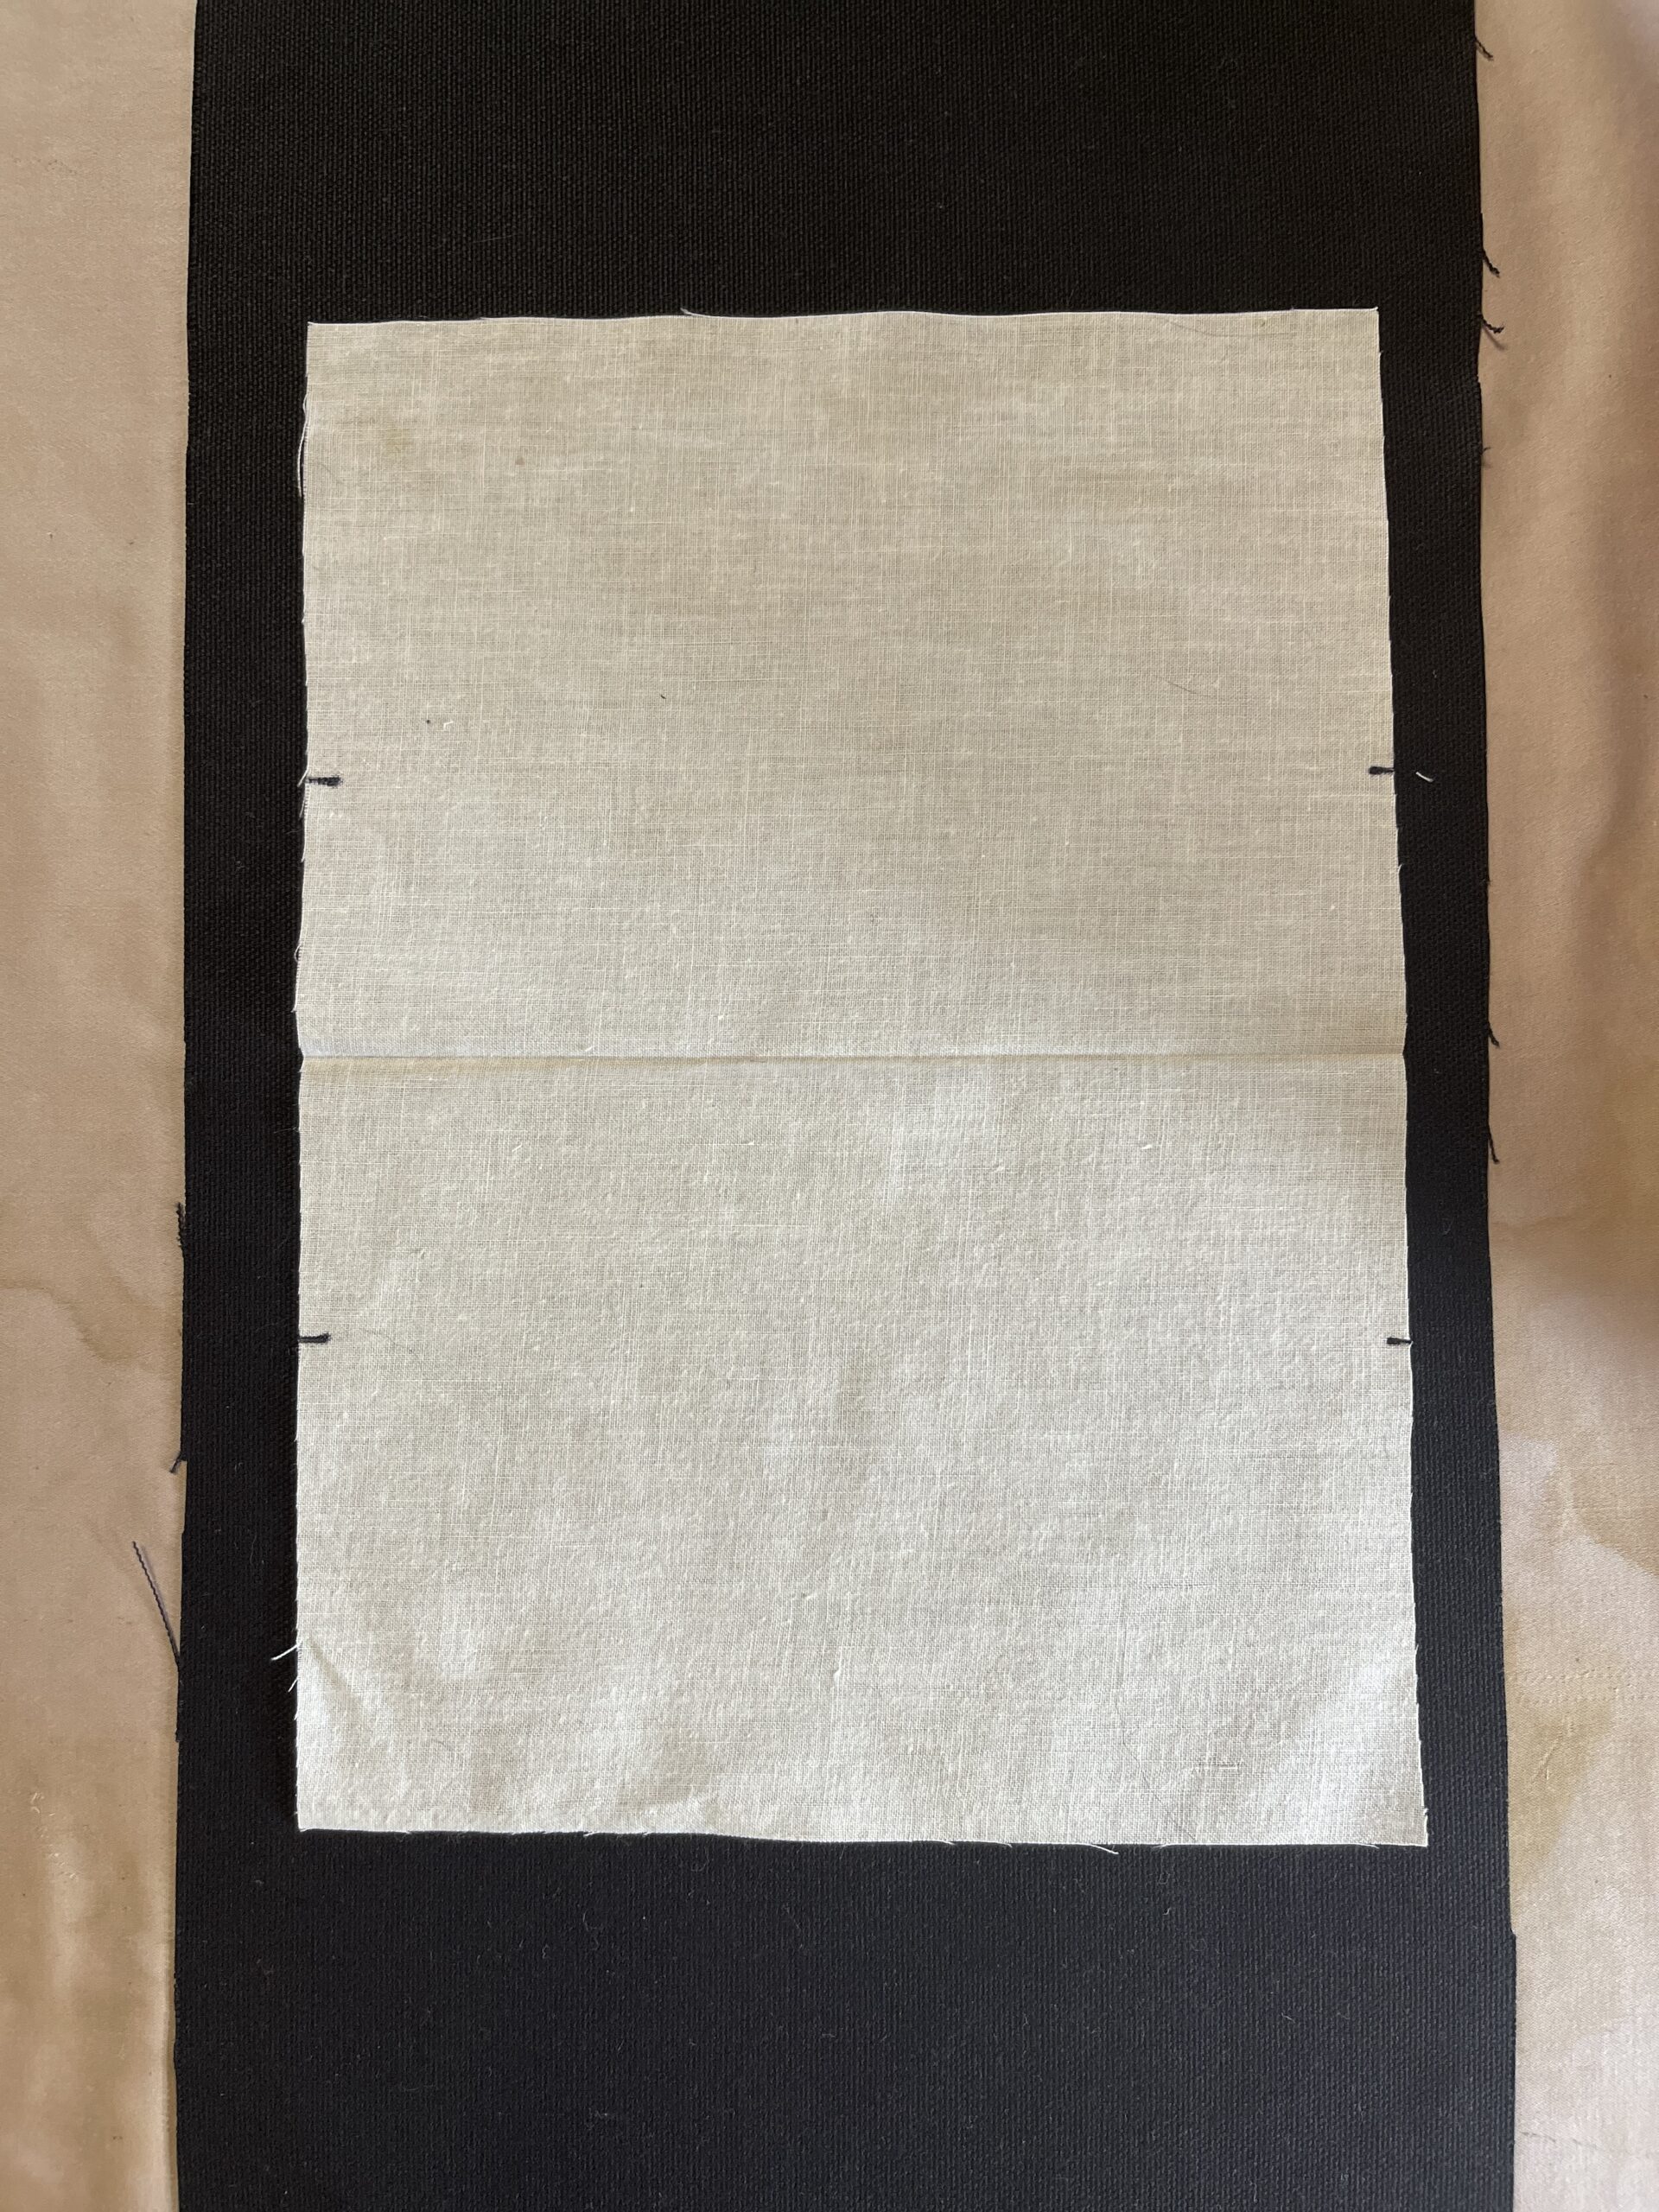
a. You should have your main piece that you created in the last step, and a lining piece (pattern piece number 2).
b. Stack these pieces, right sides together
c. Mark a space approximately 2 inches wide at the top of the pocket bag (if you’ve made a pleated pocket, this can easily be marked just outside the edges of the pleat. If you’ve made the box pleat version, it’s imperative that you maintain access to your basting stitches at the top, don’t sew over both ends.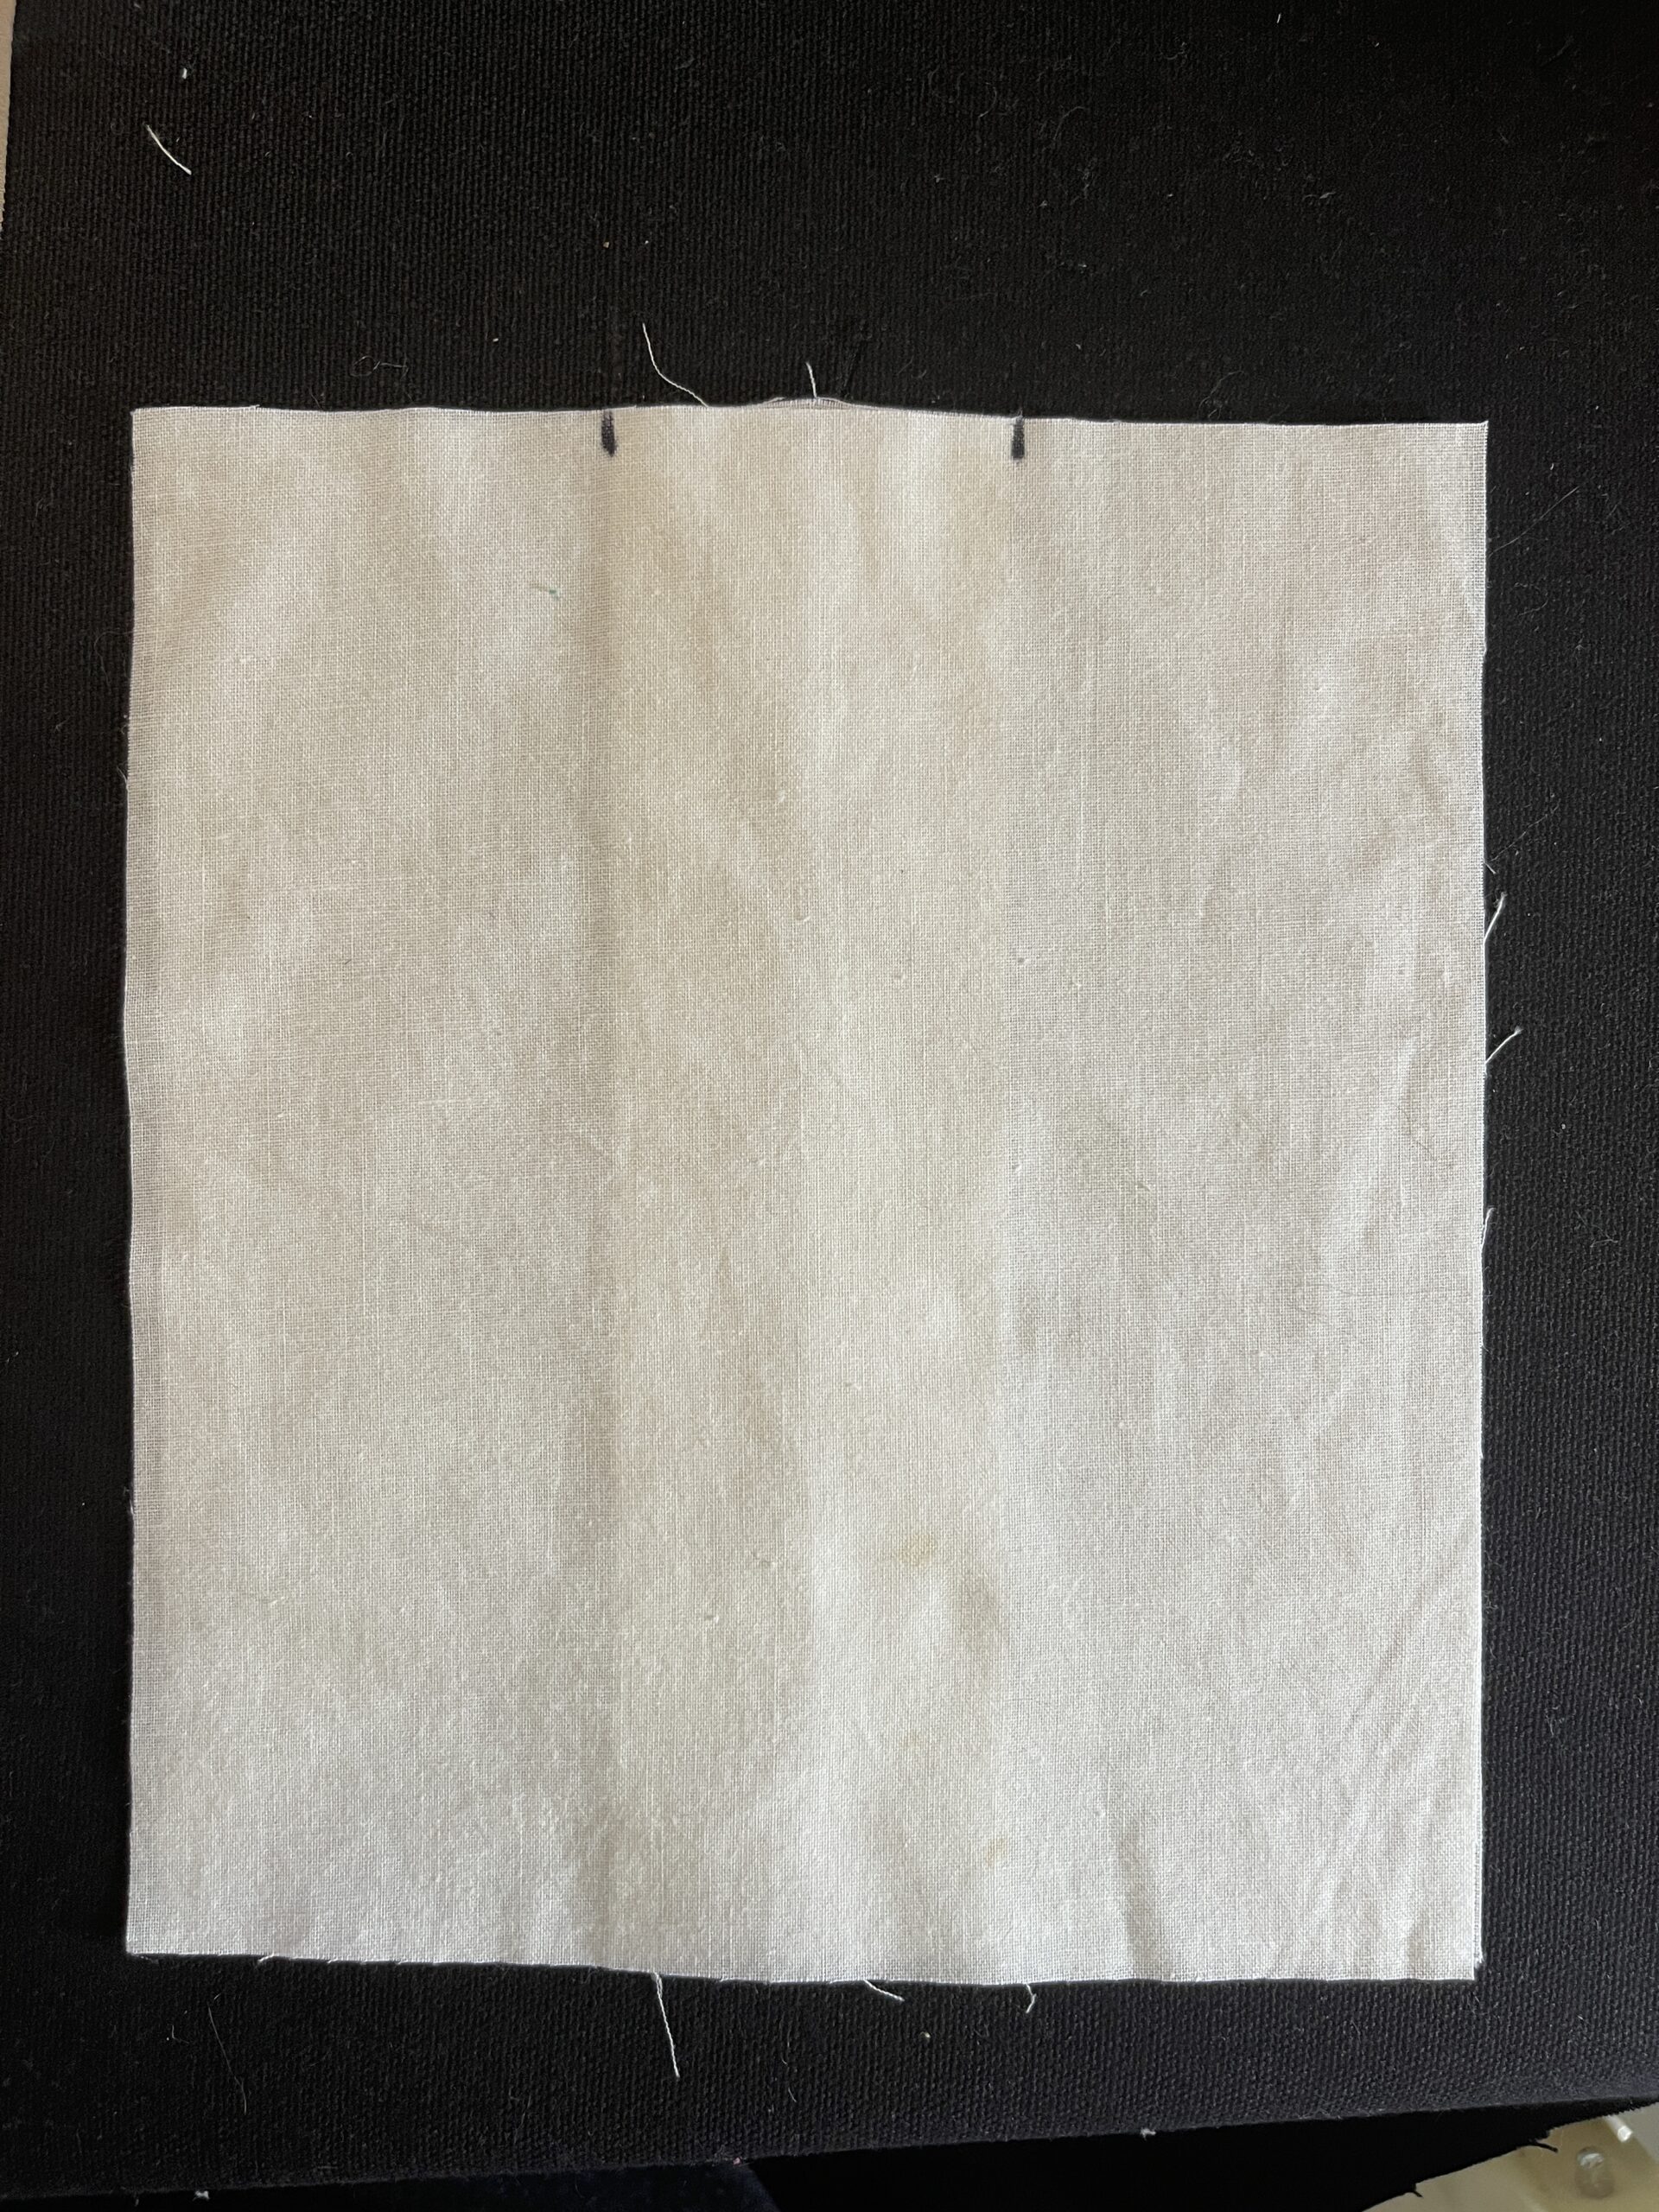
d. Begin at one mark. Sew around your pocket with a 3/8” seam allowance. Pivot at the corners (you can mark your pivot points before you sew for extra precision. Stop when you’ve reached your second mark. If you have a pleat, be sure you haven’t sewn the hole narrower than the pleat itself—as we are going to need to tuck that in to get a nice finish.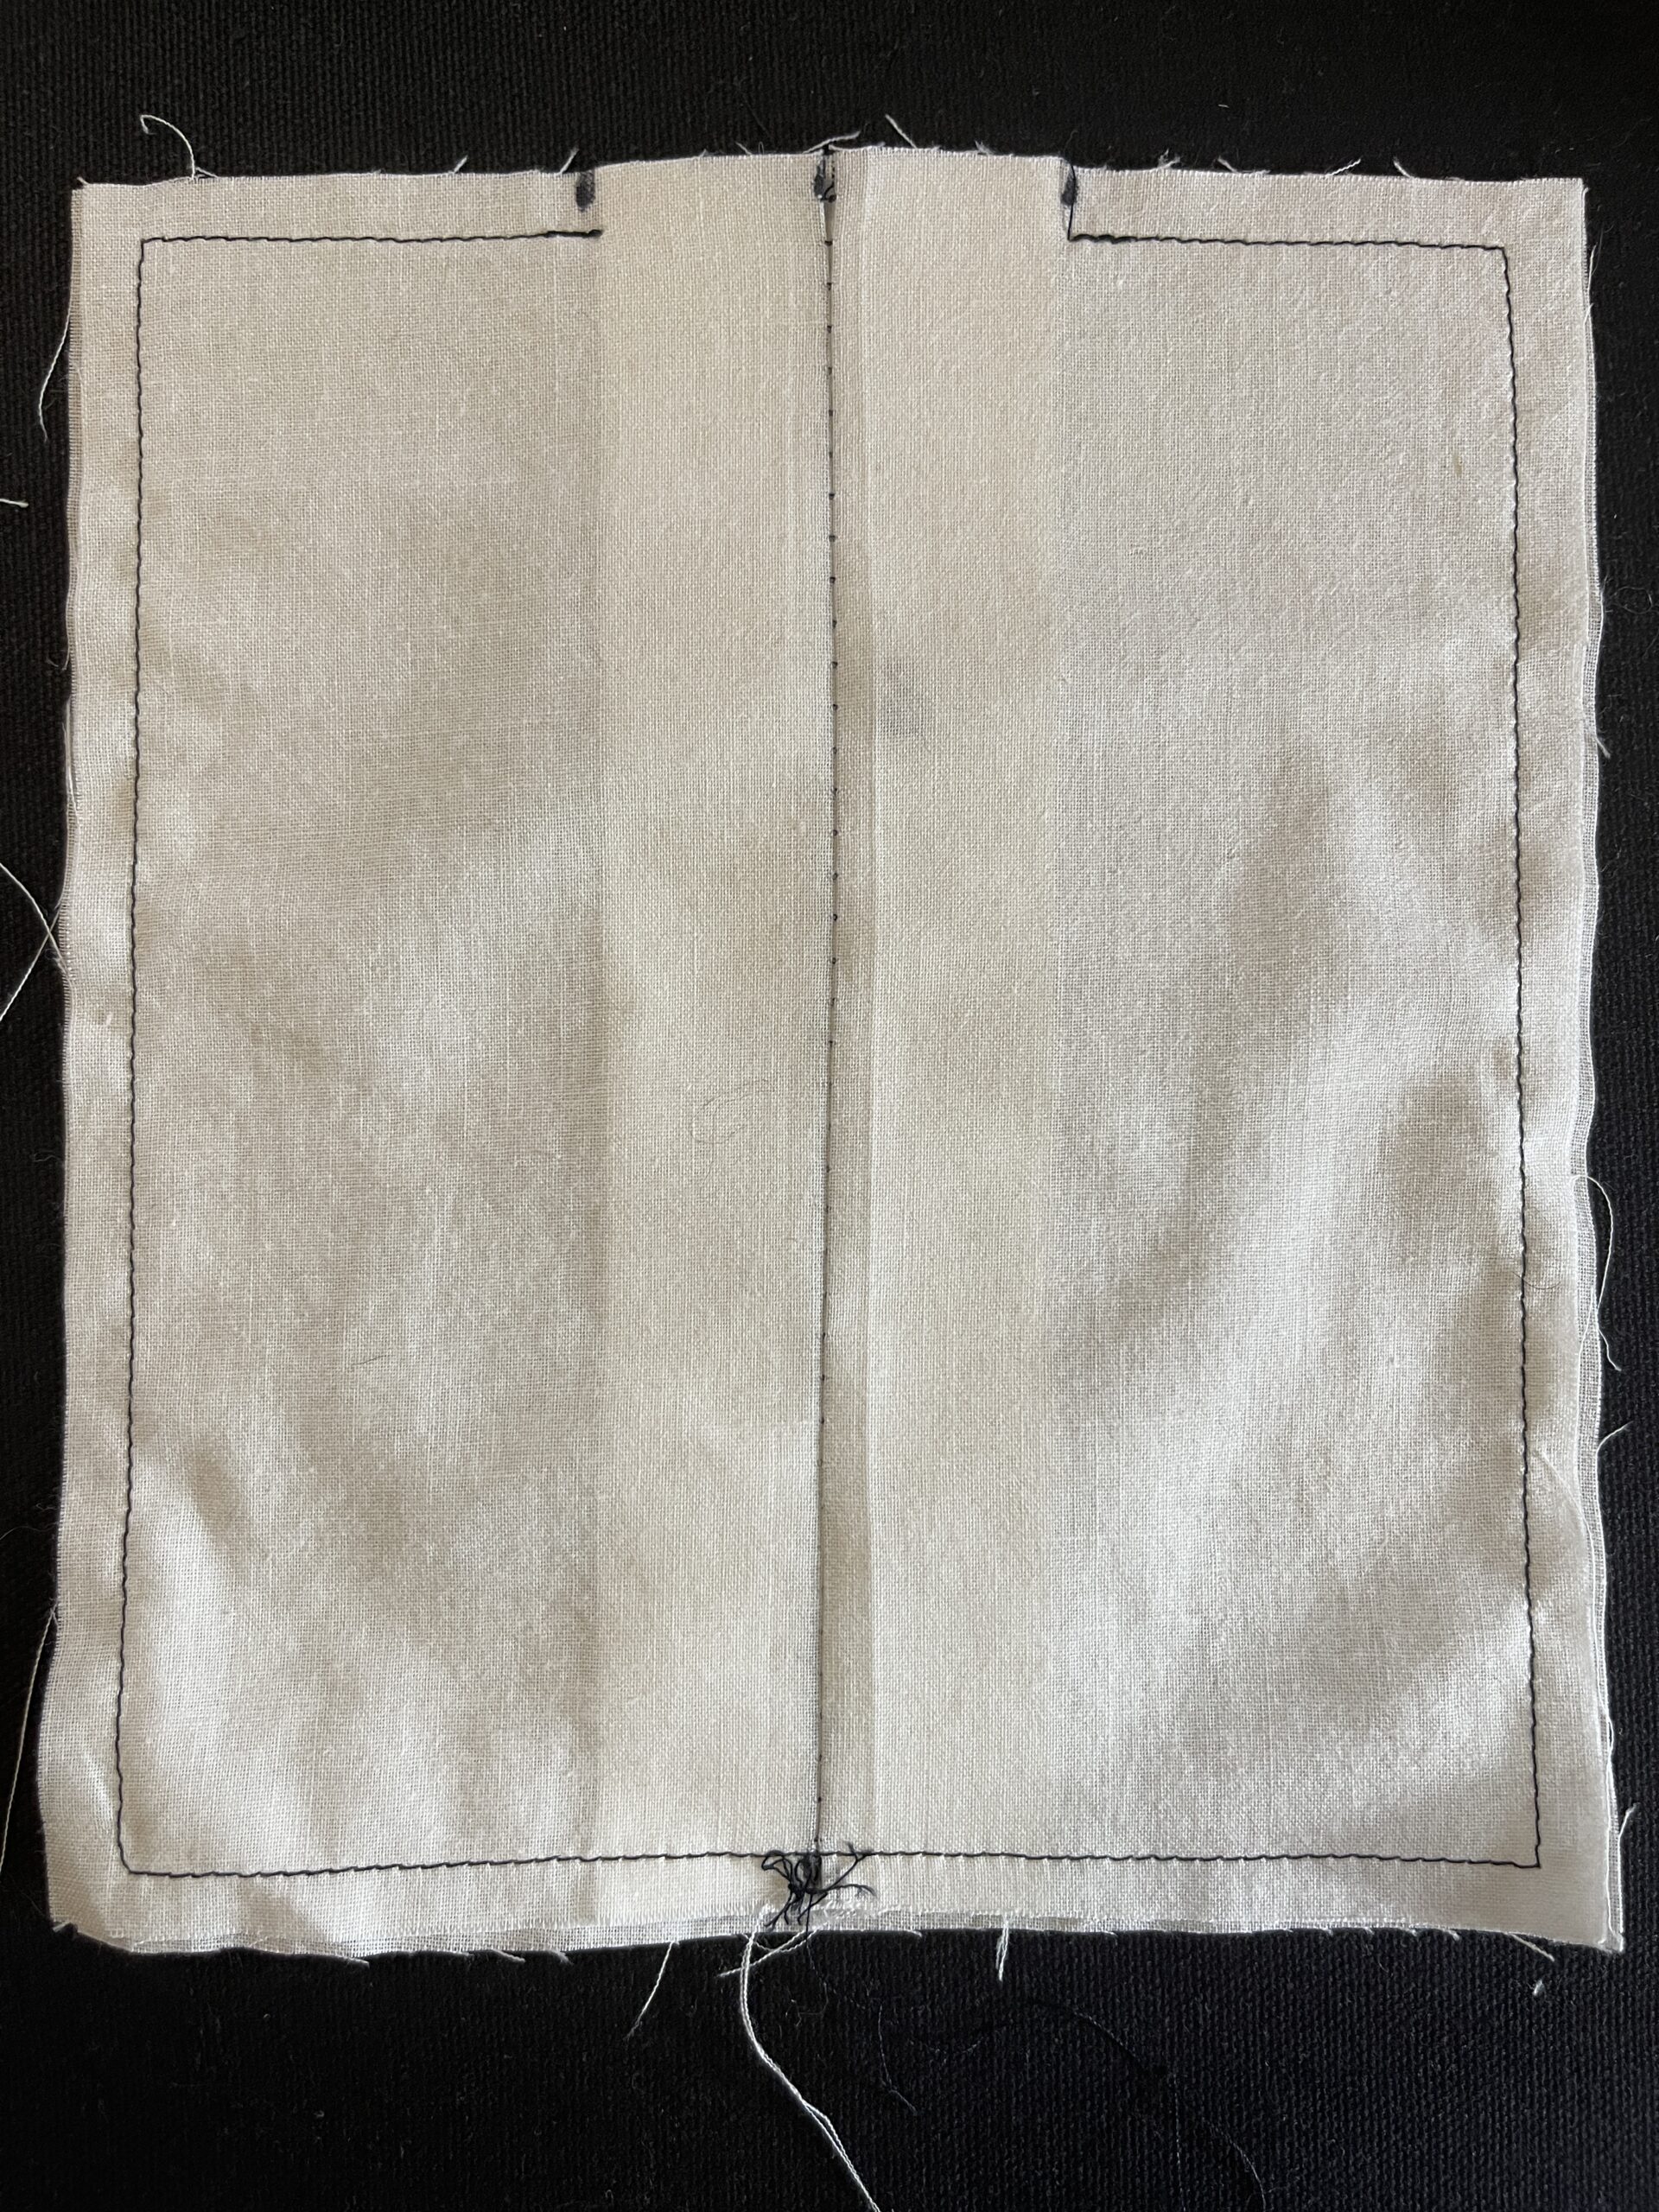
e. Trim your corners to minimize bulk. Cut about 1/8” away from the corner, and be sure not to cut through the stitching. (Your opening will be in the center— not on the side. Everything else will be the same). BOX PLEAT MAKERS: Now is the time to remove your basting stitches.
f. Turn your pocket right side out. I use a chop-stick style stick that isn’t too sharp at the end to get my corners crisp. Be careful not to poke through the corners—(but honestly, if you do, I doubt anyone will notice.)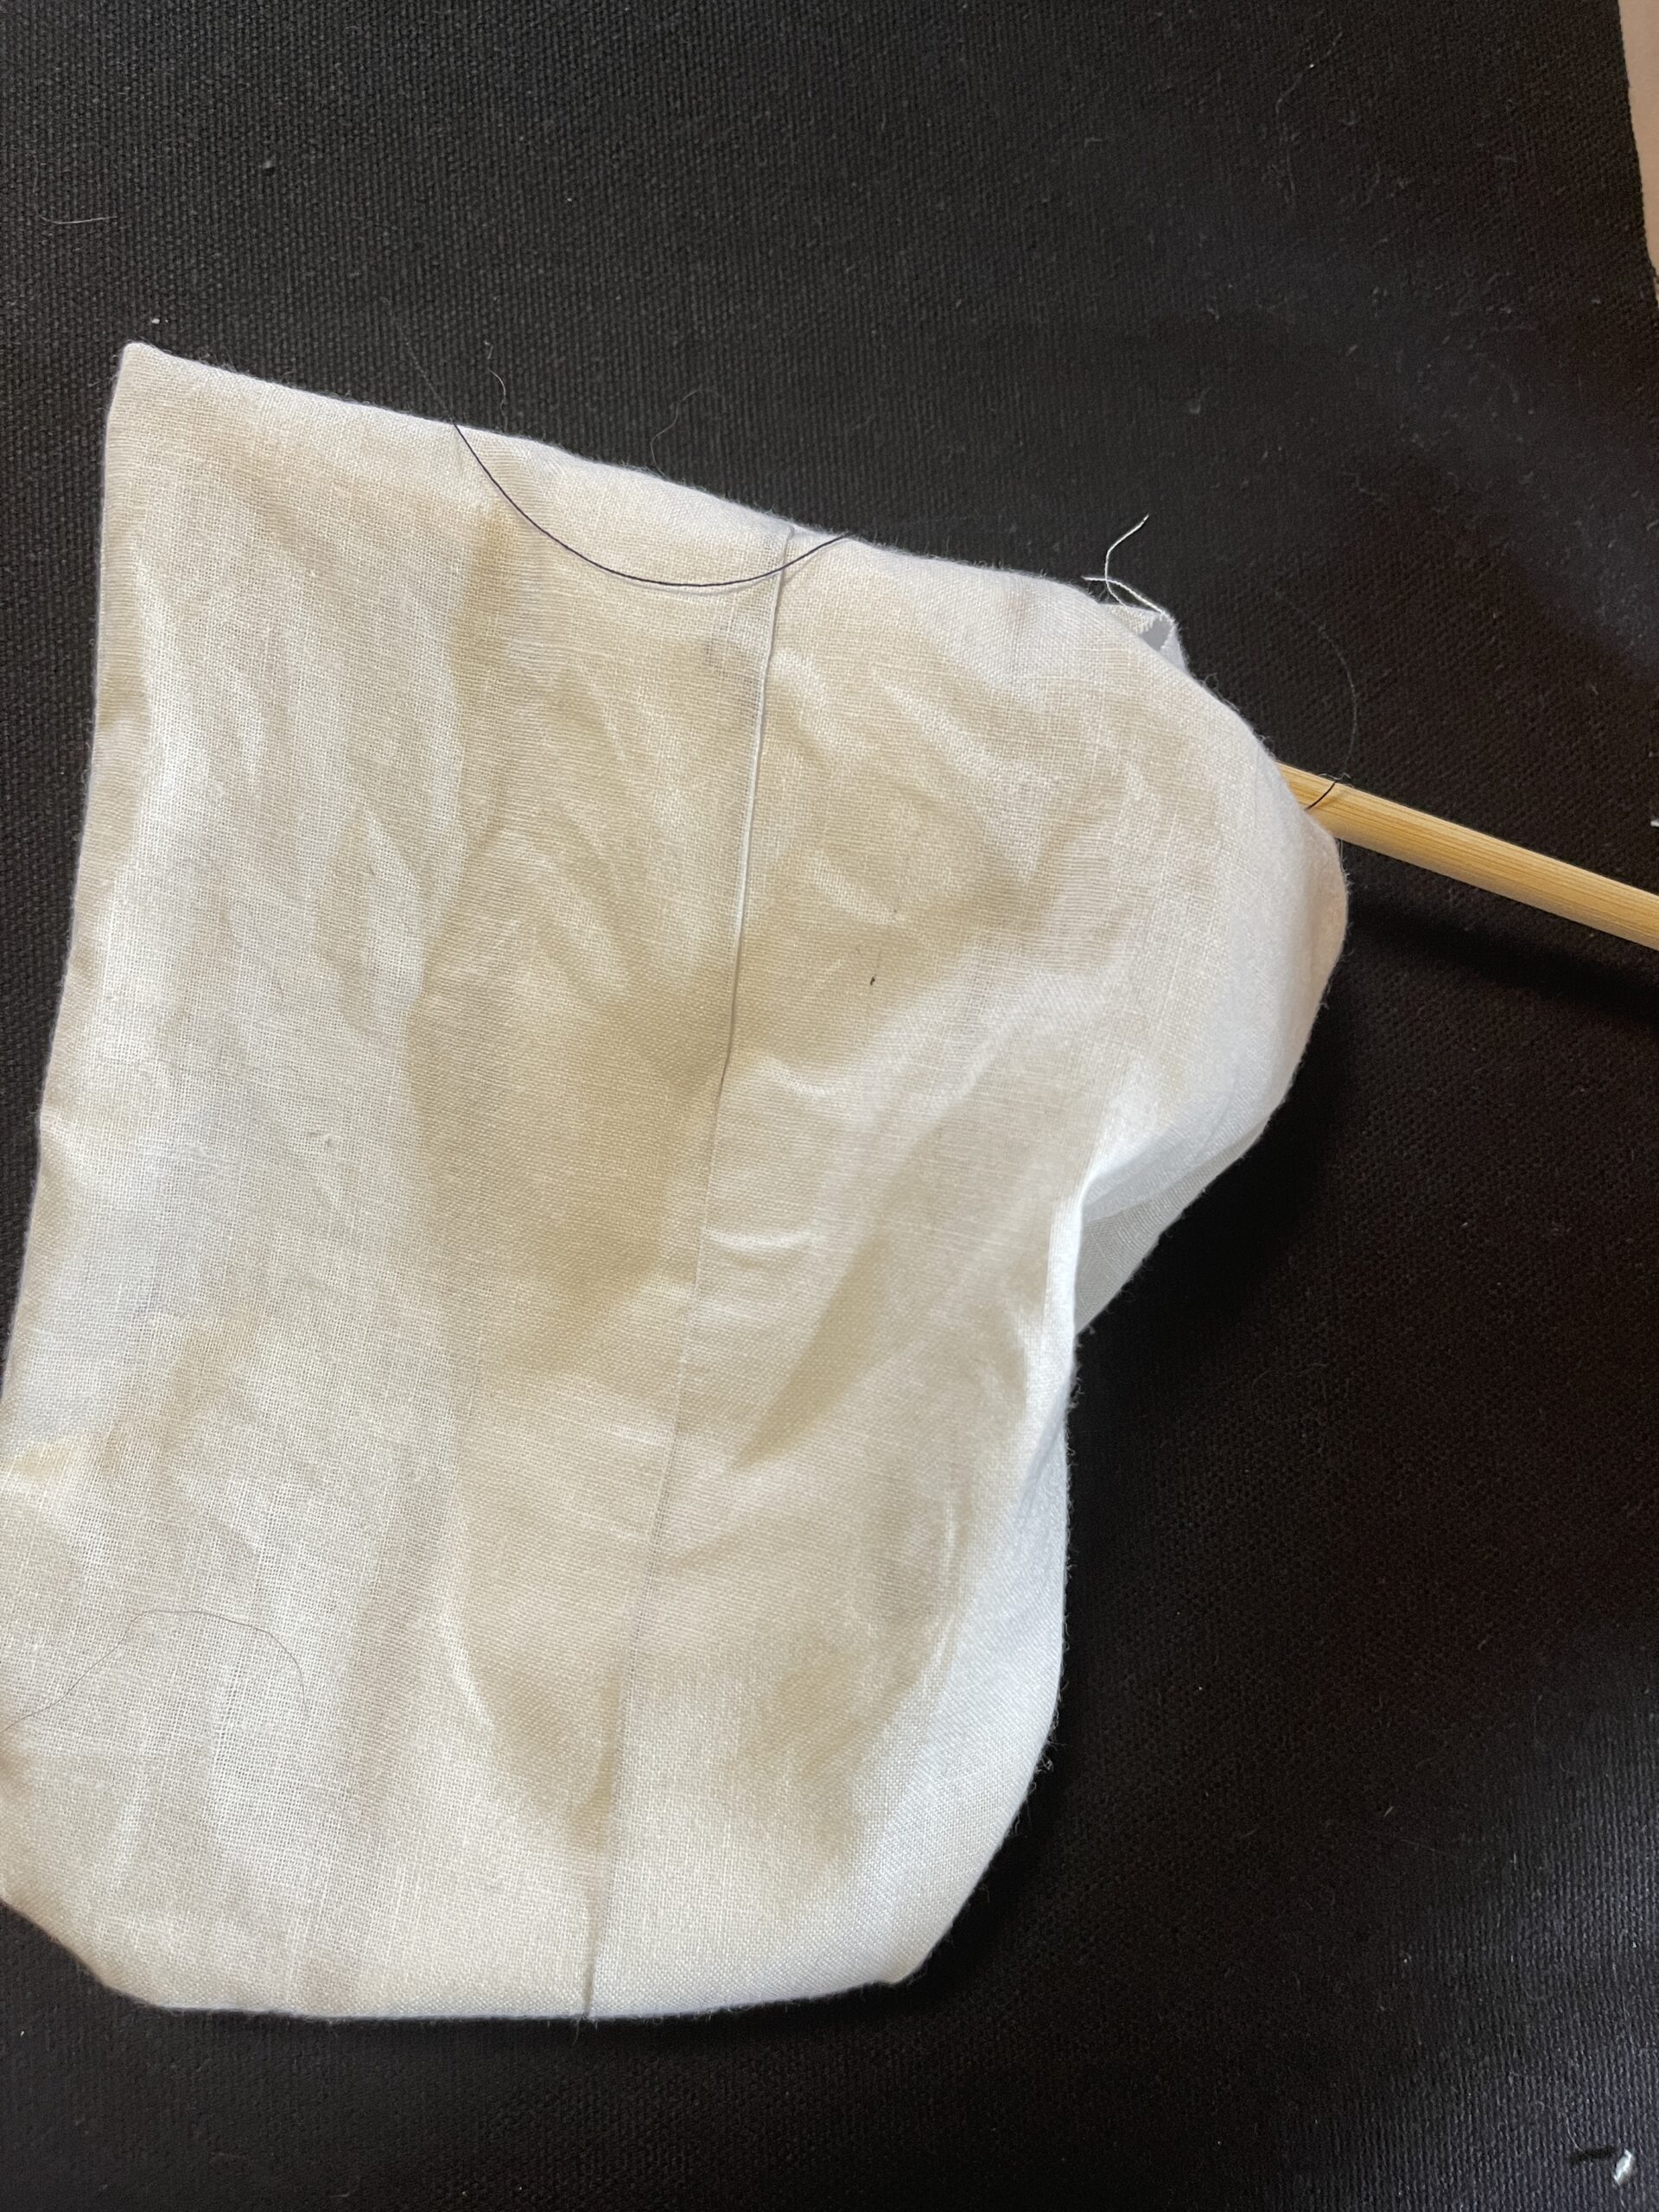
g. INVERTED PLEAT MAKERS (OR Box pleat folks that missed this in the e step) Remove your basting stitches. If you left long tails, you can snag those and pull. Otherwise, grab that handy-dandy seam ripper and GO! (If you’ve made box pleat version and skimmed over the previous basting removal, you’ll just have to dig into the opening a bit to undo the basting on the inside).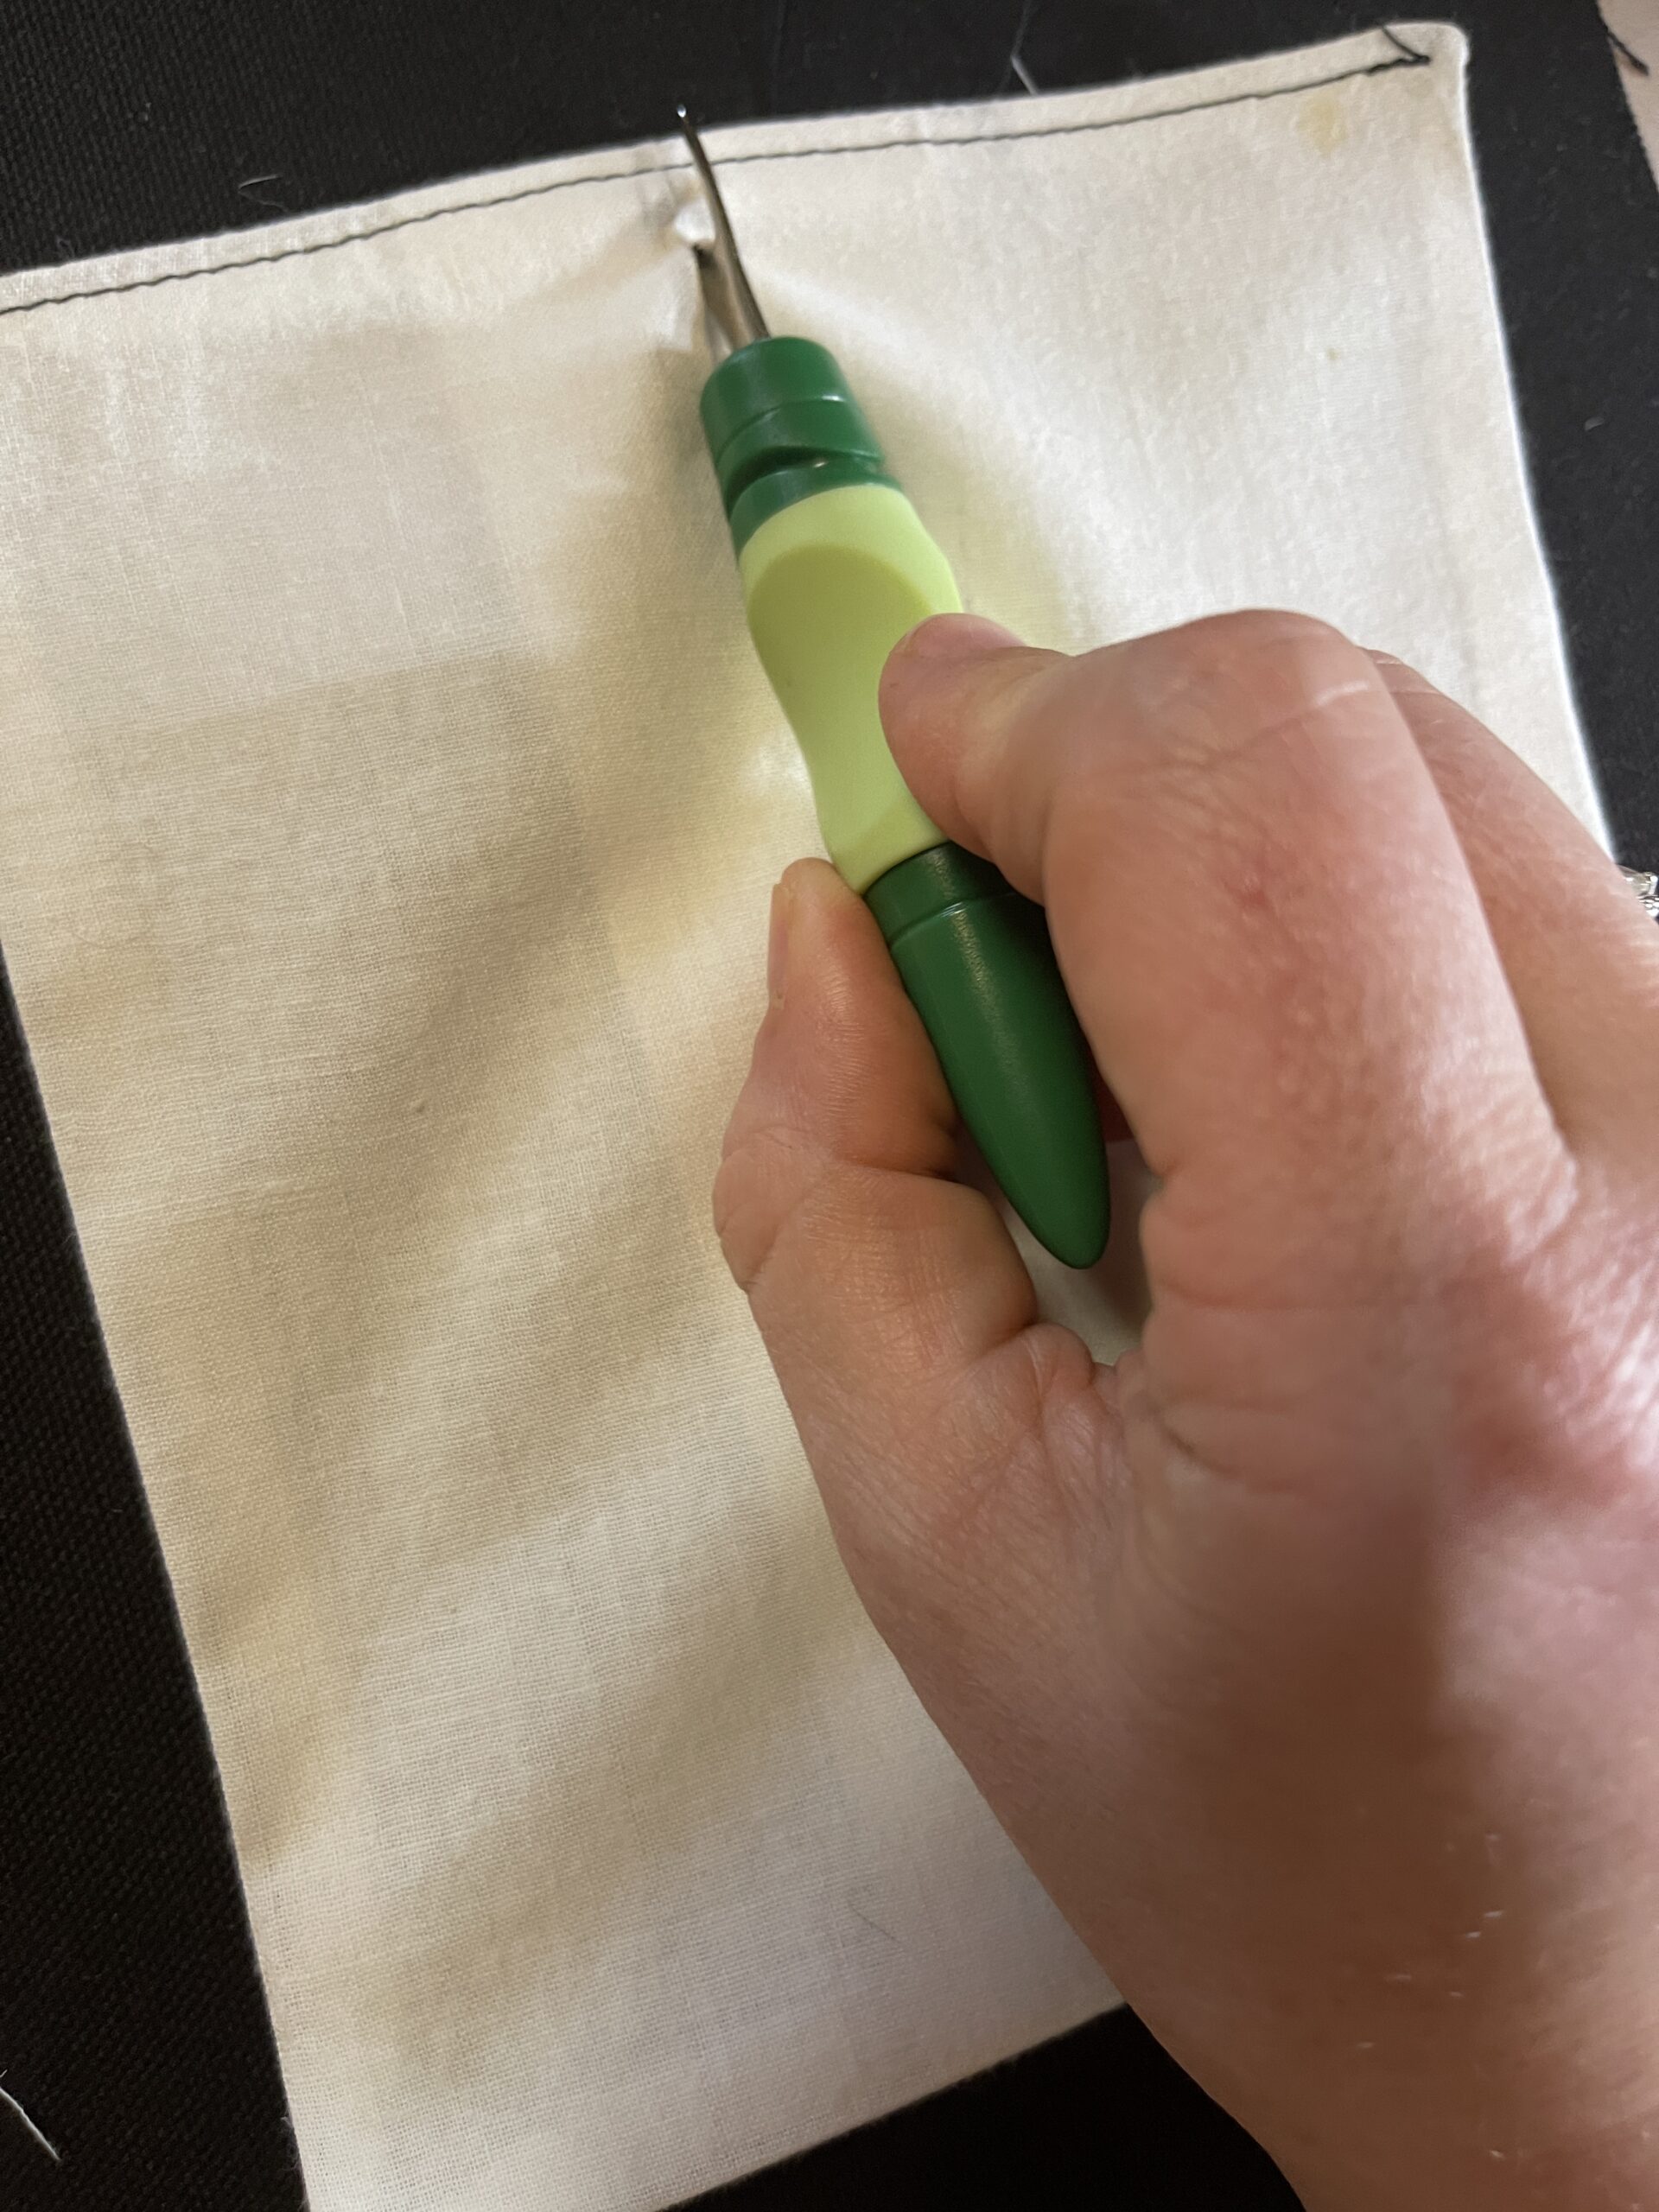
h. Now we want to close the hole, so tuck the open edges in, guided by your 3/8” seam allowance and make sure they’re flush with the rest of the pocket edge. Press.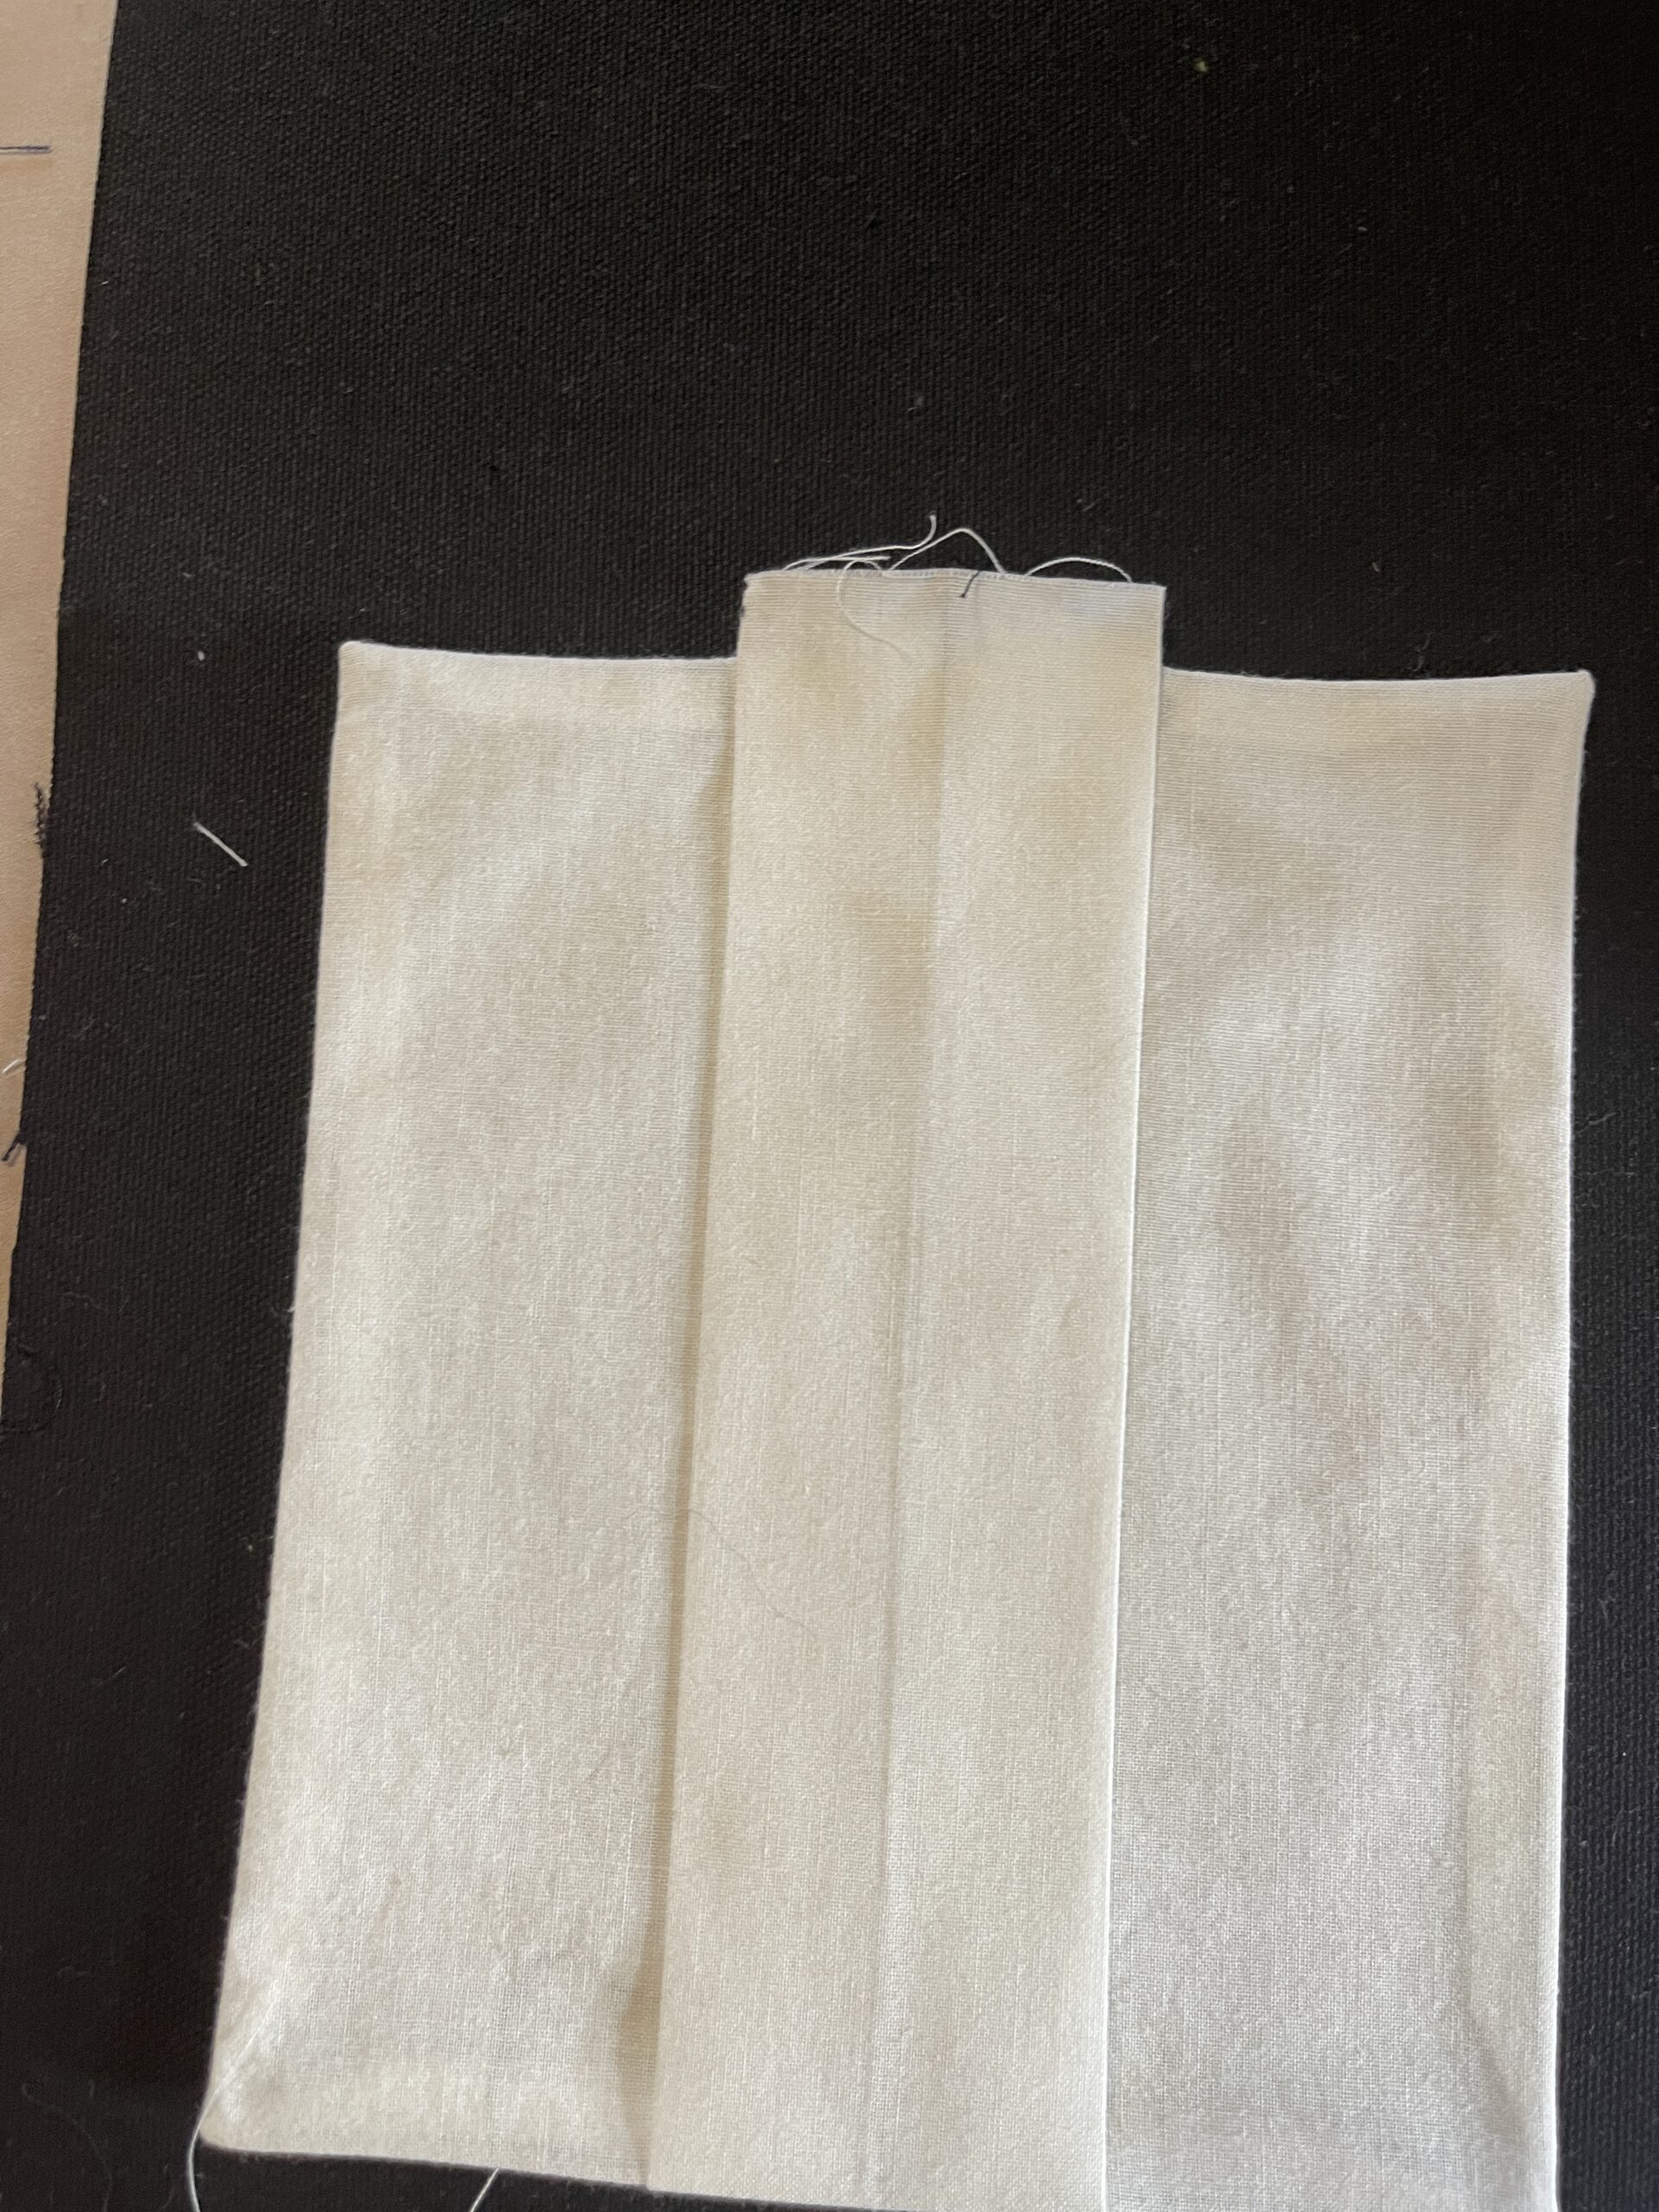
I. Adjust your machine settings for topstitching. Topstitch ¼” away from the top edge. For this project, I like to lengthen my stitch to 2.8 and increase my tension just a bit, to give some extra stitch definition.
j. Topstitch ¼” from the edge of your pocket top. You can secure the ends, but for a cleaner finish, you can just do a straight topstitch from edge to edge and knot your thread.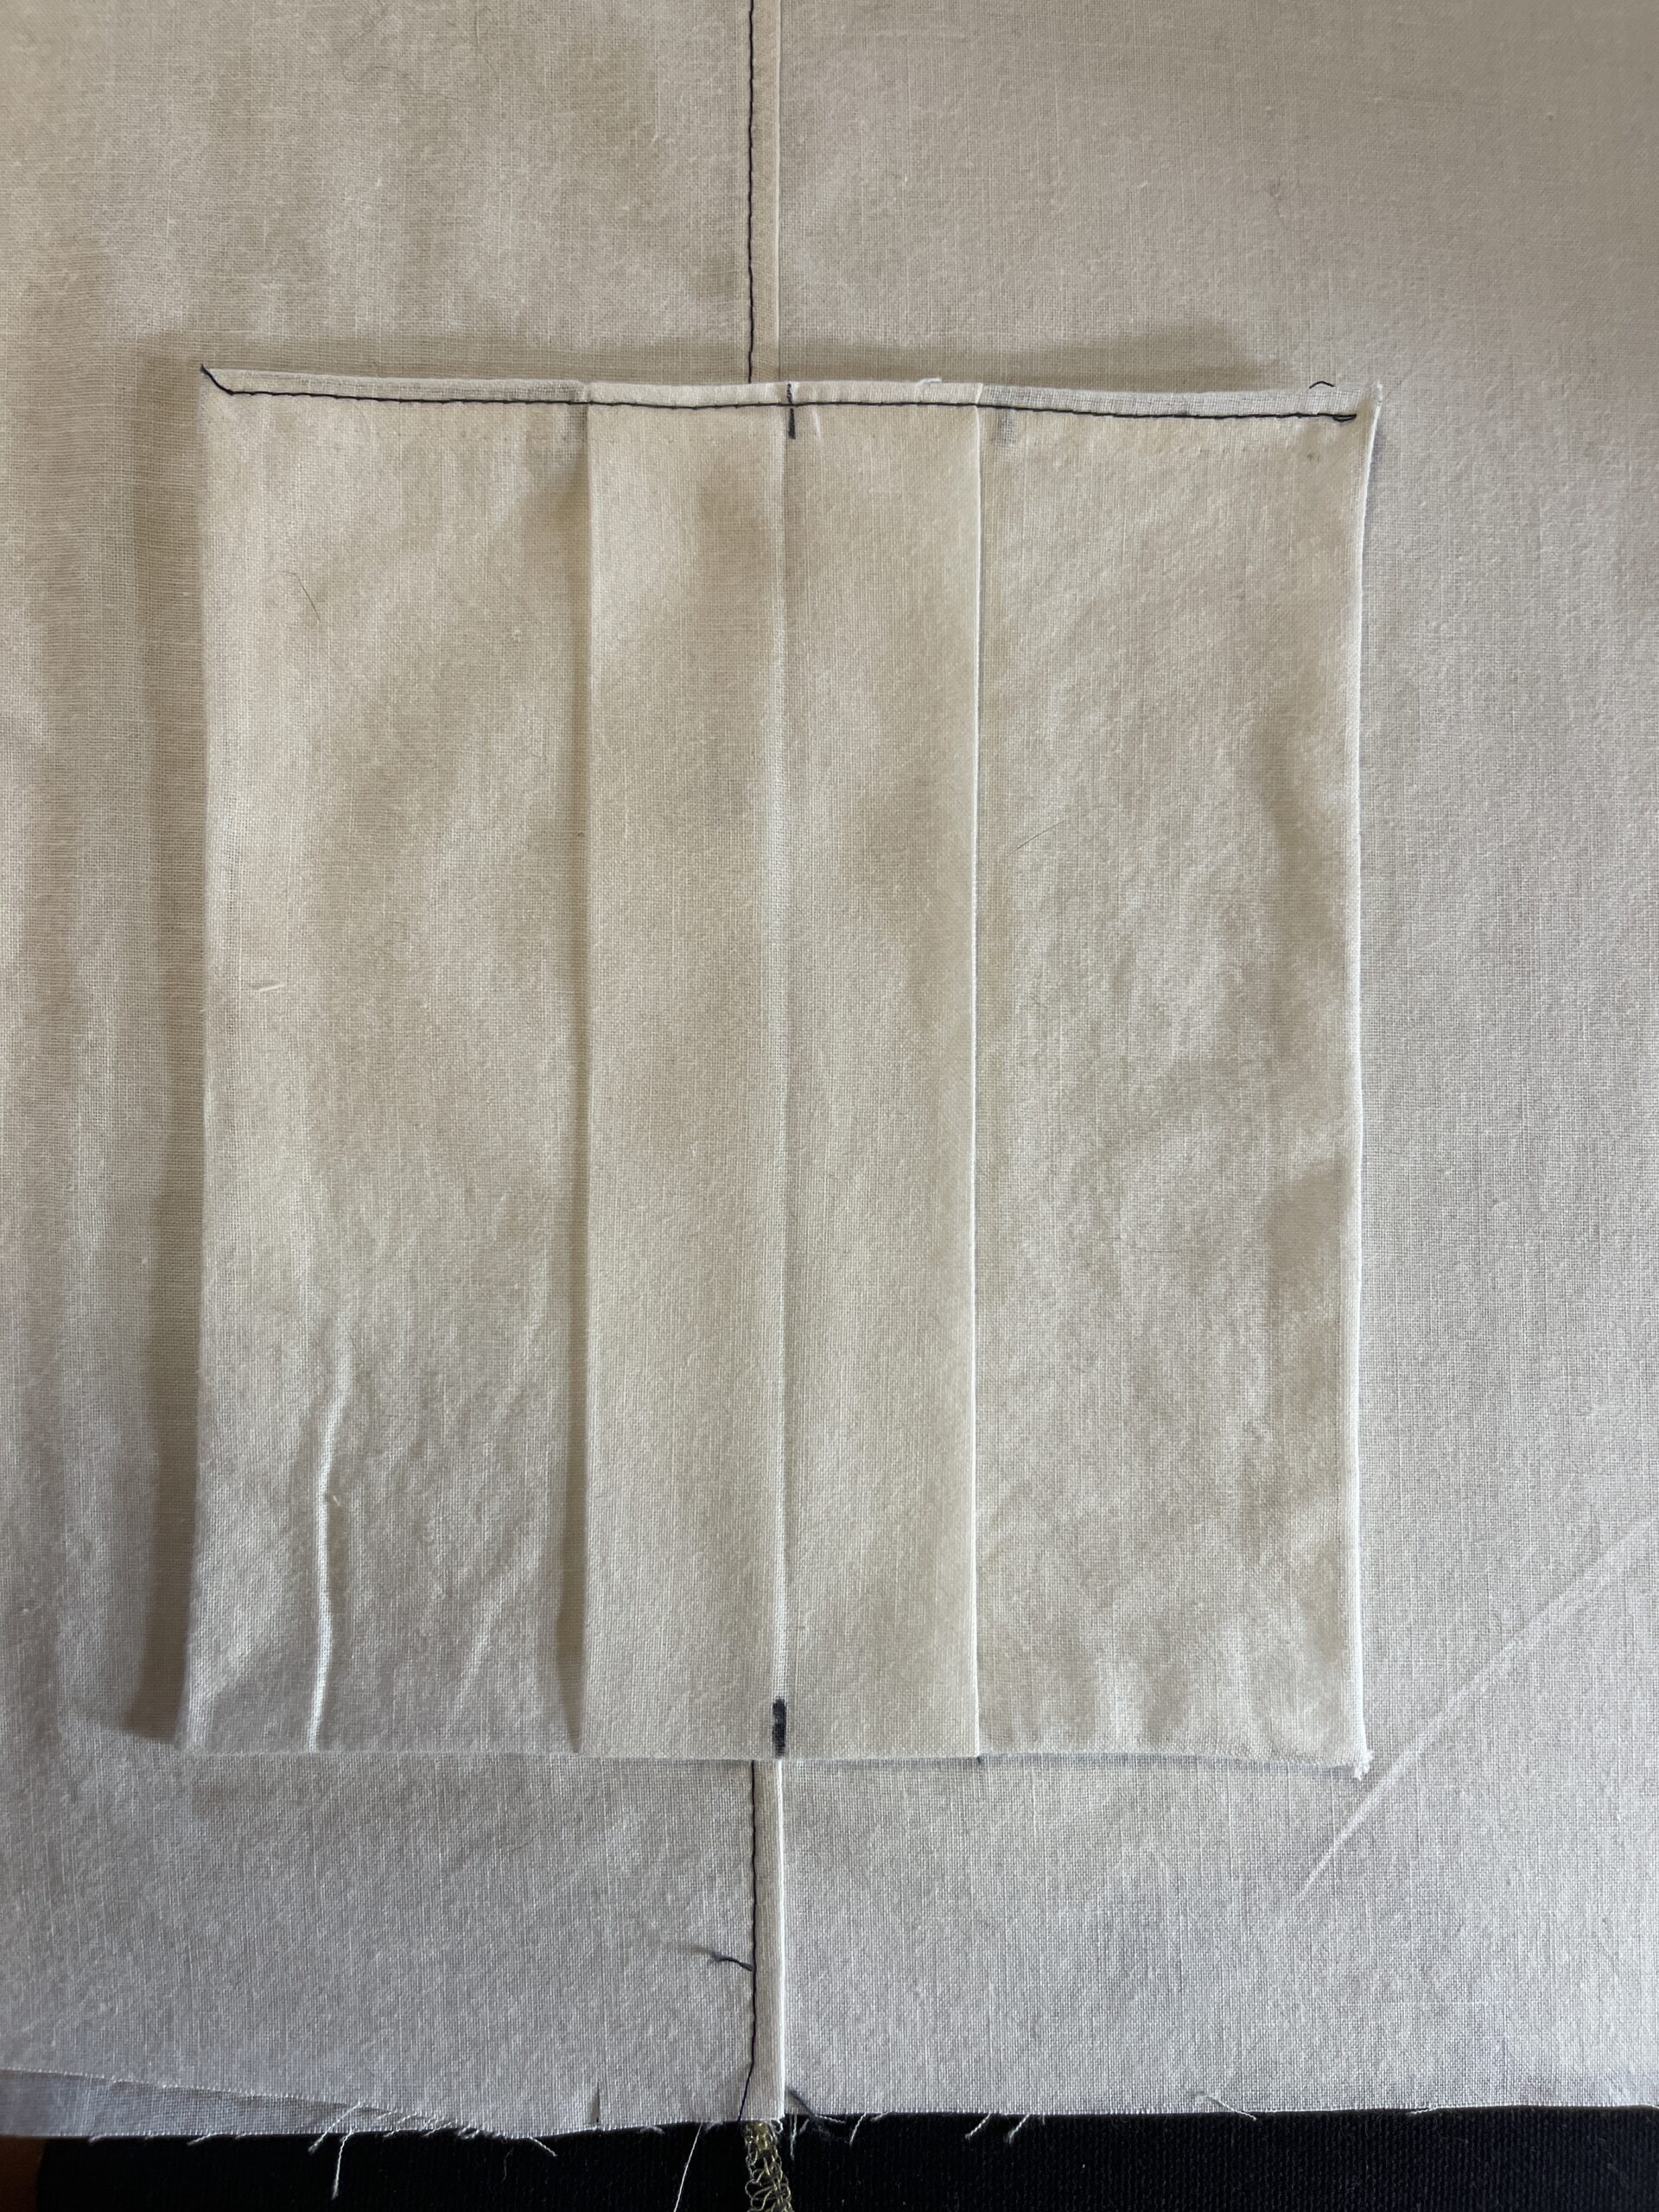
- Un-lined Pocket
a. Take your complete piece from STEP 1 and, if it has a pleat, I recommend basting the pleat to secure it in place, as shown. This isn’t required, but it will help keep things in place.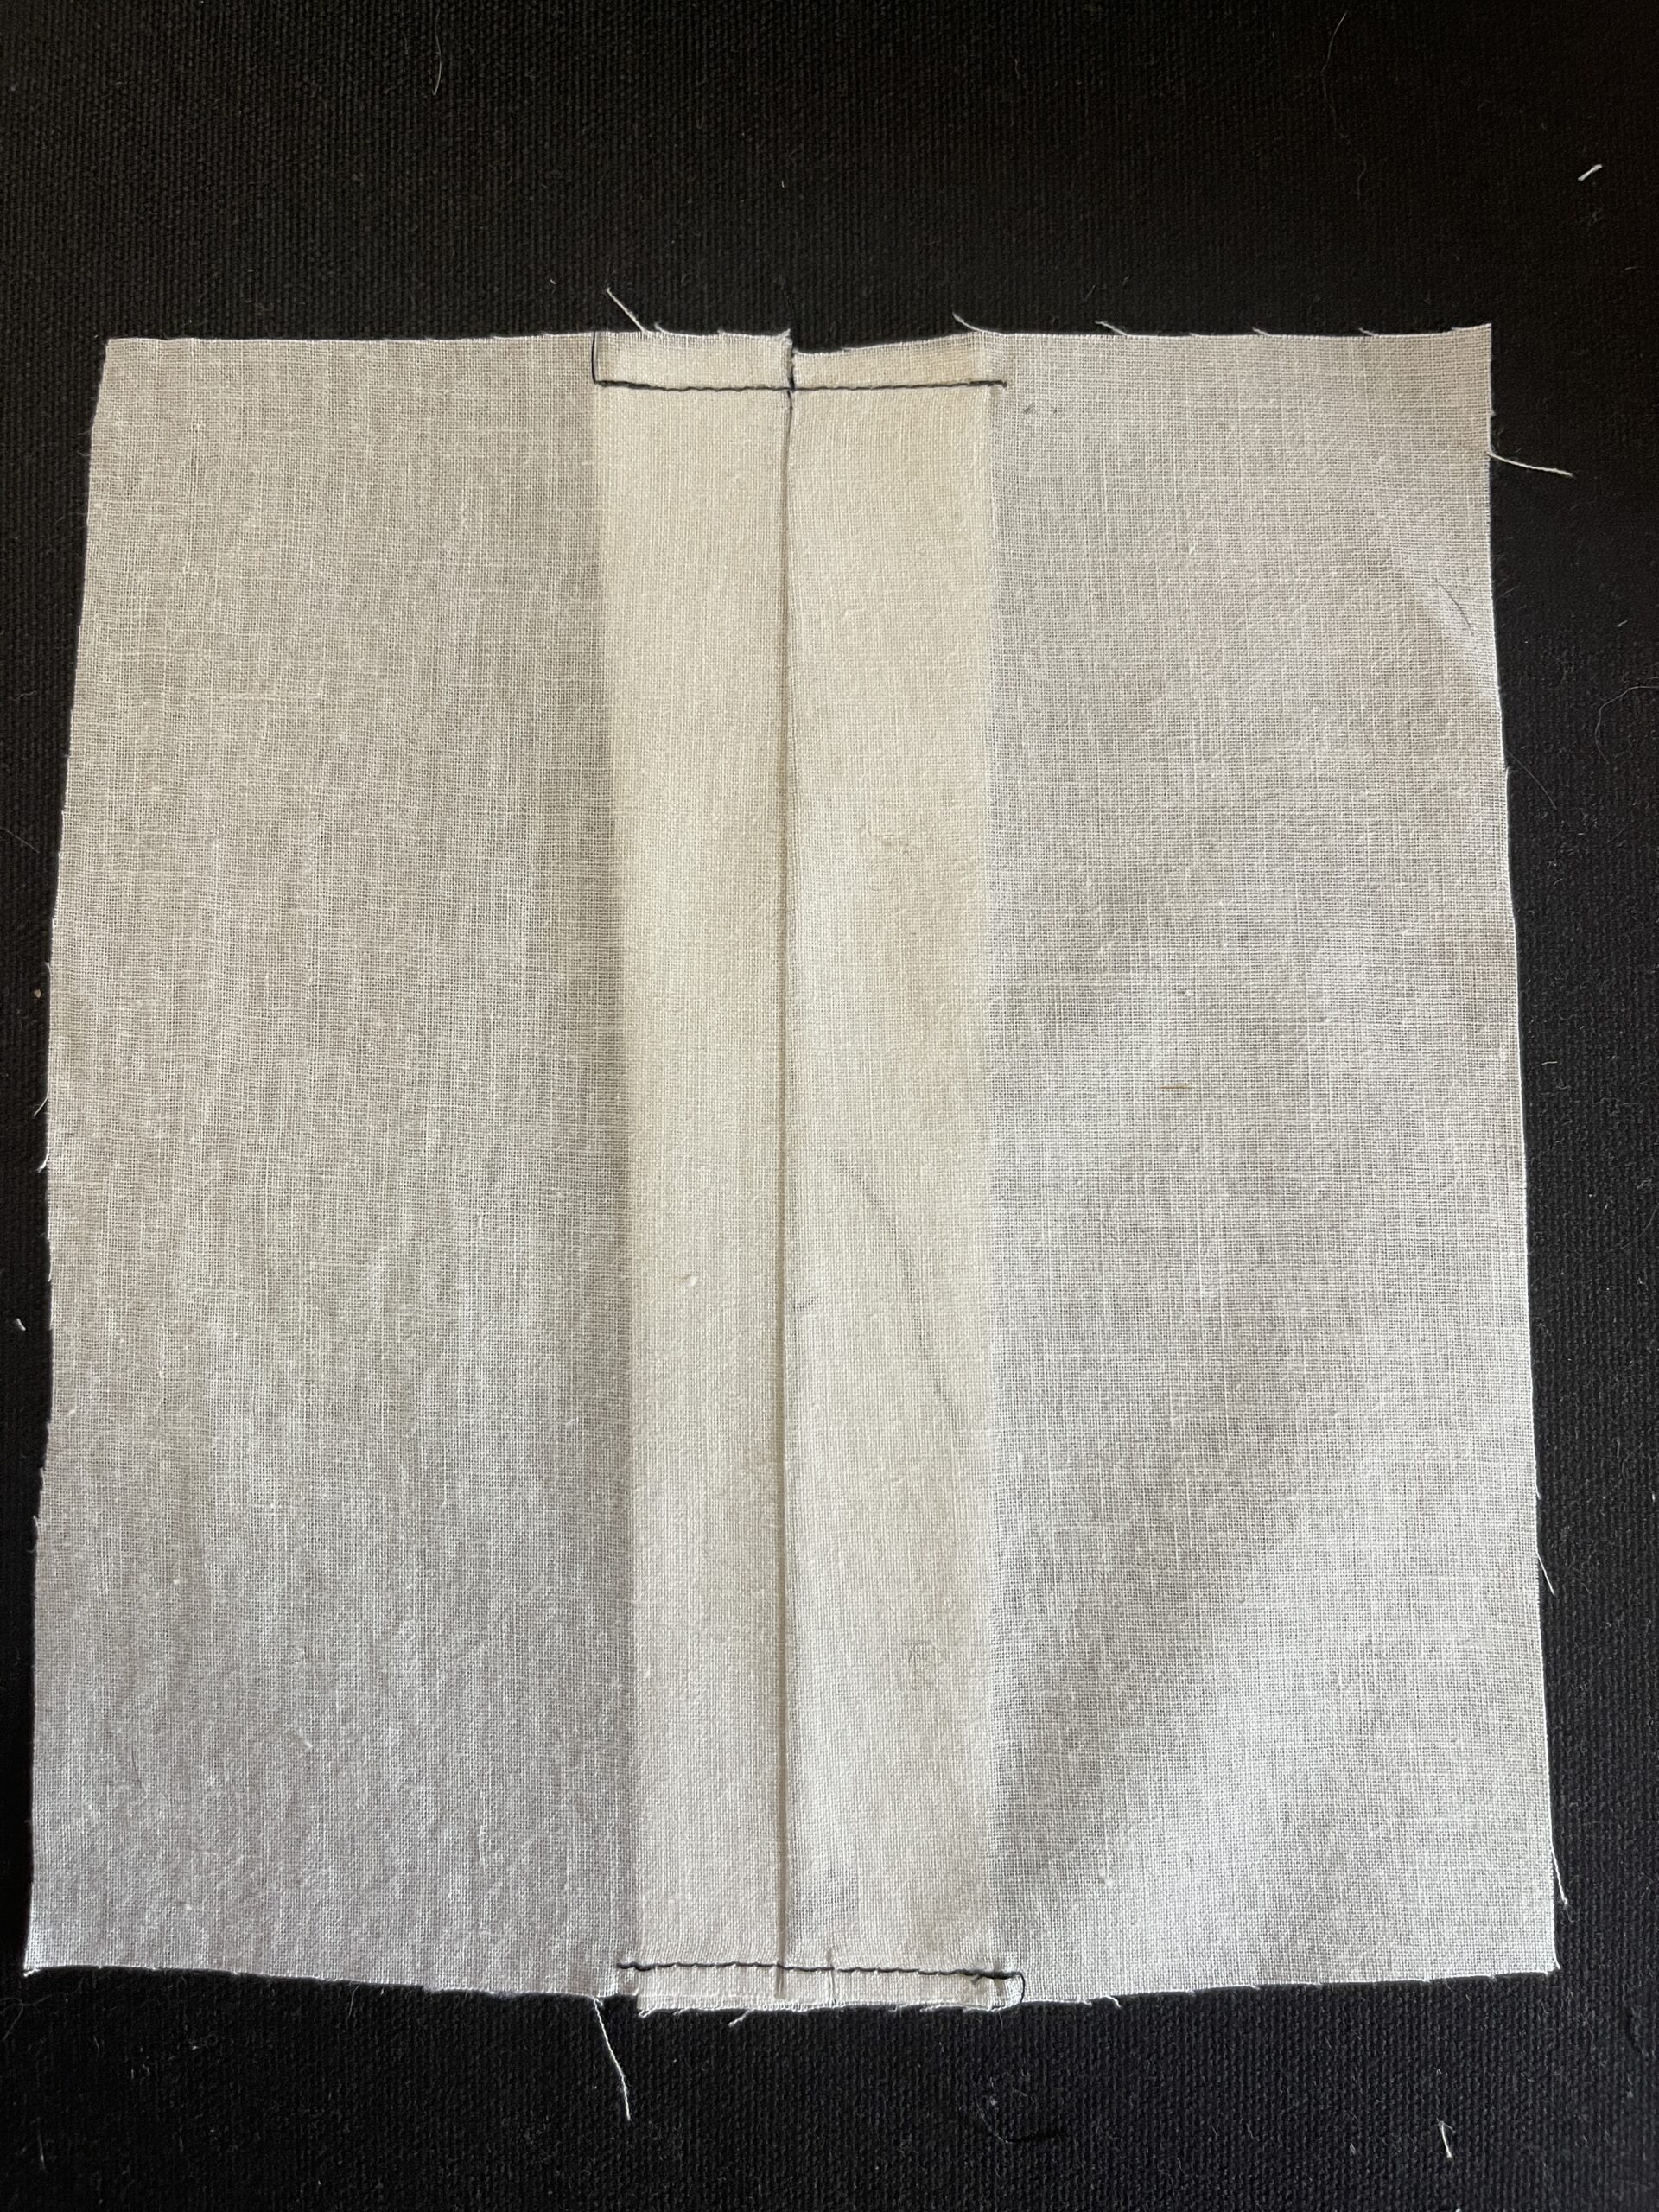
b. Finish your pocket edges, bearing in mind the 3/8” seam allowance. You can use your preferred method- surging or zig-zag stitching the edges are great options. If you use an overlocker, be cognizant that you don’t shave off your seam allowance. If you do shave off part of your seam allowance, just make a smaller fold in the next step.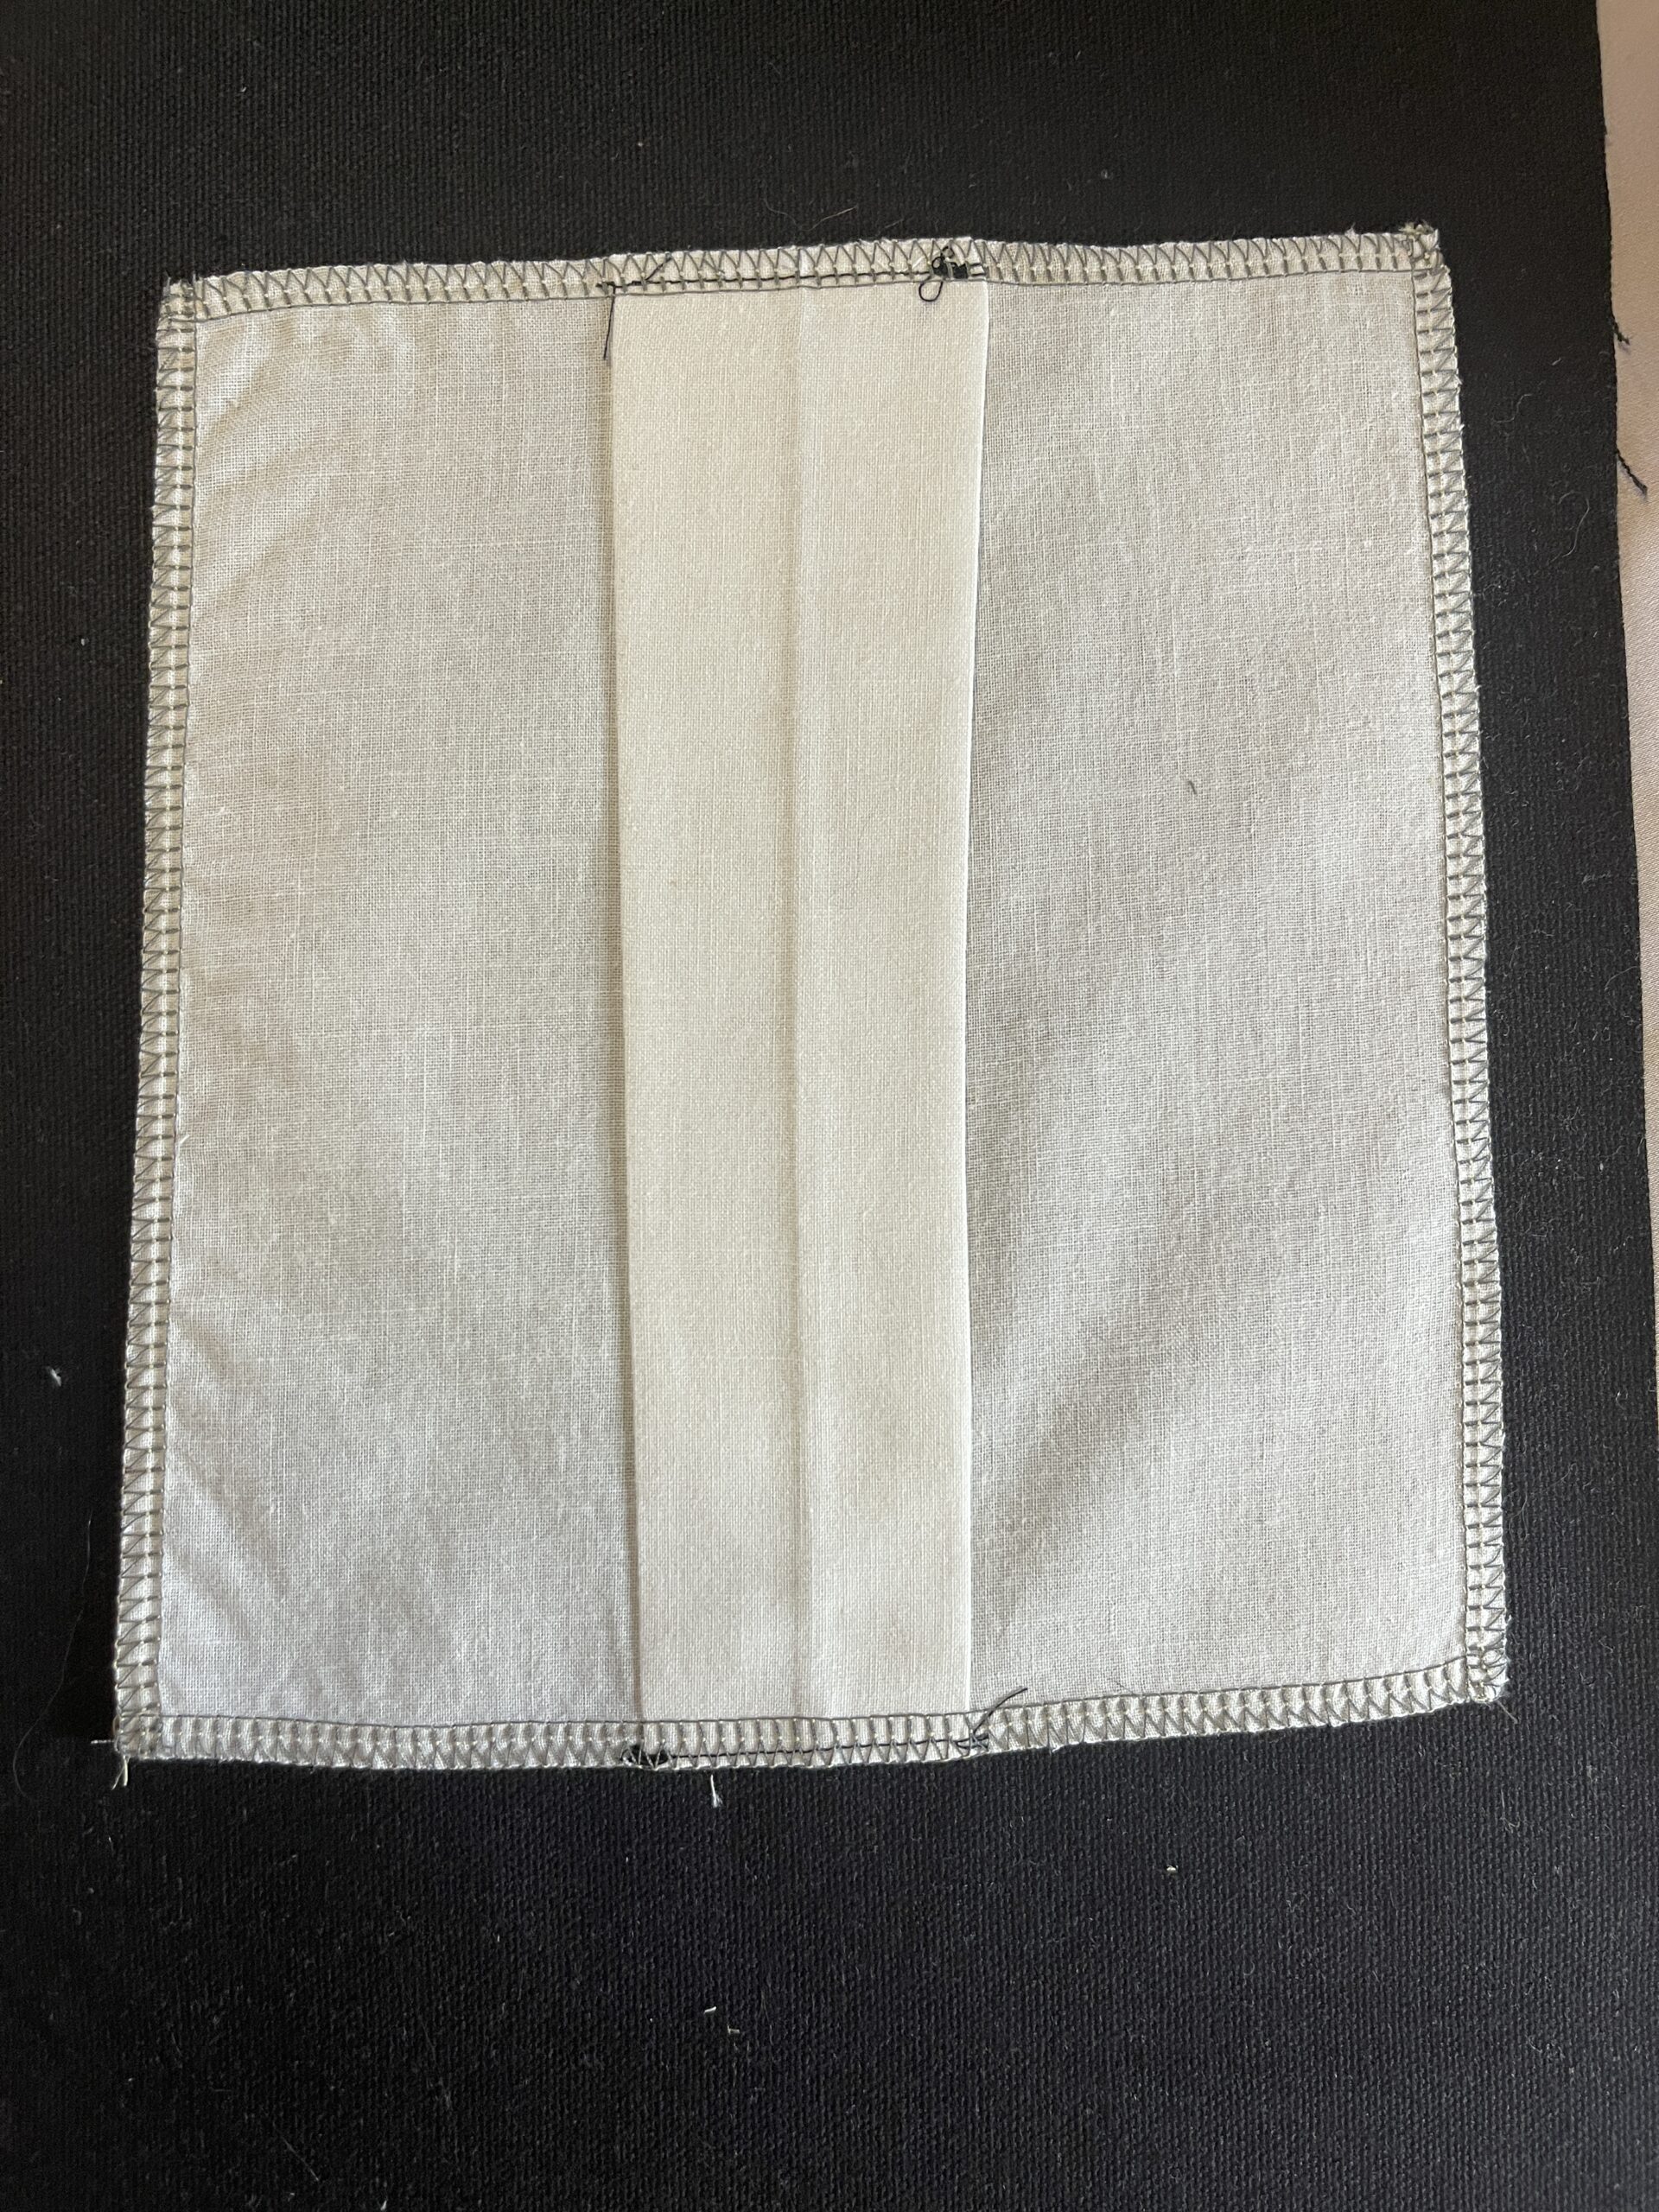
c. Fold the edges in by 3/8”, all the way around, and press.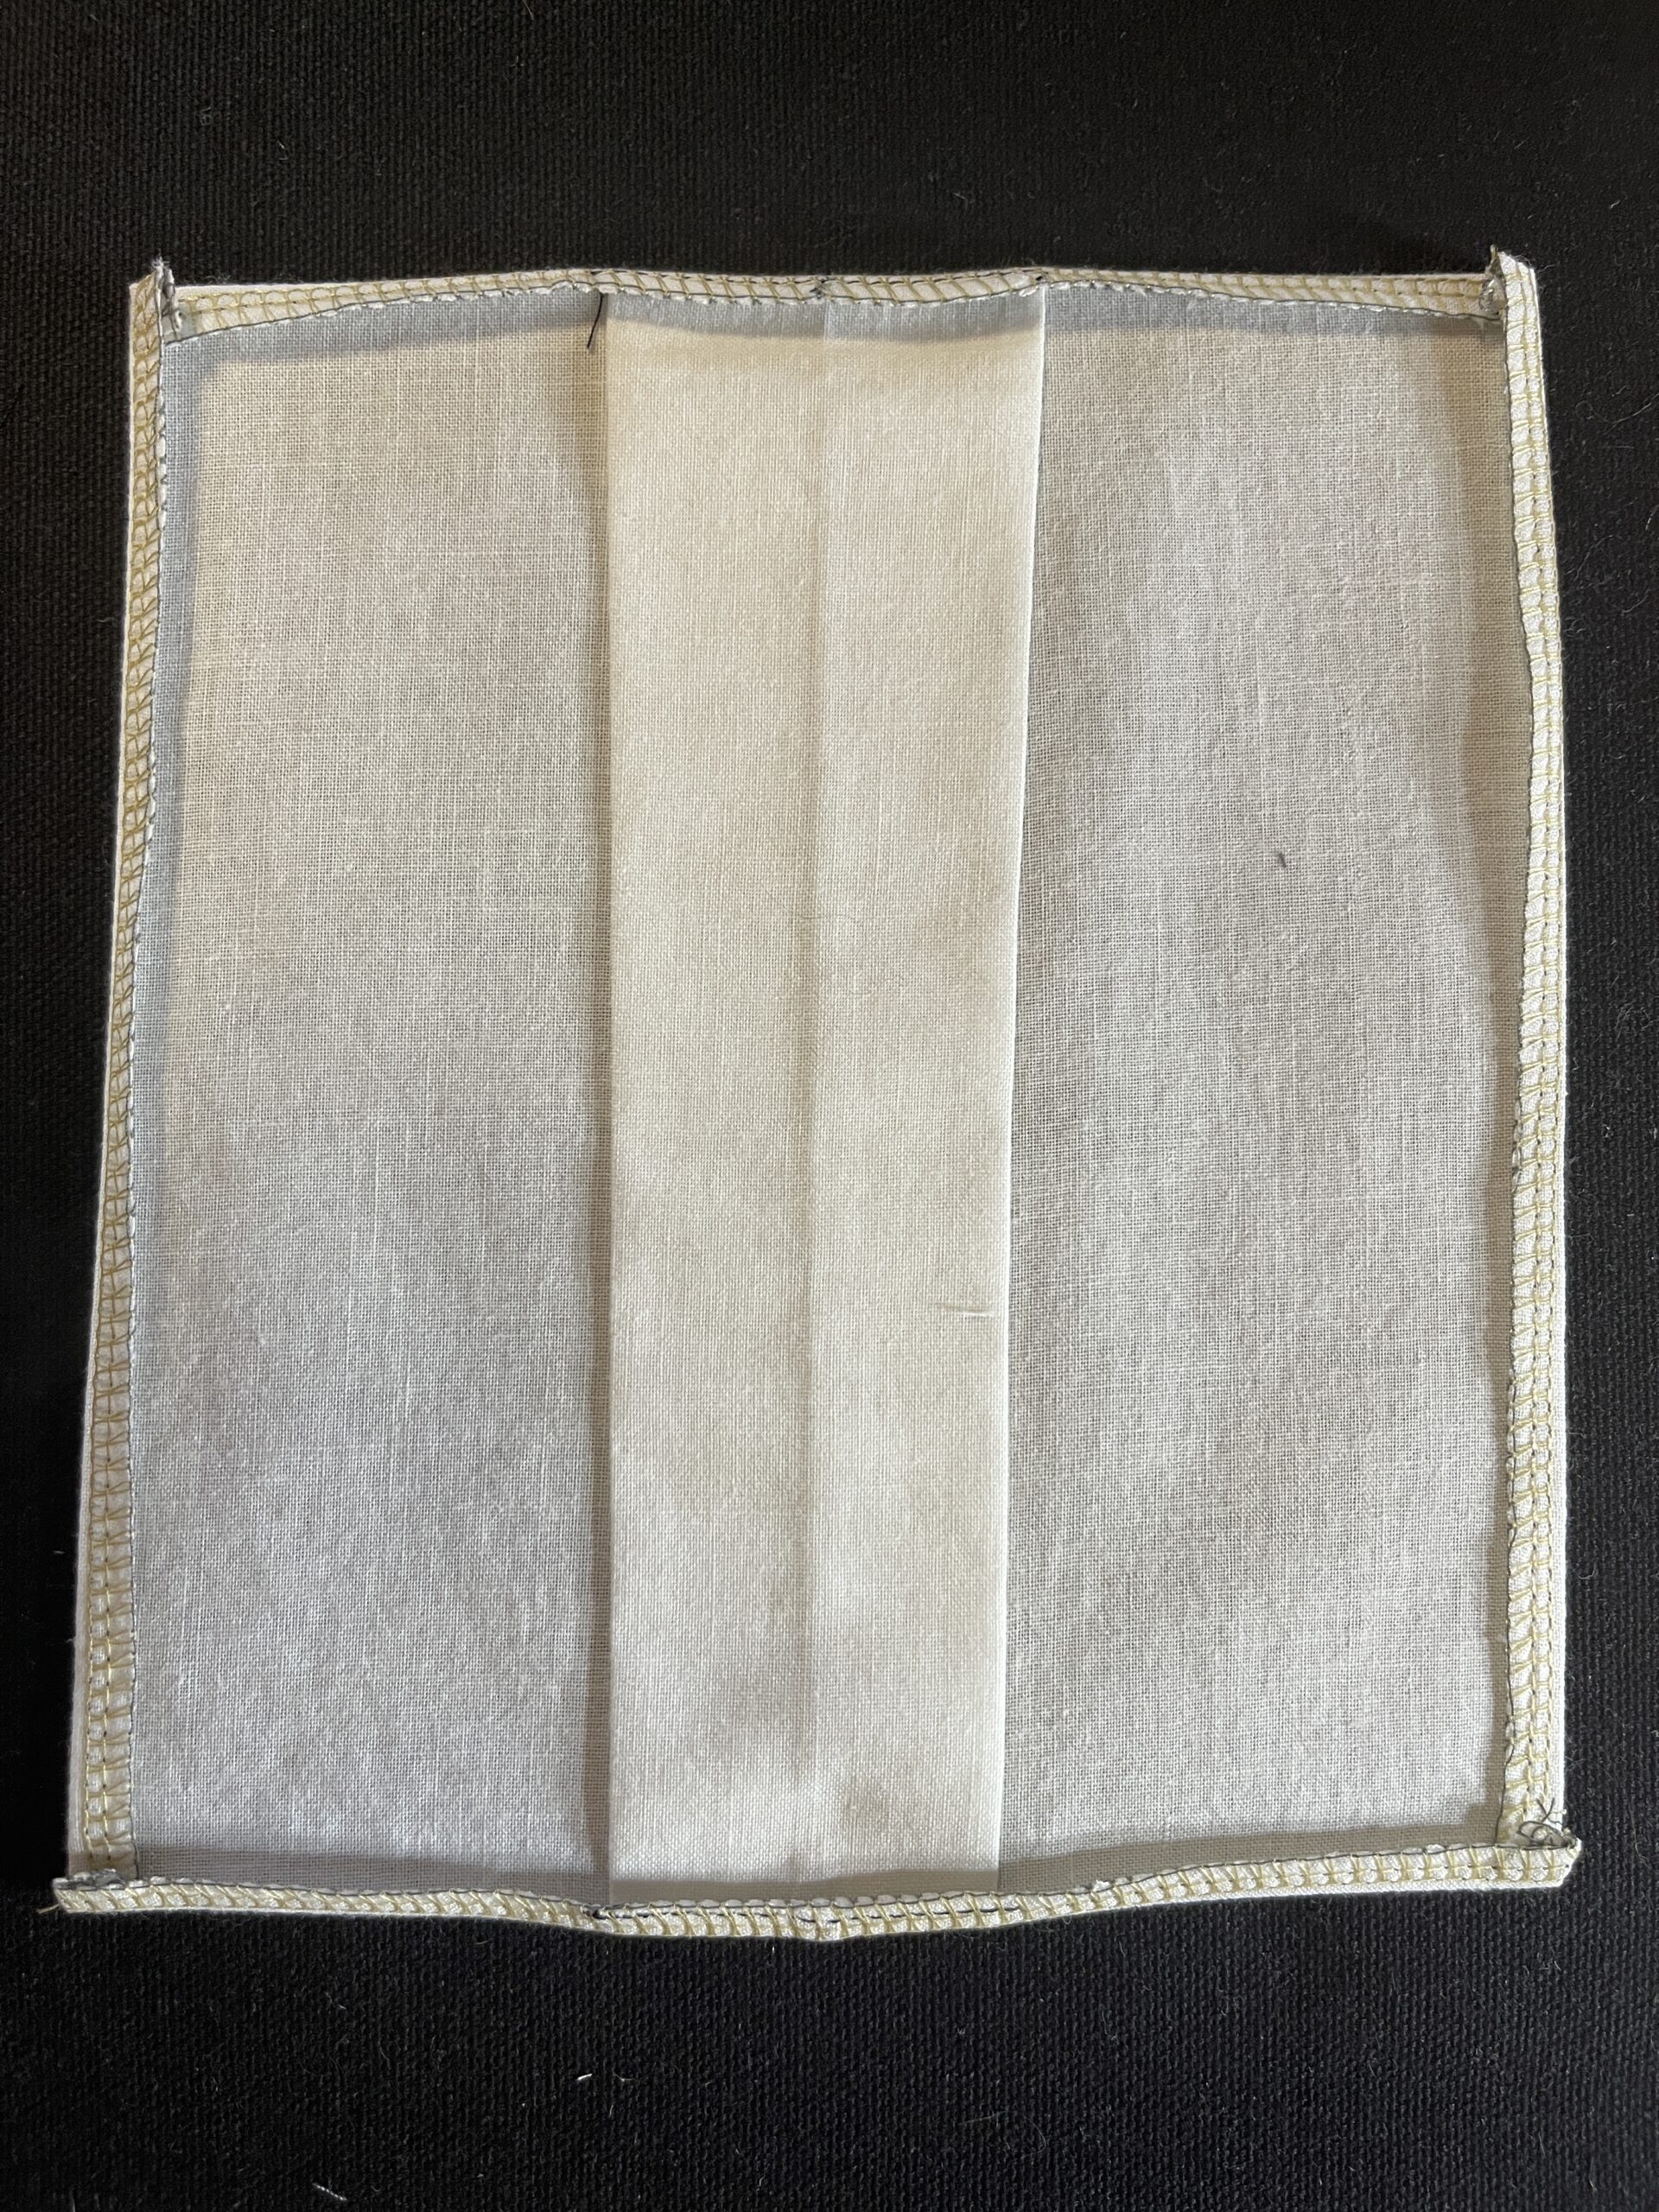
d. Topstitch the top of the pocket, about ¼” from the edge. I like to adjust my machine settings for topstitching to about 2.8, and tighten the tension just a bit, to get better stitch definition.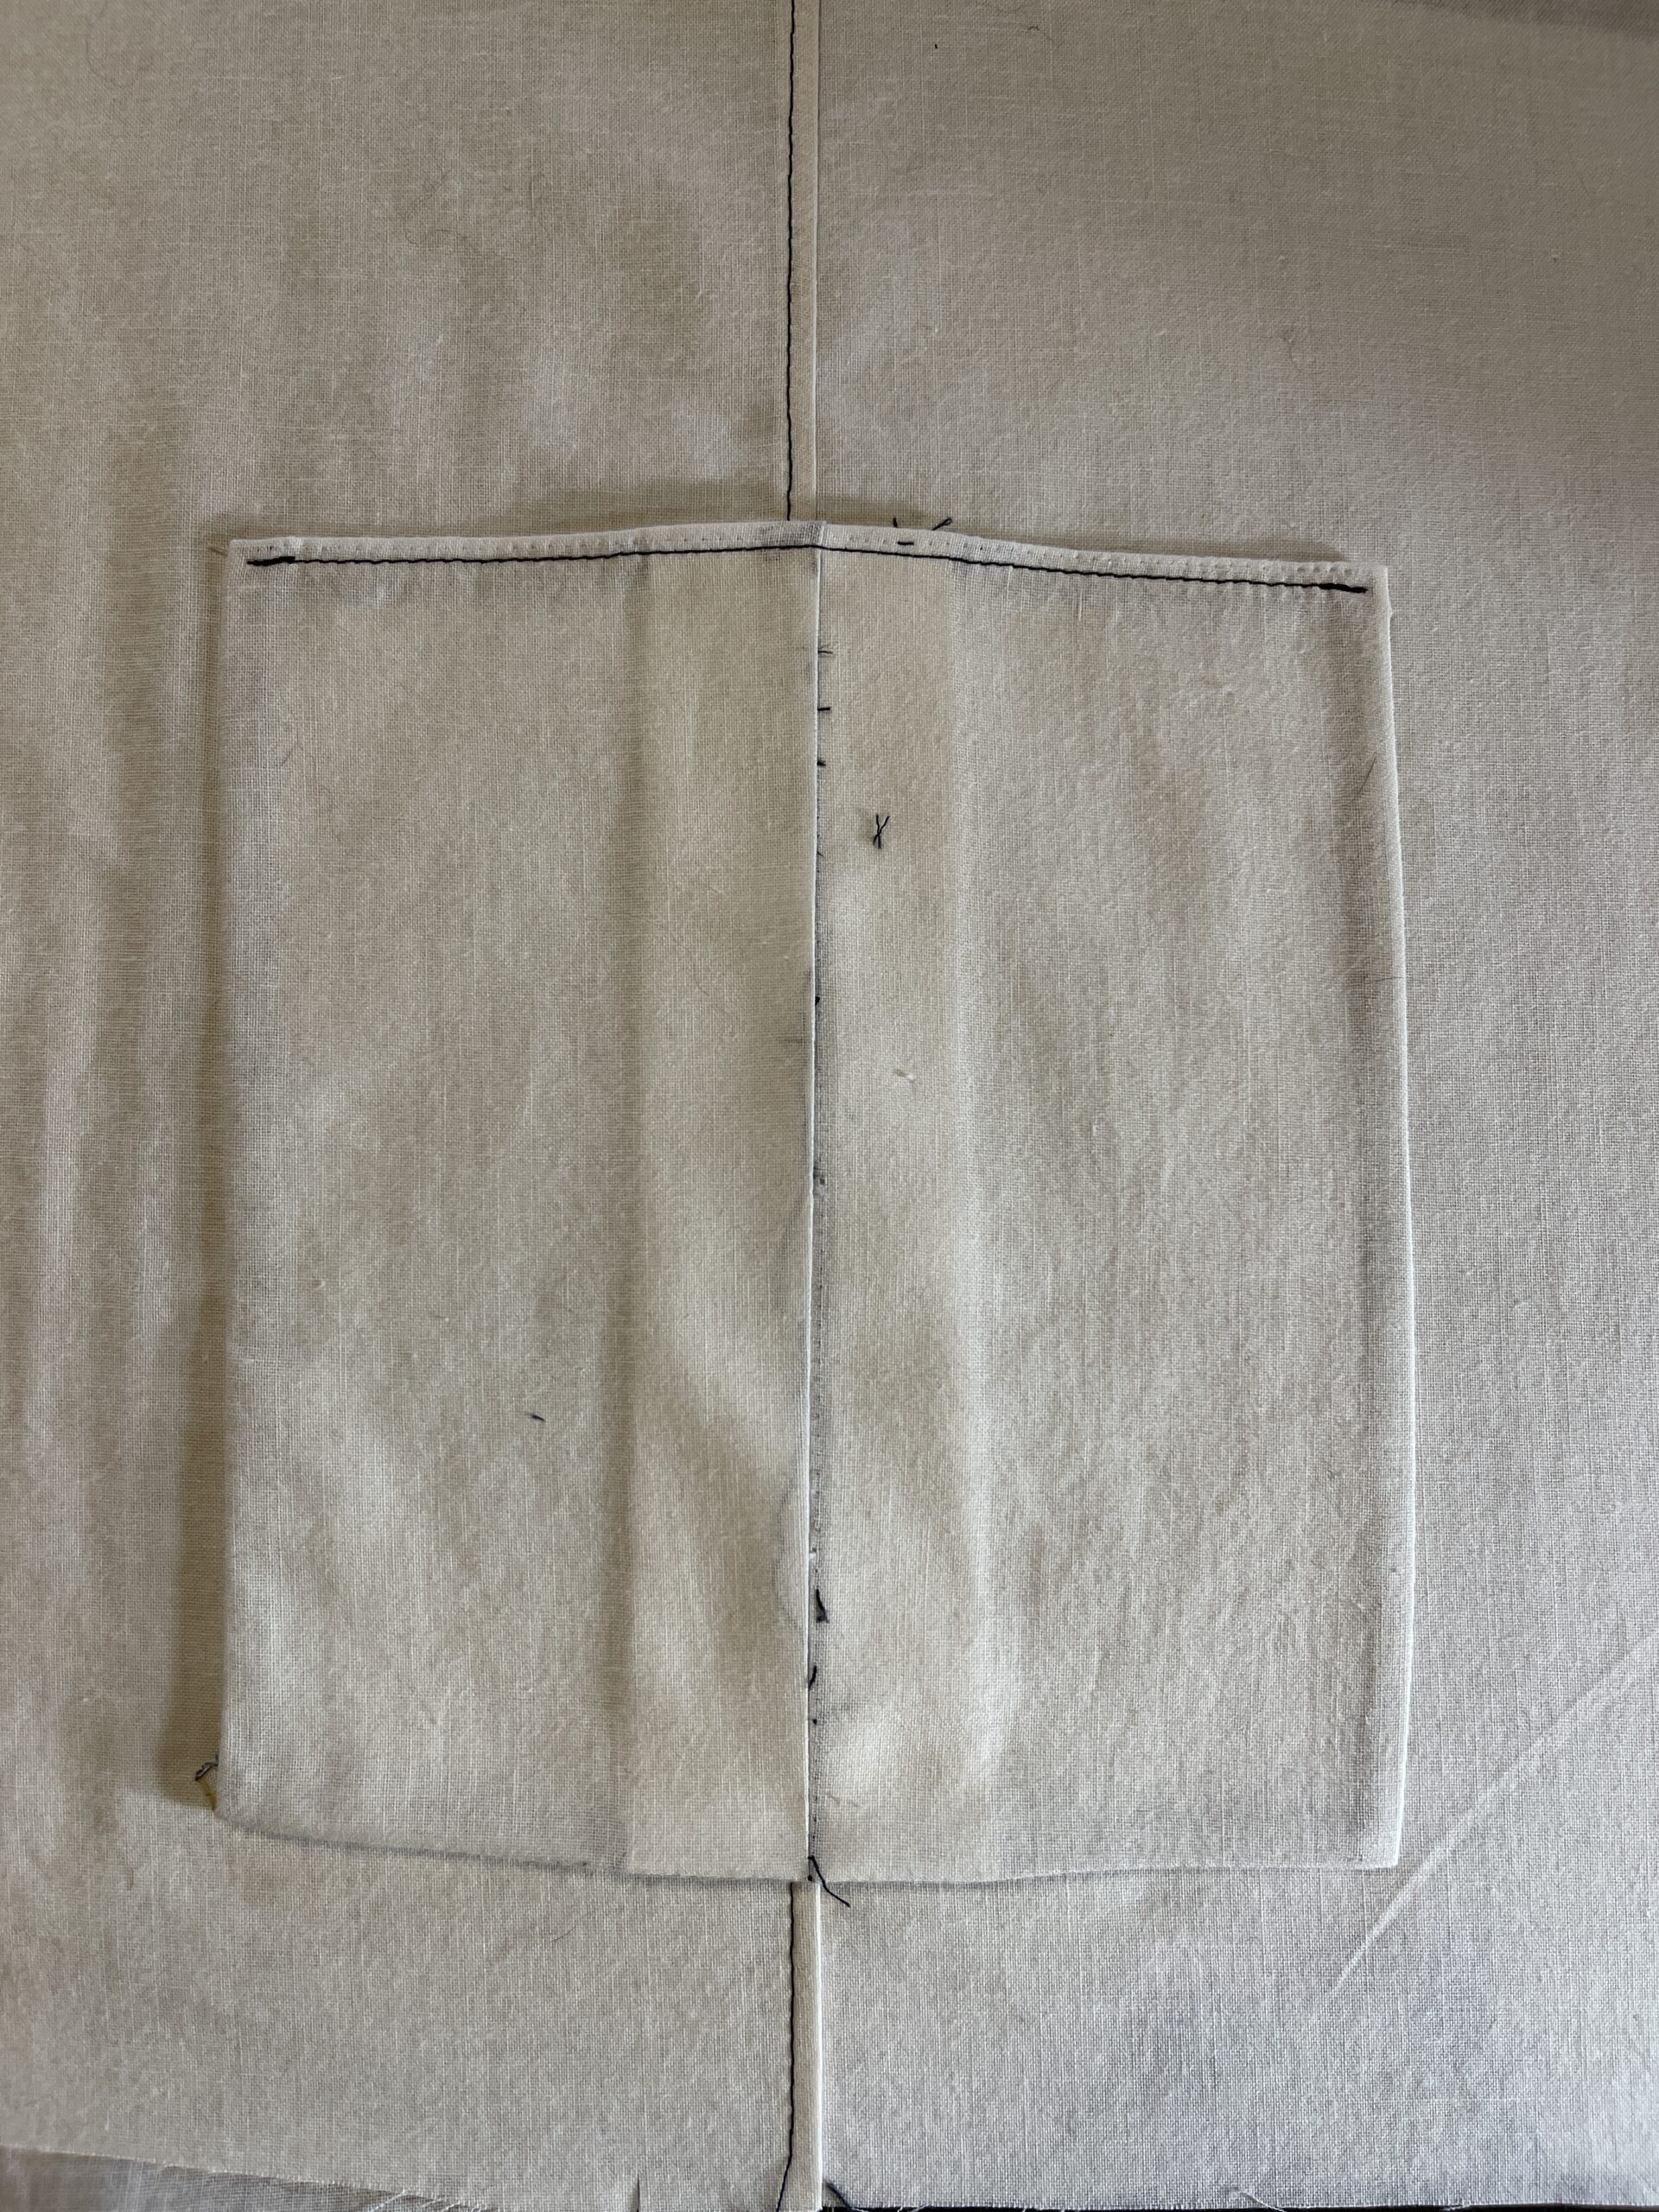
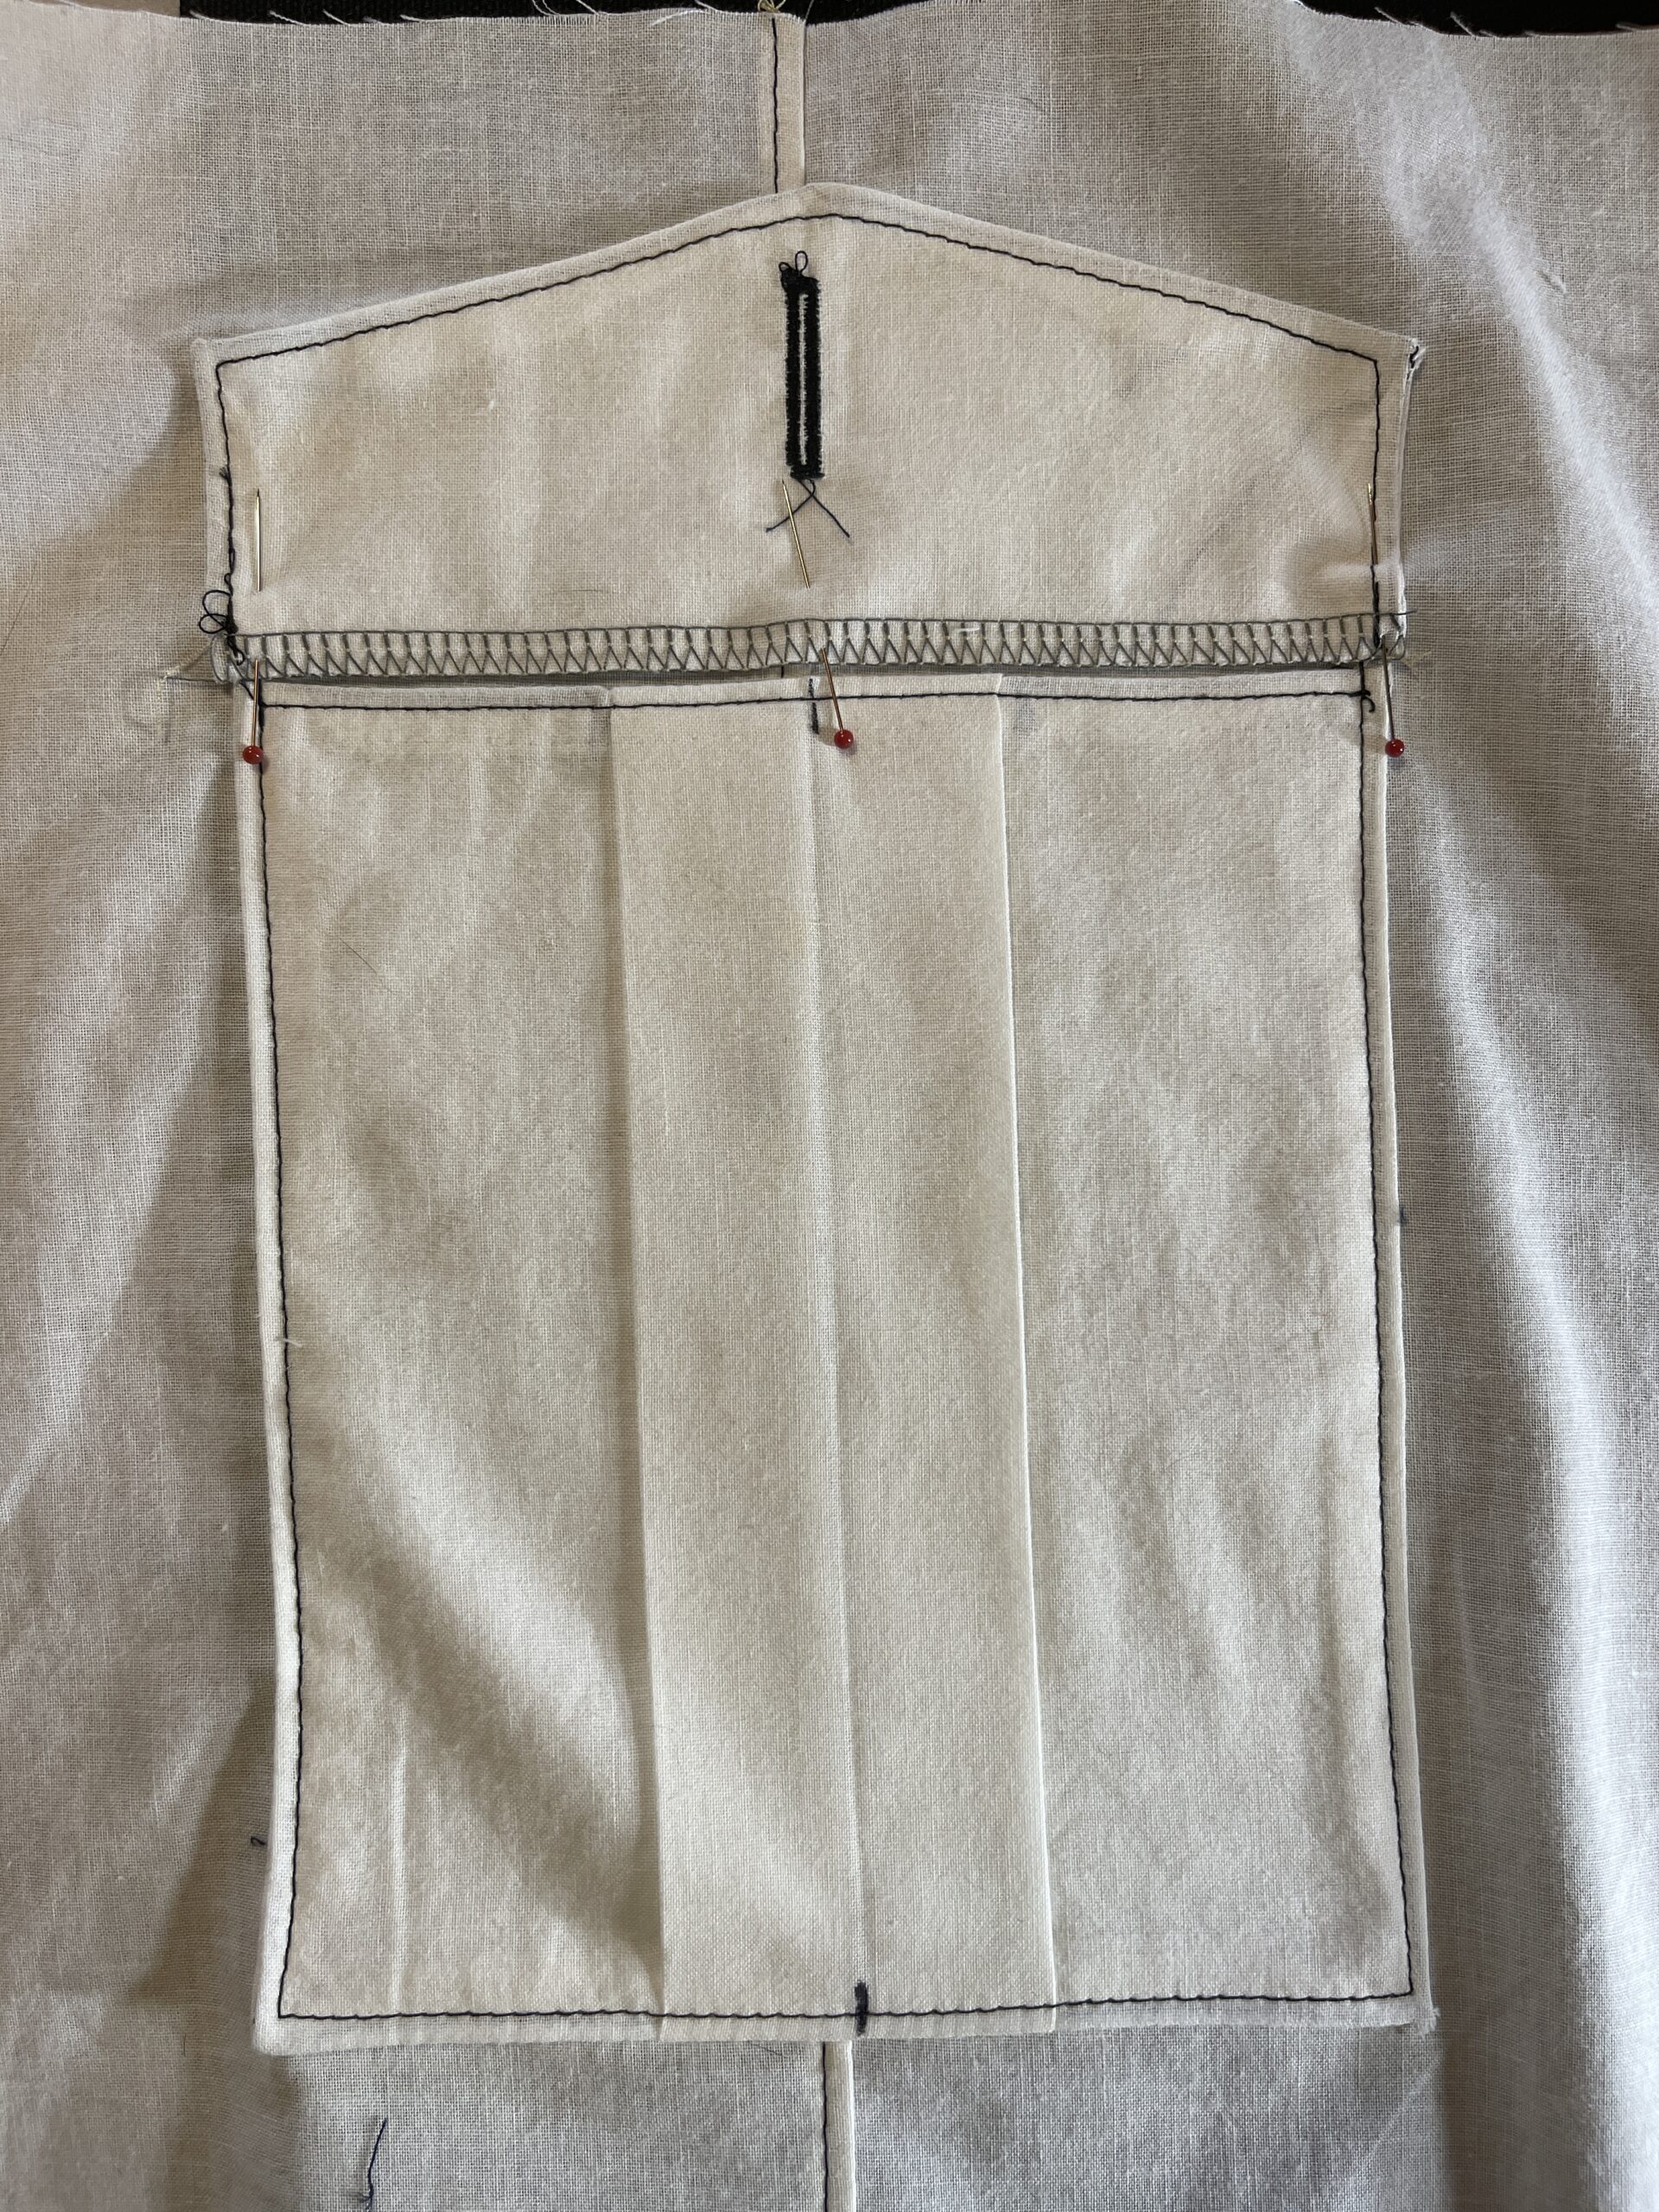
STEP 3: (Choose 6, 7 OR 8) - Lined Pocket Flap:
a. You’ll need two of pattern piece #3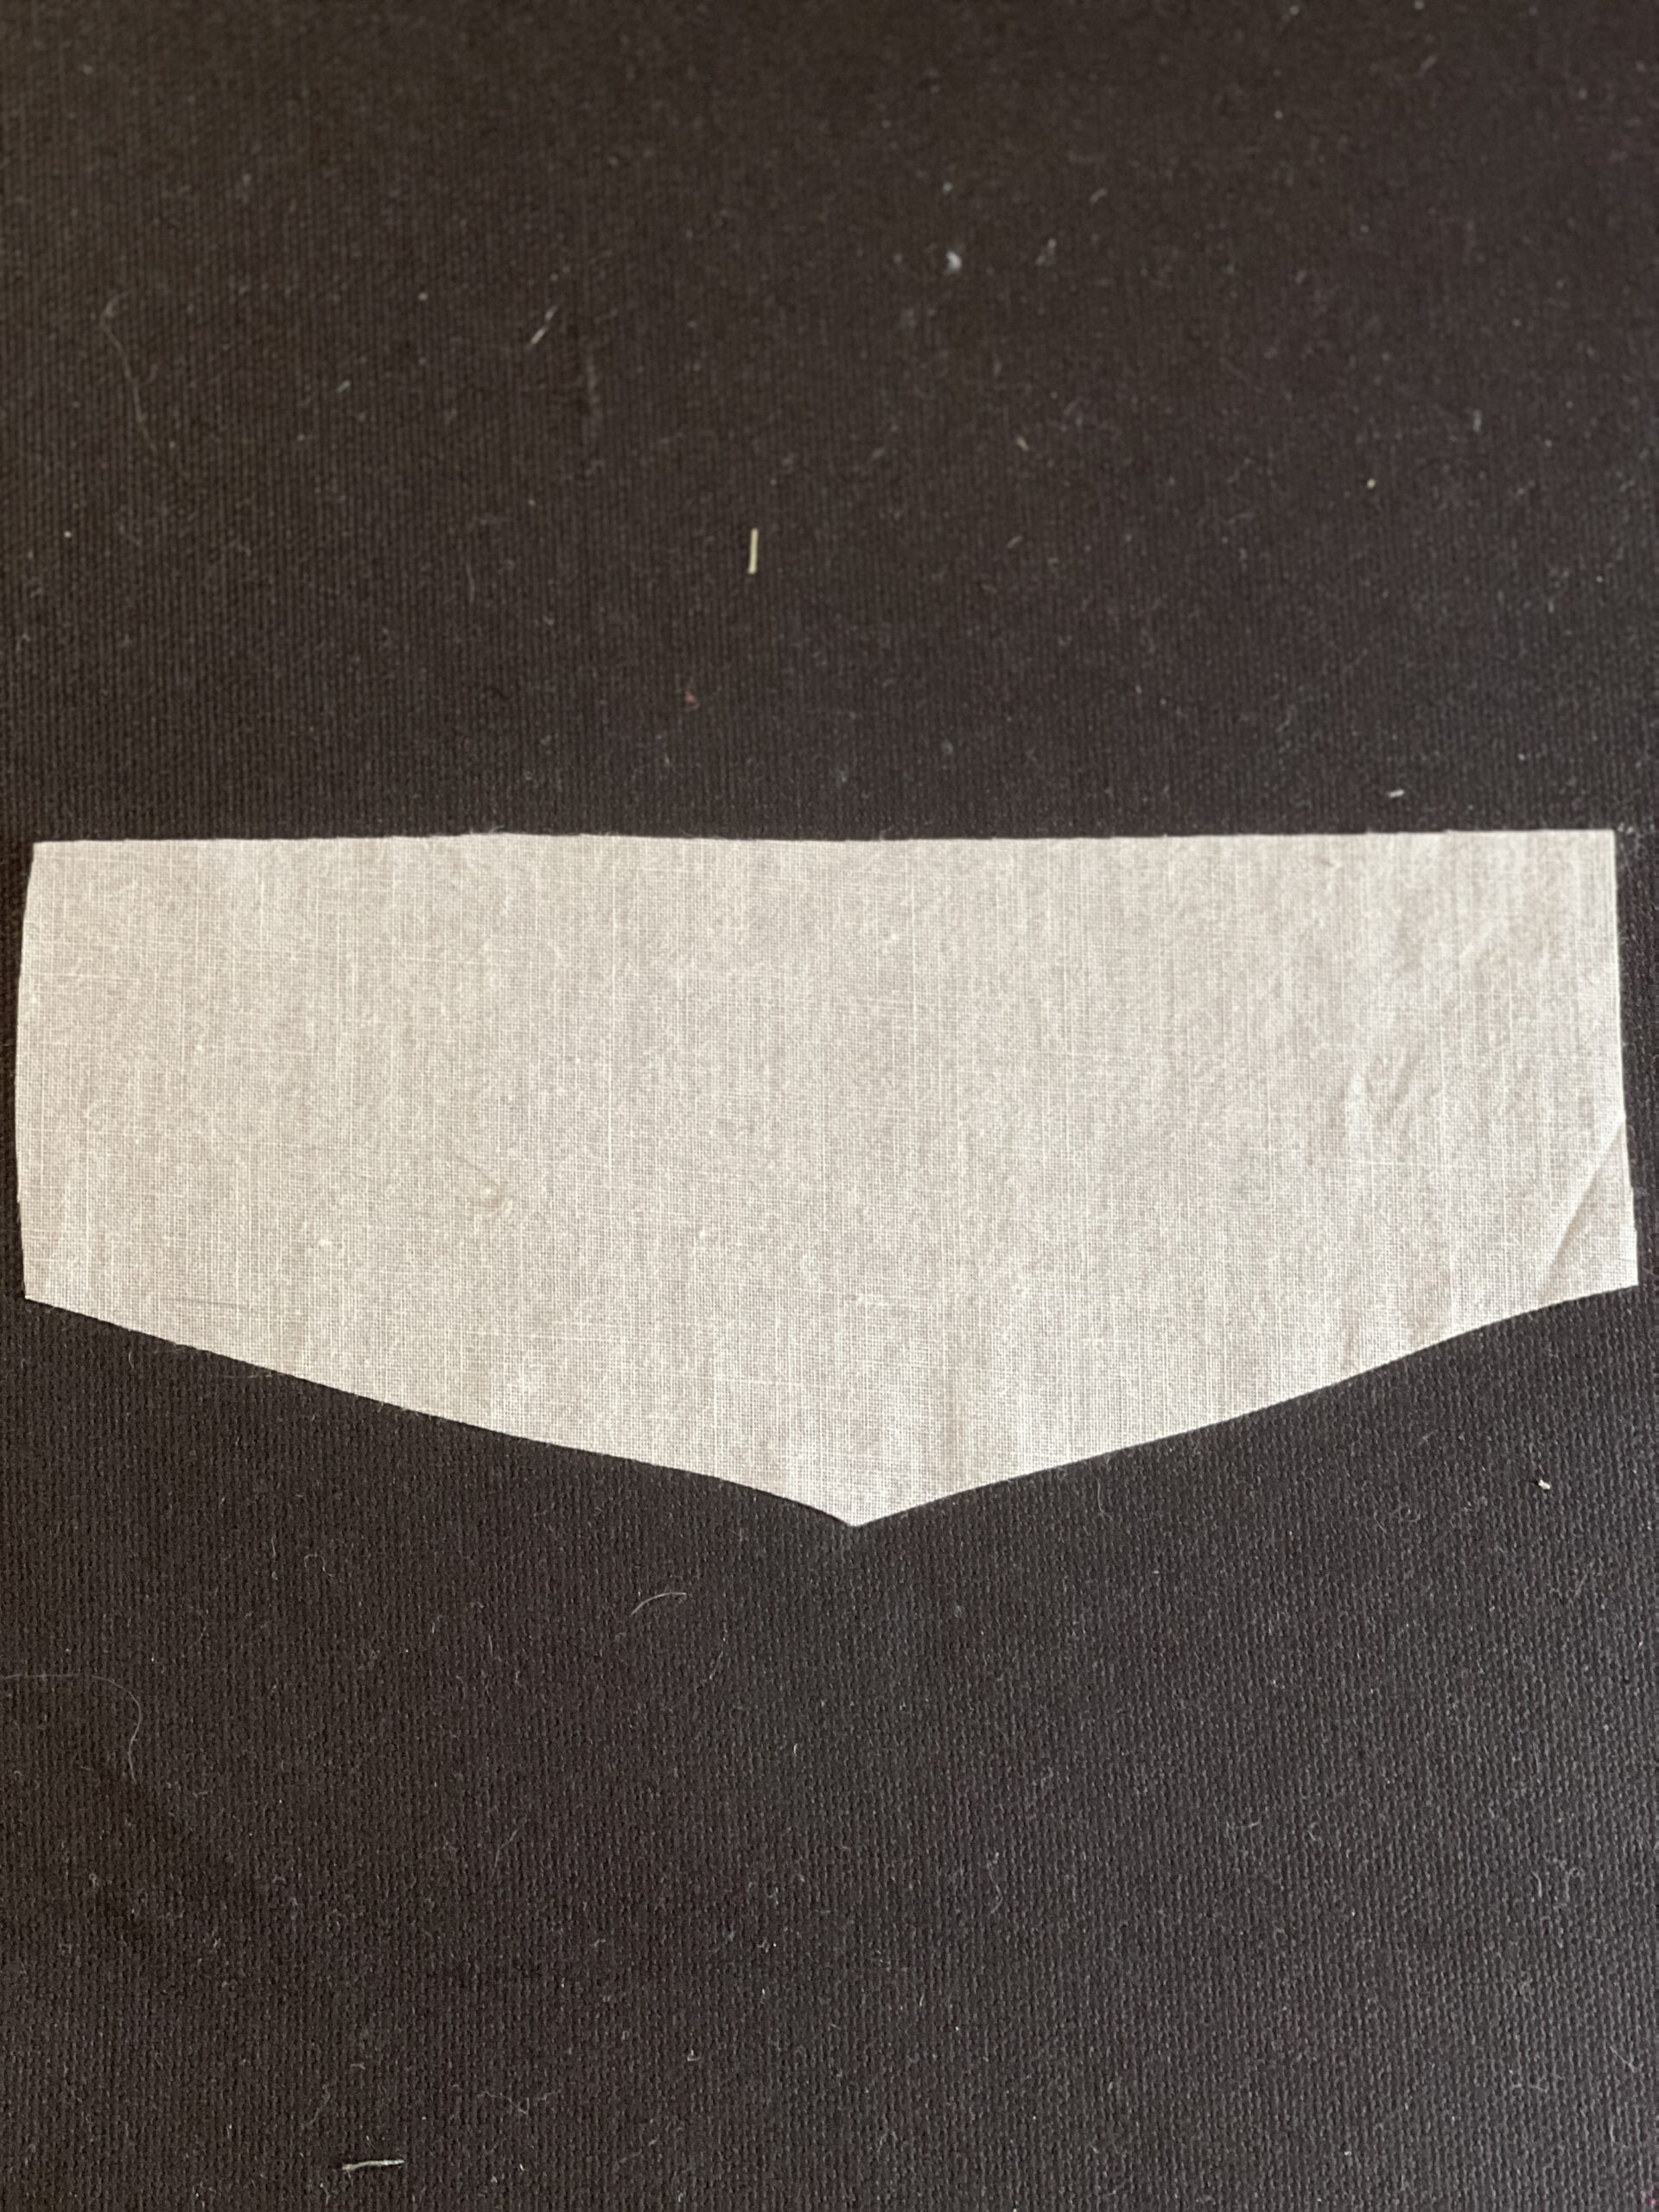
b. Stack your two pieces, right sides together
c. Beginning at the top of one of the short edges, sew around the bottom of the flap with a 3/8” seam allowance, pivoting at the corners, until you’ve sewn all but the longest top edge, ending on another short side.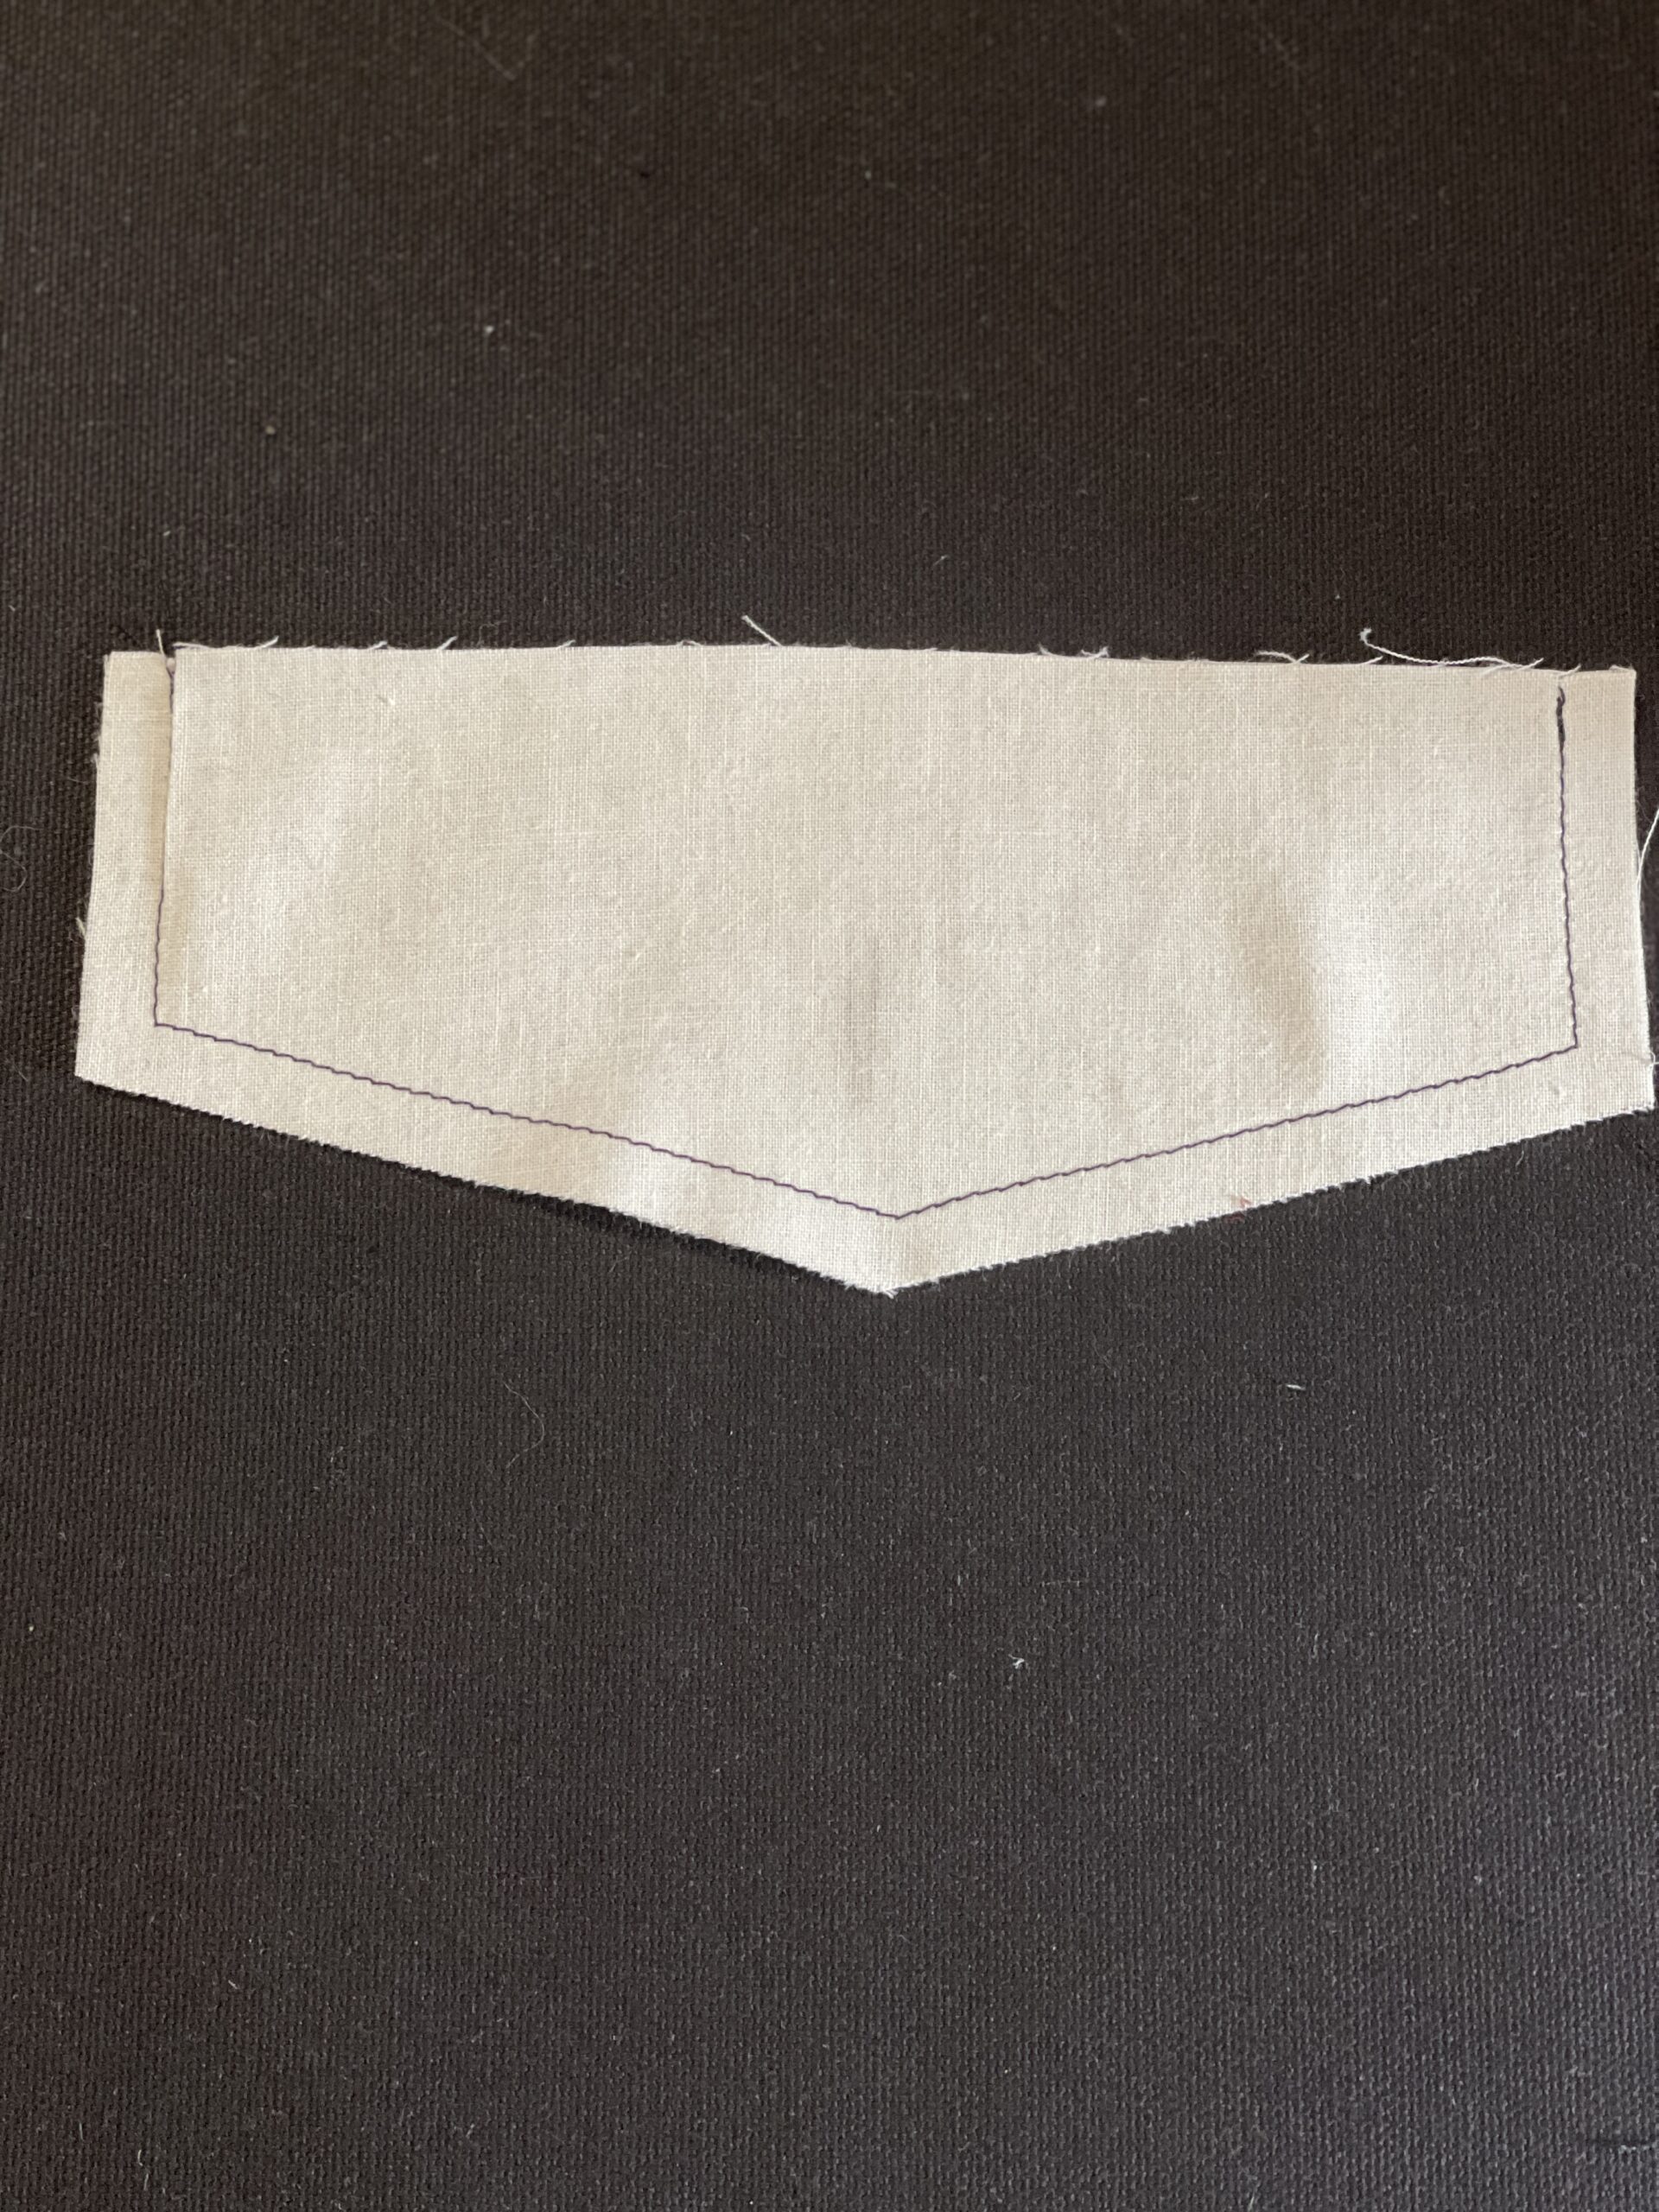
d. Turn your piece right side out through the open long end.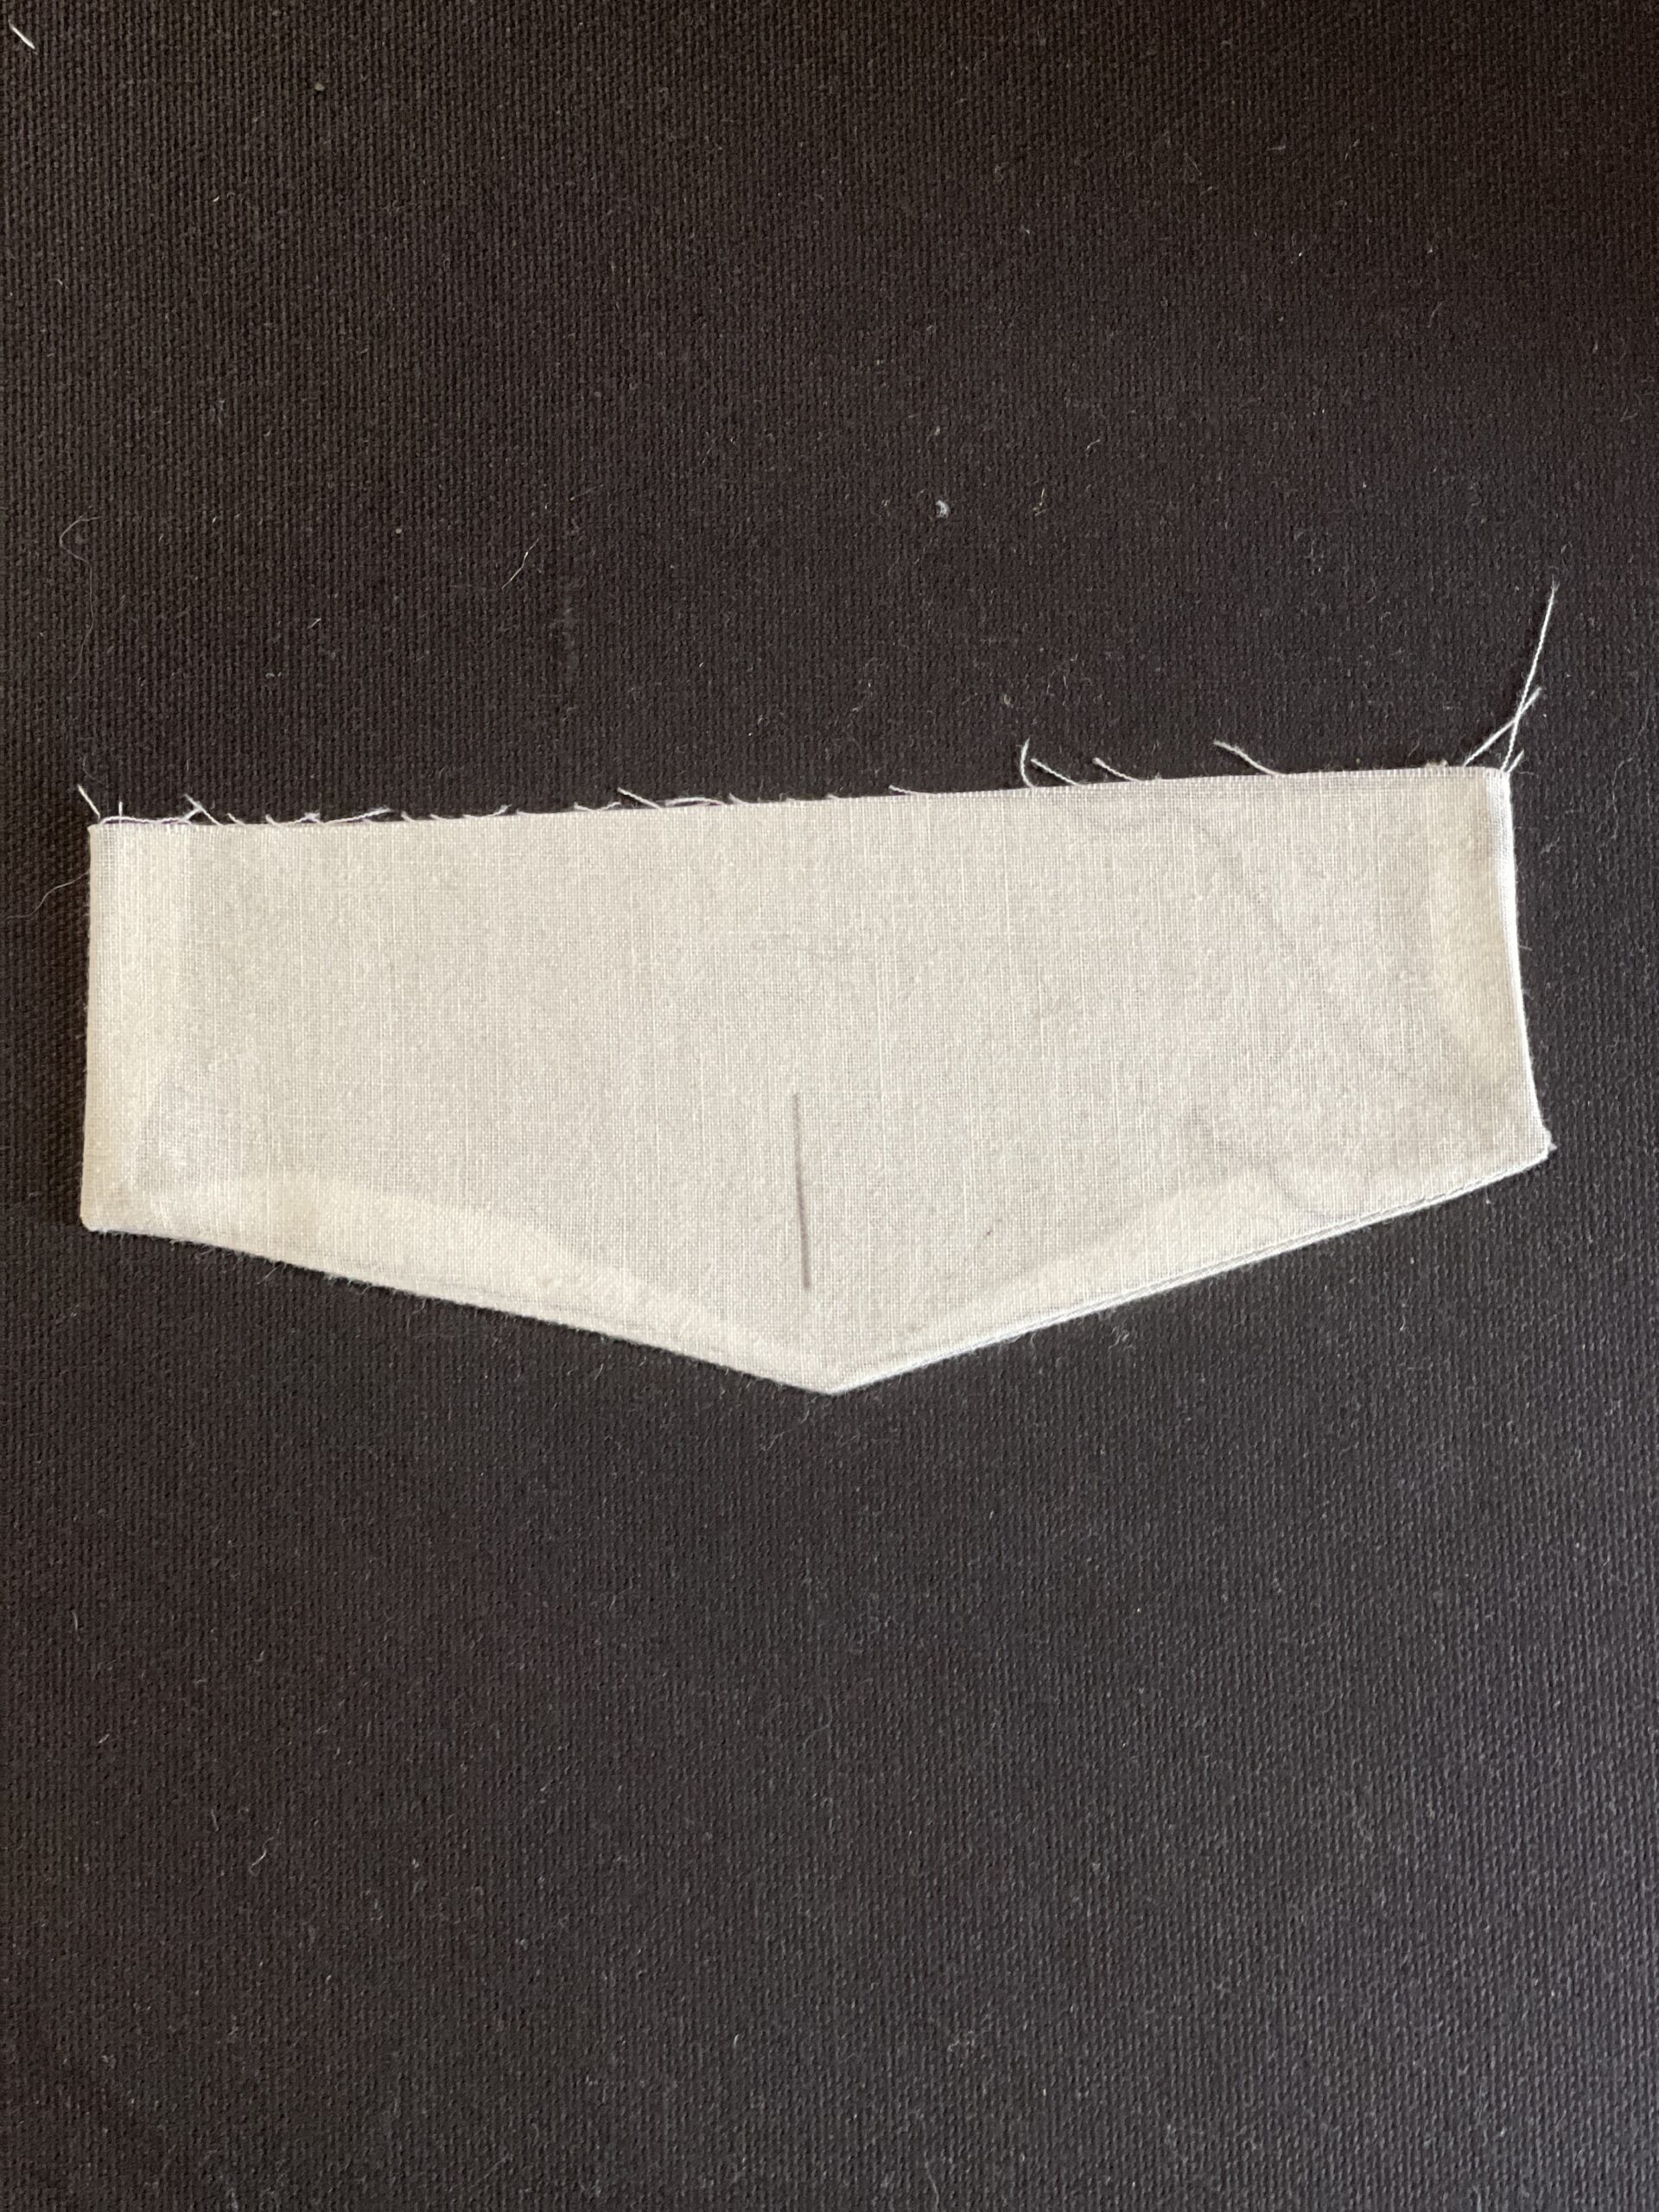
e. Poke out your corners and press flat
f. OPTIONAL: Topstitch around the edge at ¼”
g. Finish the top, long edge. You’ll be sewing both main and lining together.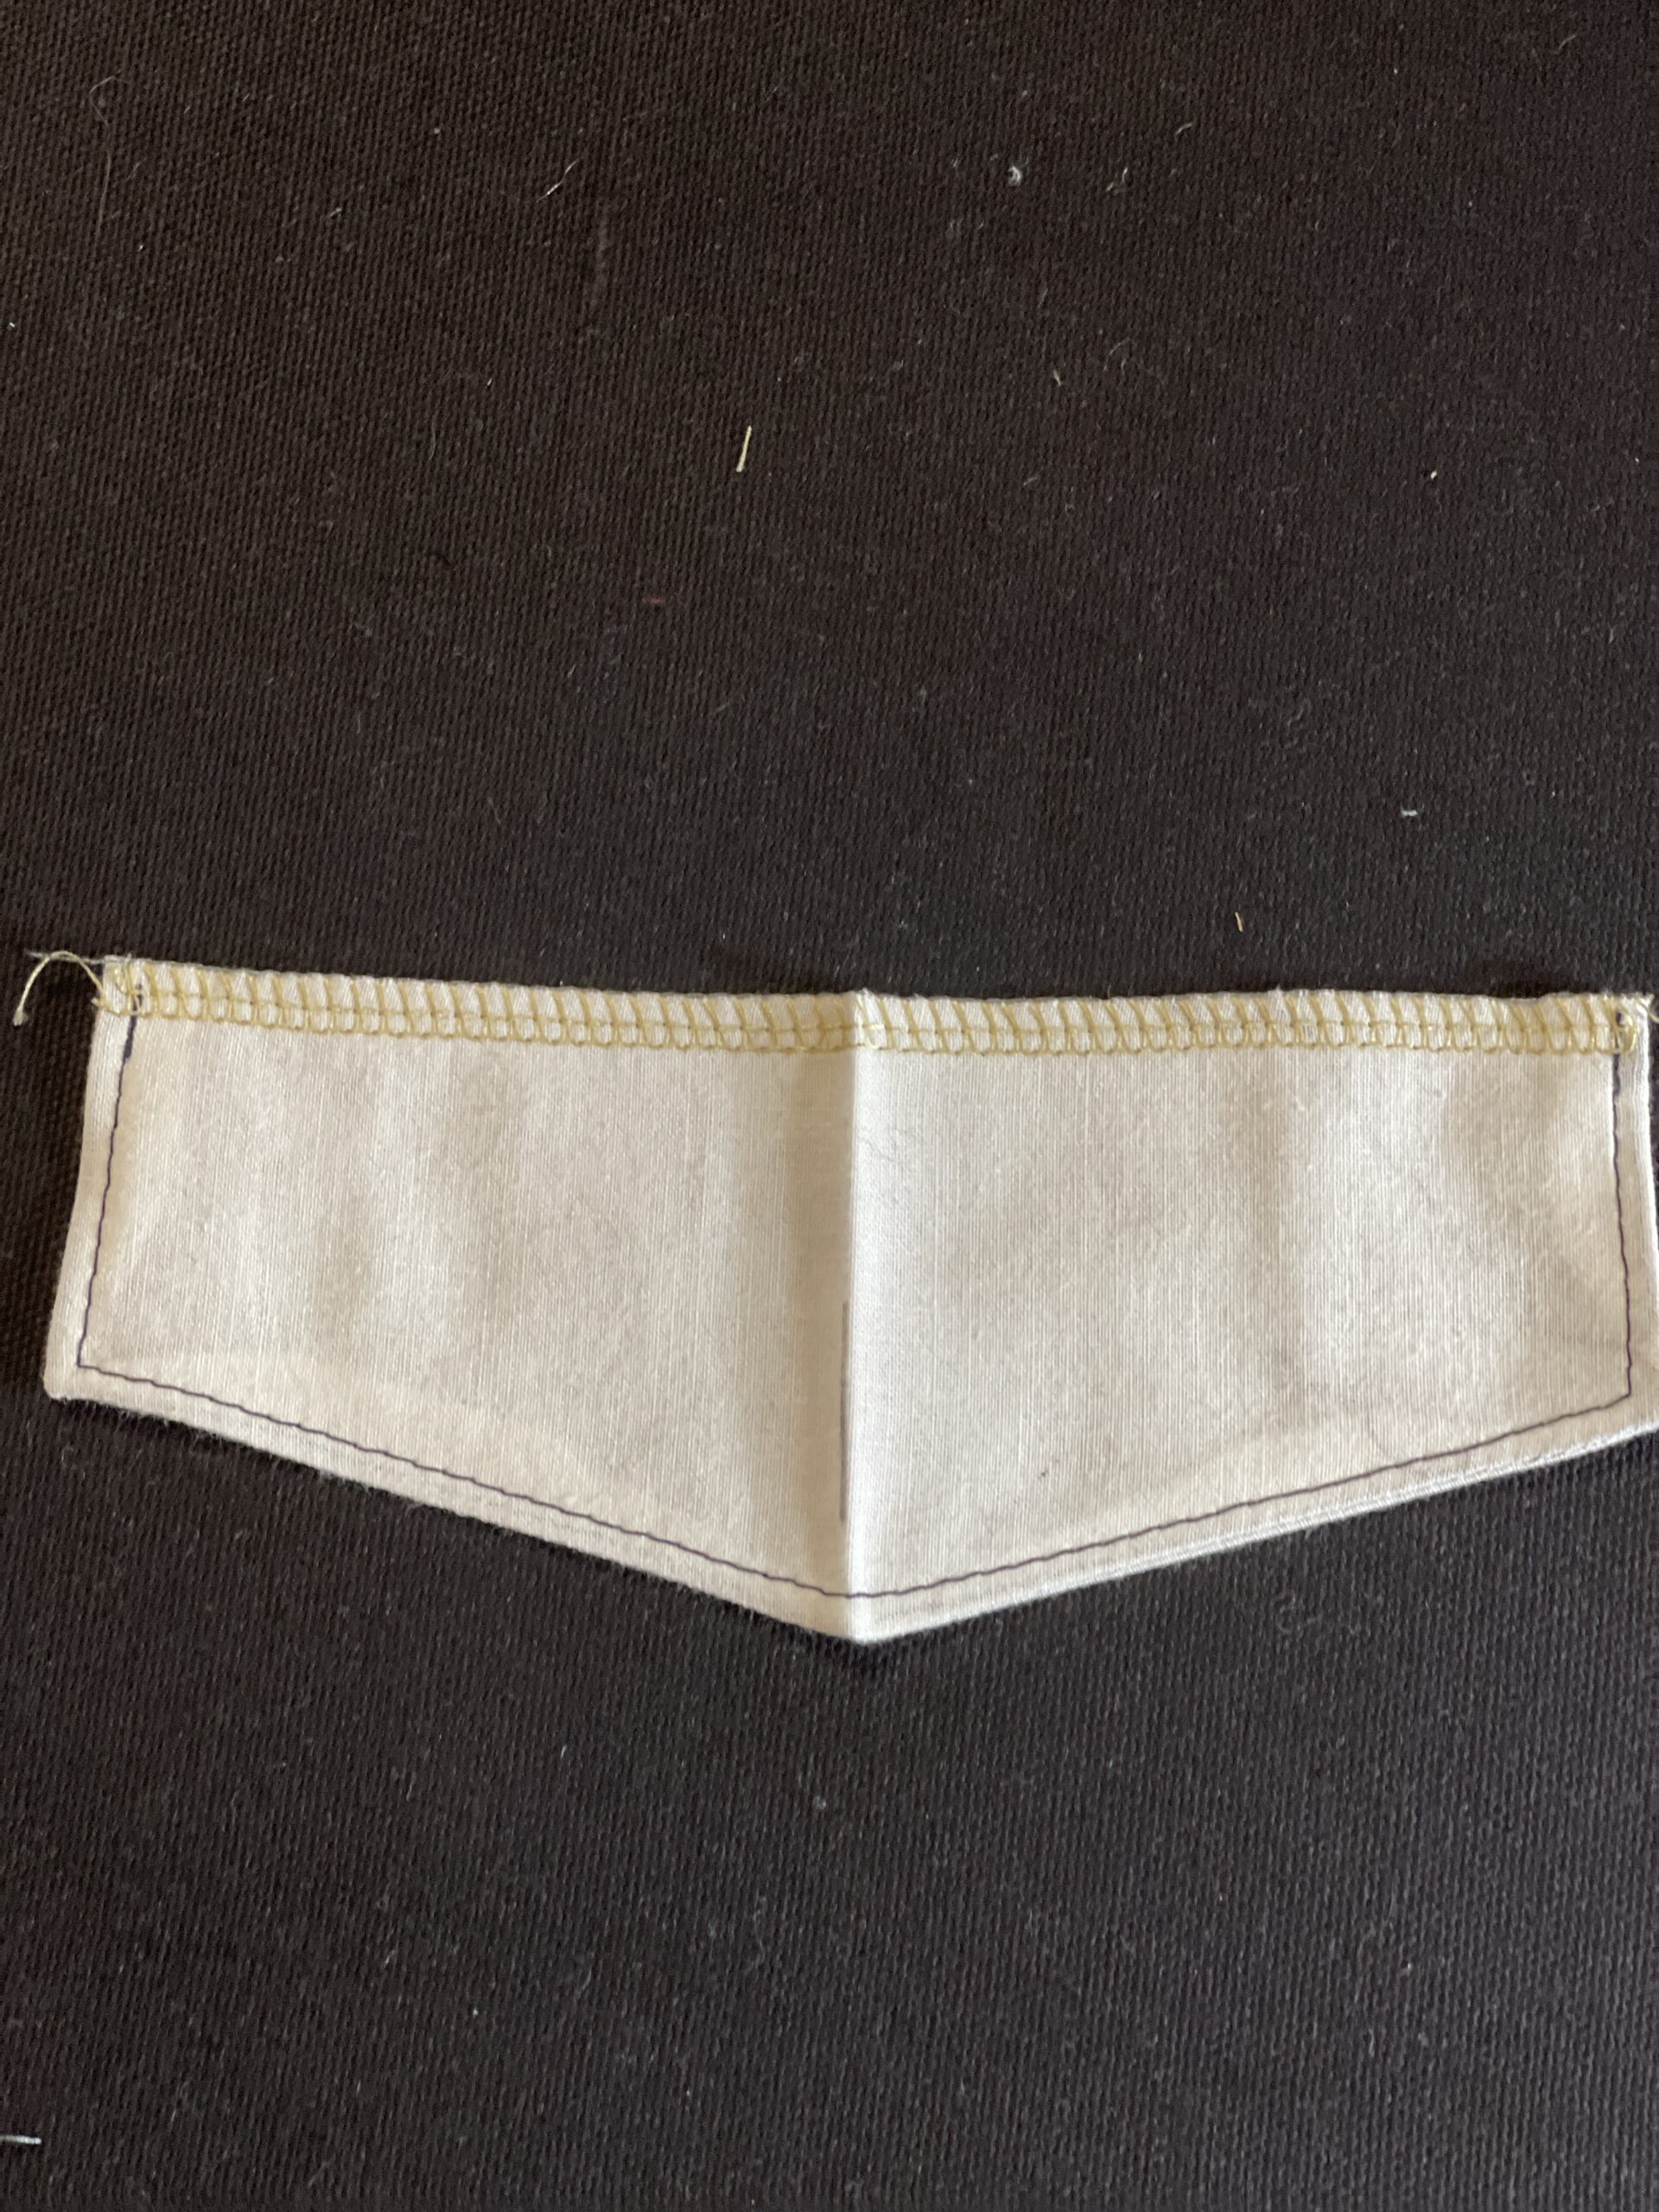
h. If you are adding buttons, place your buttonhole about 3/8” above the flap point, in the center.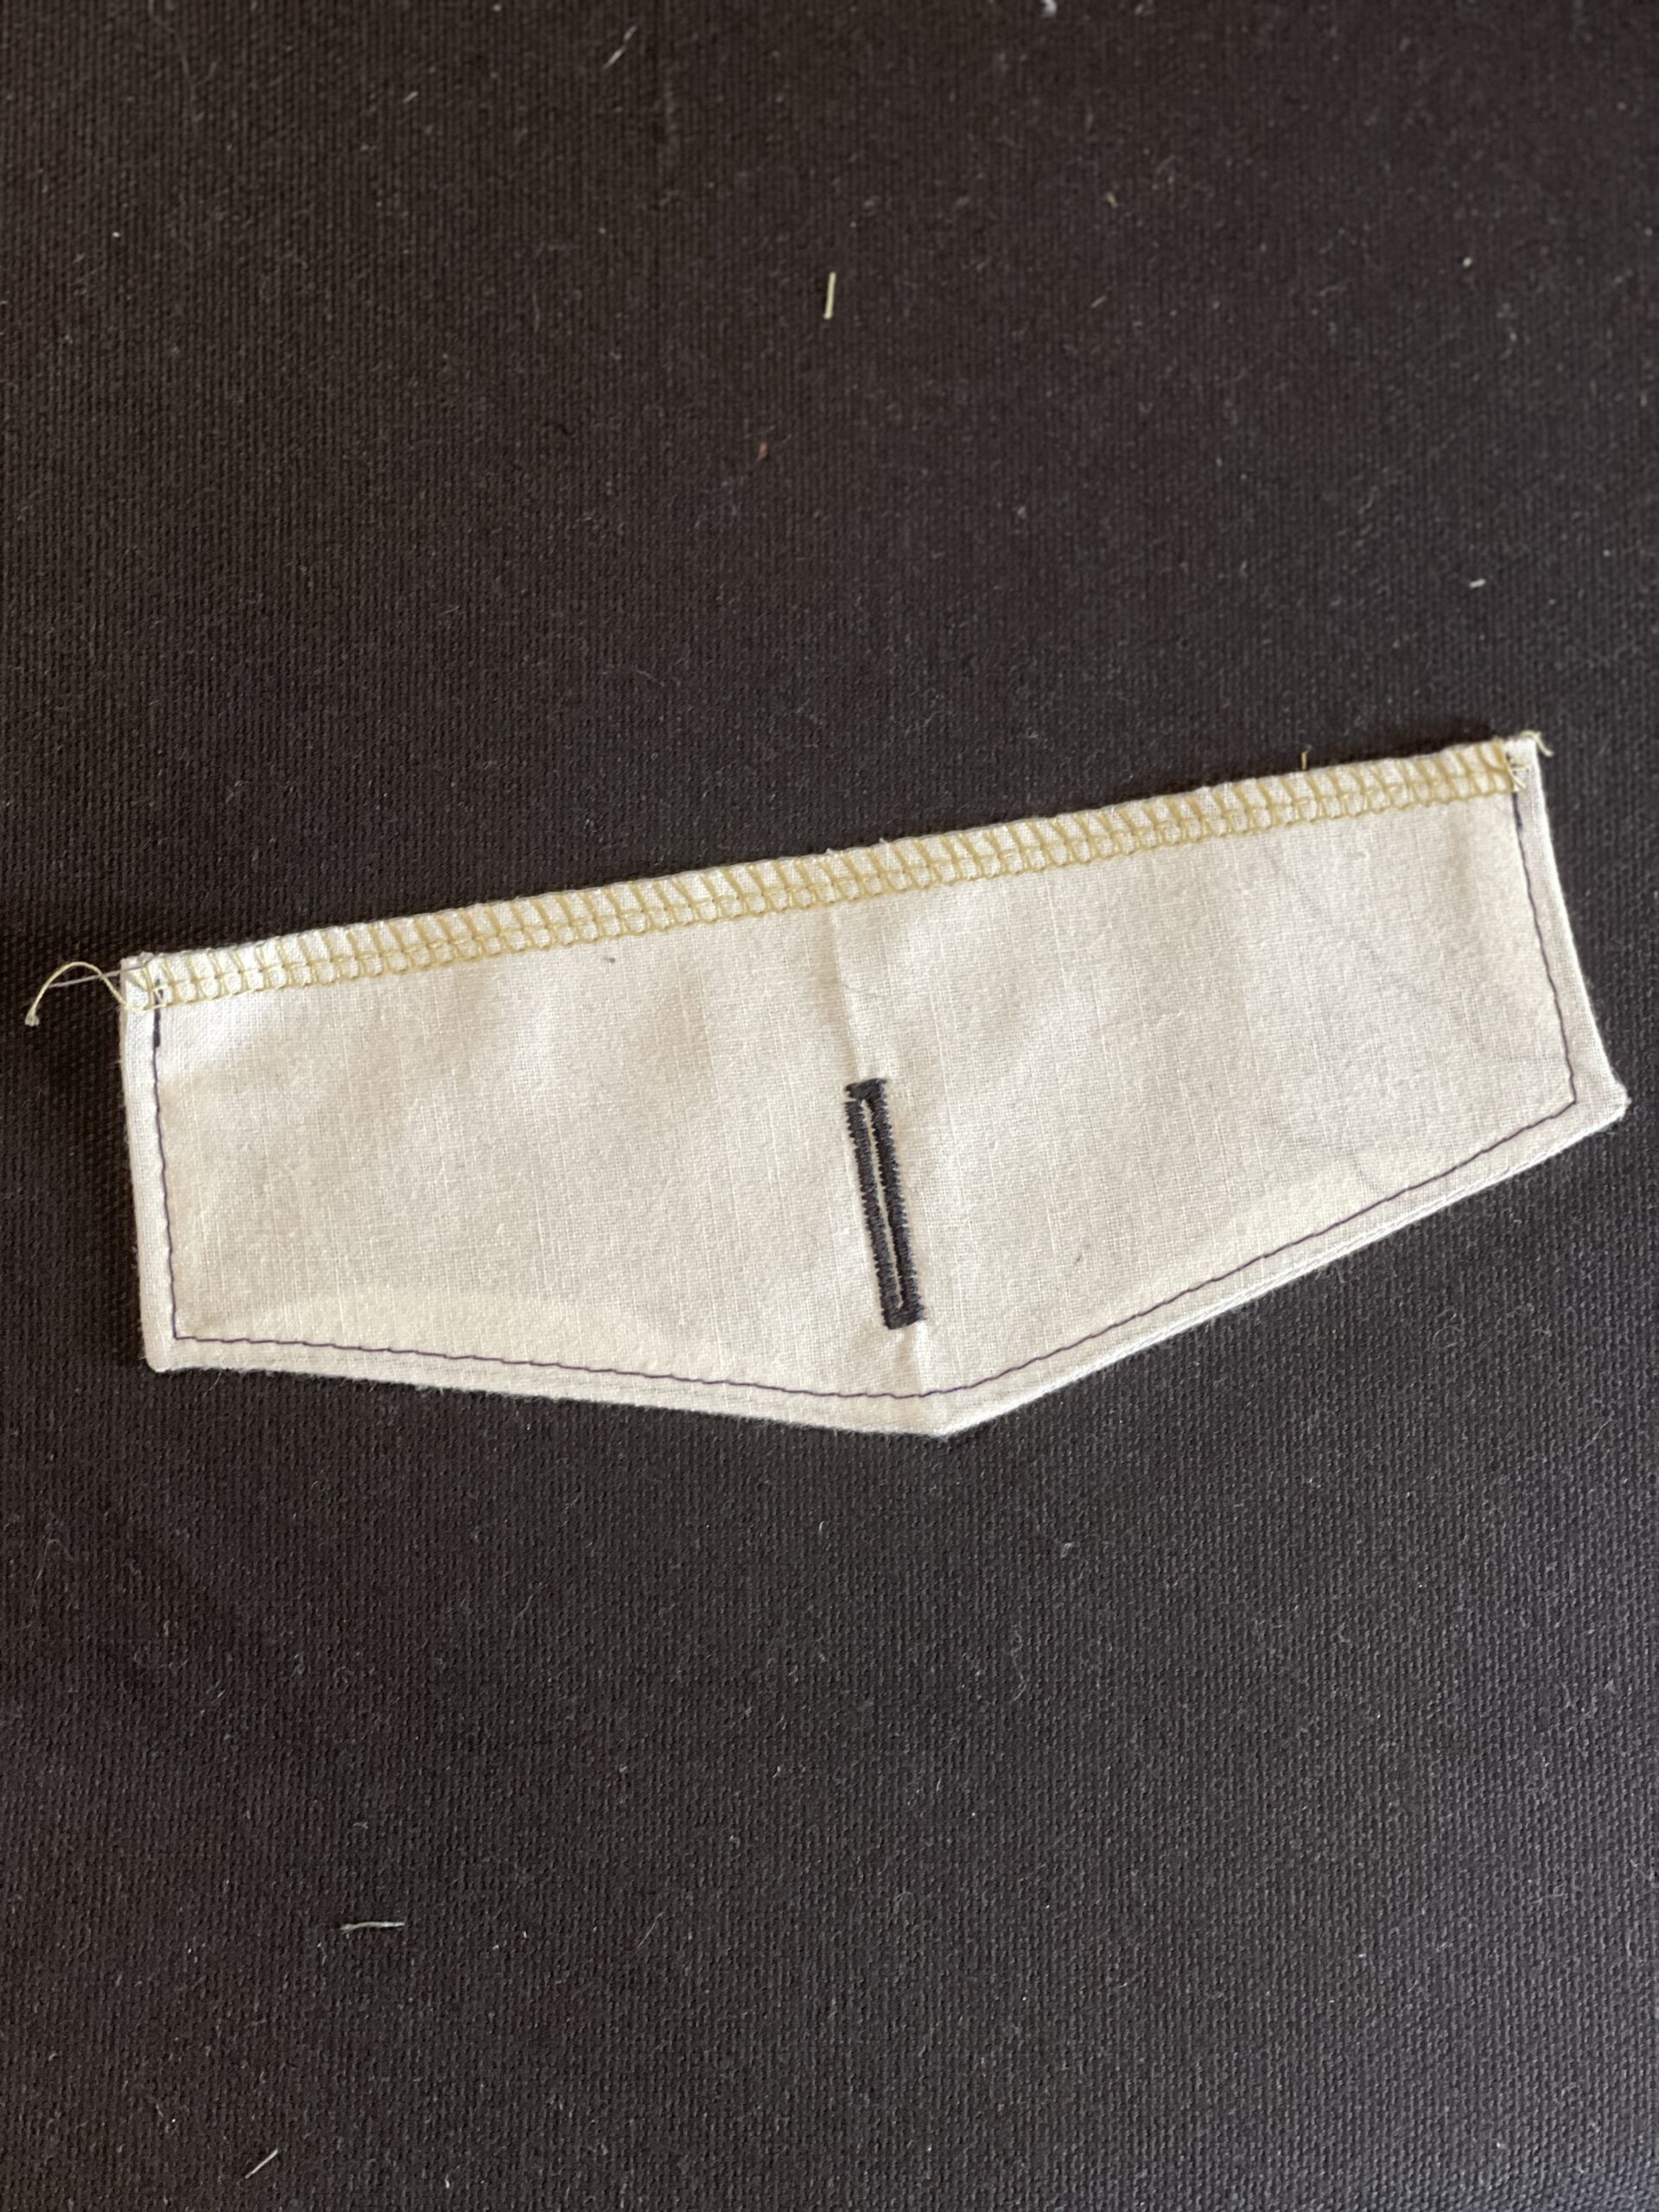
- Unlined Pocket Flap: You’ll need one of pattern piece #3 *Note: This works best with more stable fabrics.
a. Finish all 5 edges of your pocket flap using your preferred method.
b. Fold in the seam allowance of the bottom 4 edges, leaving the top long edge alone.
c. Press your 4 folded edges
d. Topstitch around the folded edges at ¼”, catching the seam allowance.
e. If you are adding a button, place your buttonhole about 3/8” above the point, in the center of the flap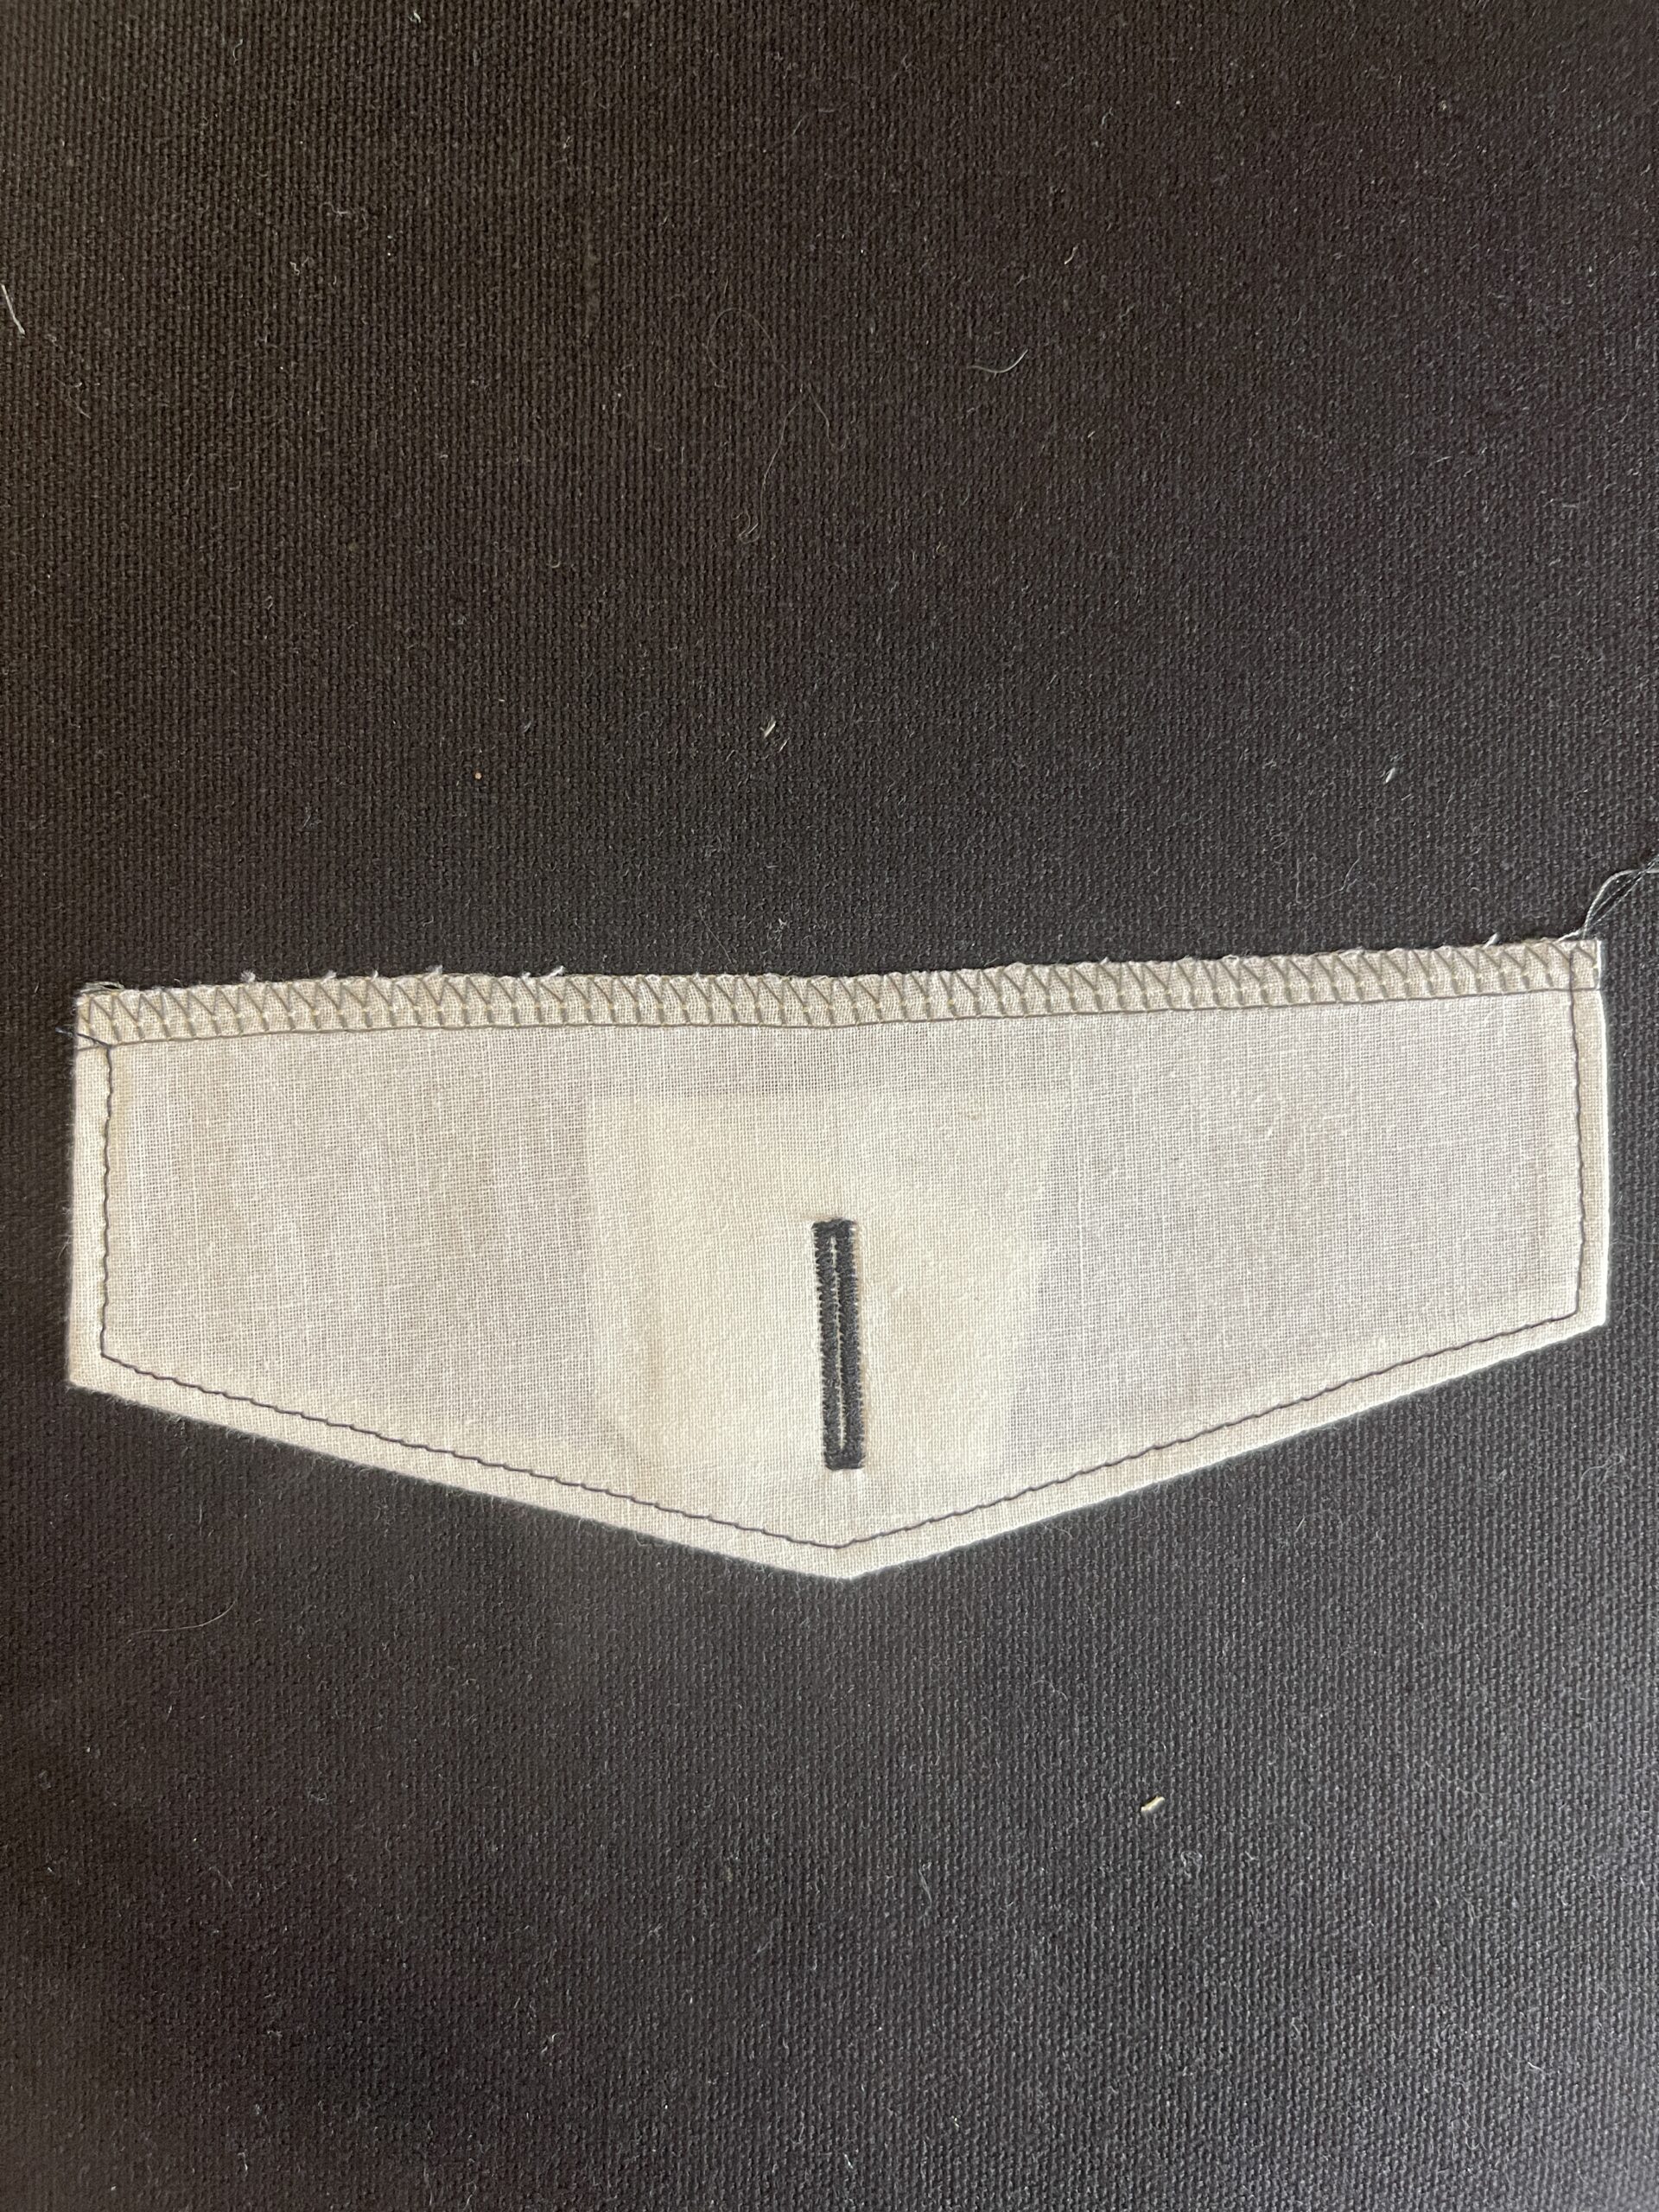
- NO FLAP—You don’t have to do anything here. Go, take a break and come back when you’re ready to sew your pockets on your pants!
Now—this is where we all meet together again. You should have a 6″ x 7″ pocket, and a flap if you opted for one. Set your pockets aside until you are ready to assemble your pants legs. This is very important so I’m going to use capitals and bold– I’m not yelling at you, I’m drawing attention.
ONLY SEW EACH LEG OUTSEAM BEFORE ATTACHING YOUR POCKET. DO NOT SEW THE INSEAM YET.
OPTIONAL: I like to secure my outseam with a mock flat-felled seam (which is just topstitching the outseam seam allowance down at about 1/4” to secure it. You can see in the photos that I’ve done this in my sample. For more info, Google “mock flat felled seam”.
And now, the moment we’ve all been waiting for.
It’s time to sew on our pockets!!!
First, let’s decide where to put them. It’s a good idea to hold your pant leg up to your body and mark (I use chalk) where you want your pockets to be. I placed mine about 6” down from the bottom of my side pocket opening.
ALL VIEWS: ADD POCKET BAG TO PANTS
- Once you’ve decided where you want your pocket, pin it in place so that the center of the pocket lines up with the outseam. If you’ve made a pleated version and can see the center line, you can use that as a guide. If not, just fold your pocket in half, and mark the center.
- Topstitch the three remaining sides of the pocket to the pant leg (the fourth side, you’ve already topstitched, and will remain open so that you can put snacks in your pockets using your favorite topstitch settings. Make sure that the distance from the edge is ¼” or less. (If you topstitch within 1/8” of the edge, you can be fancy and call it “edgestitching”.)
- Make sure your top corners are secure, either by backstitching, or a bartack for heavier fabrics. If you aren’t adding a flap—you’re finished! Go forth and enjoy your pockets!
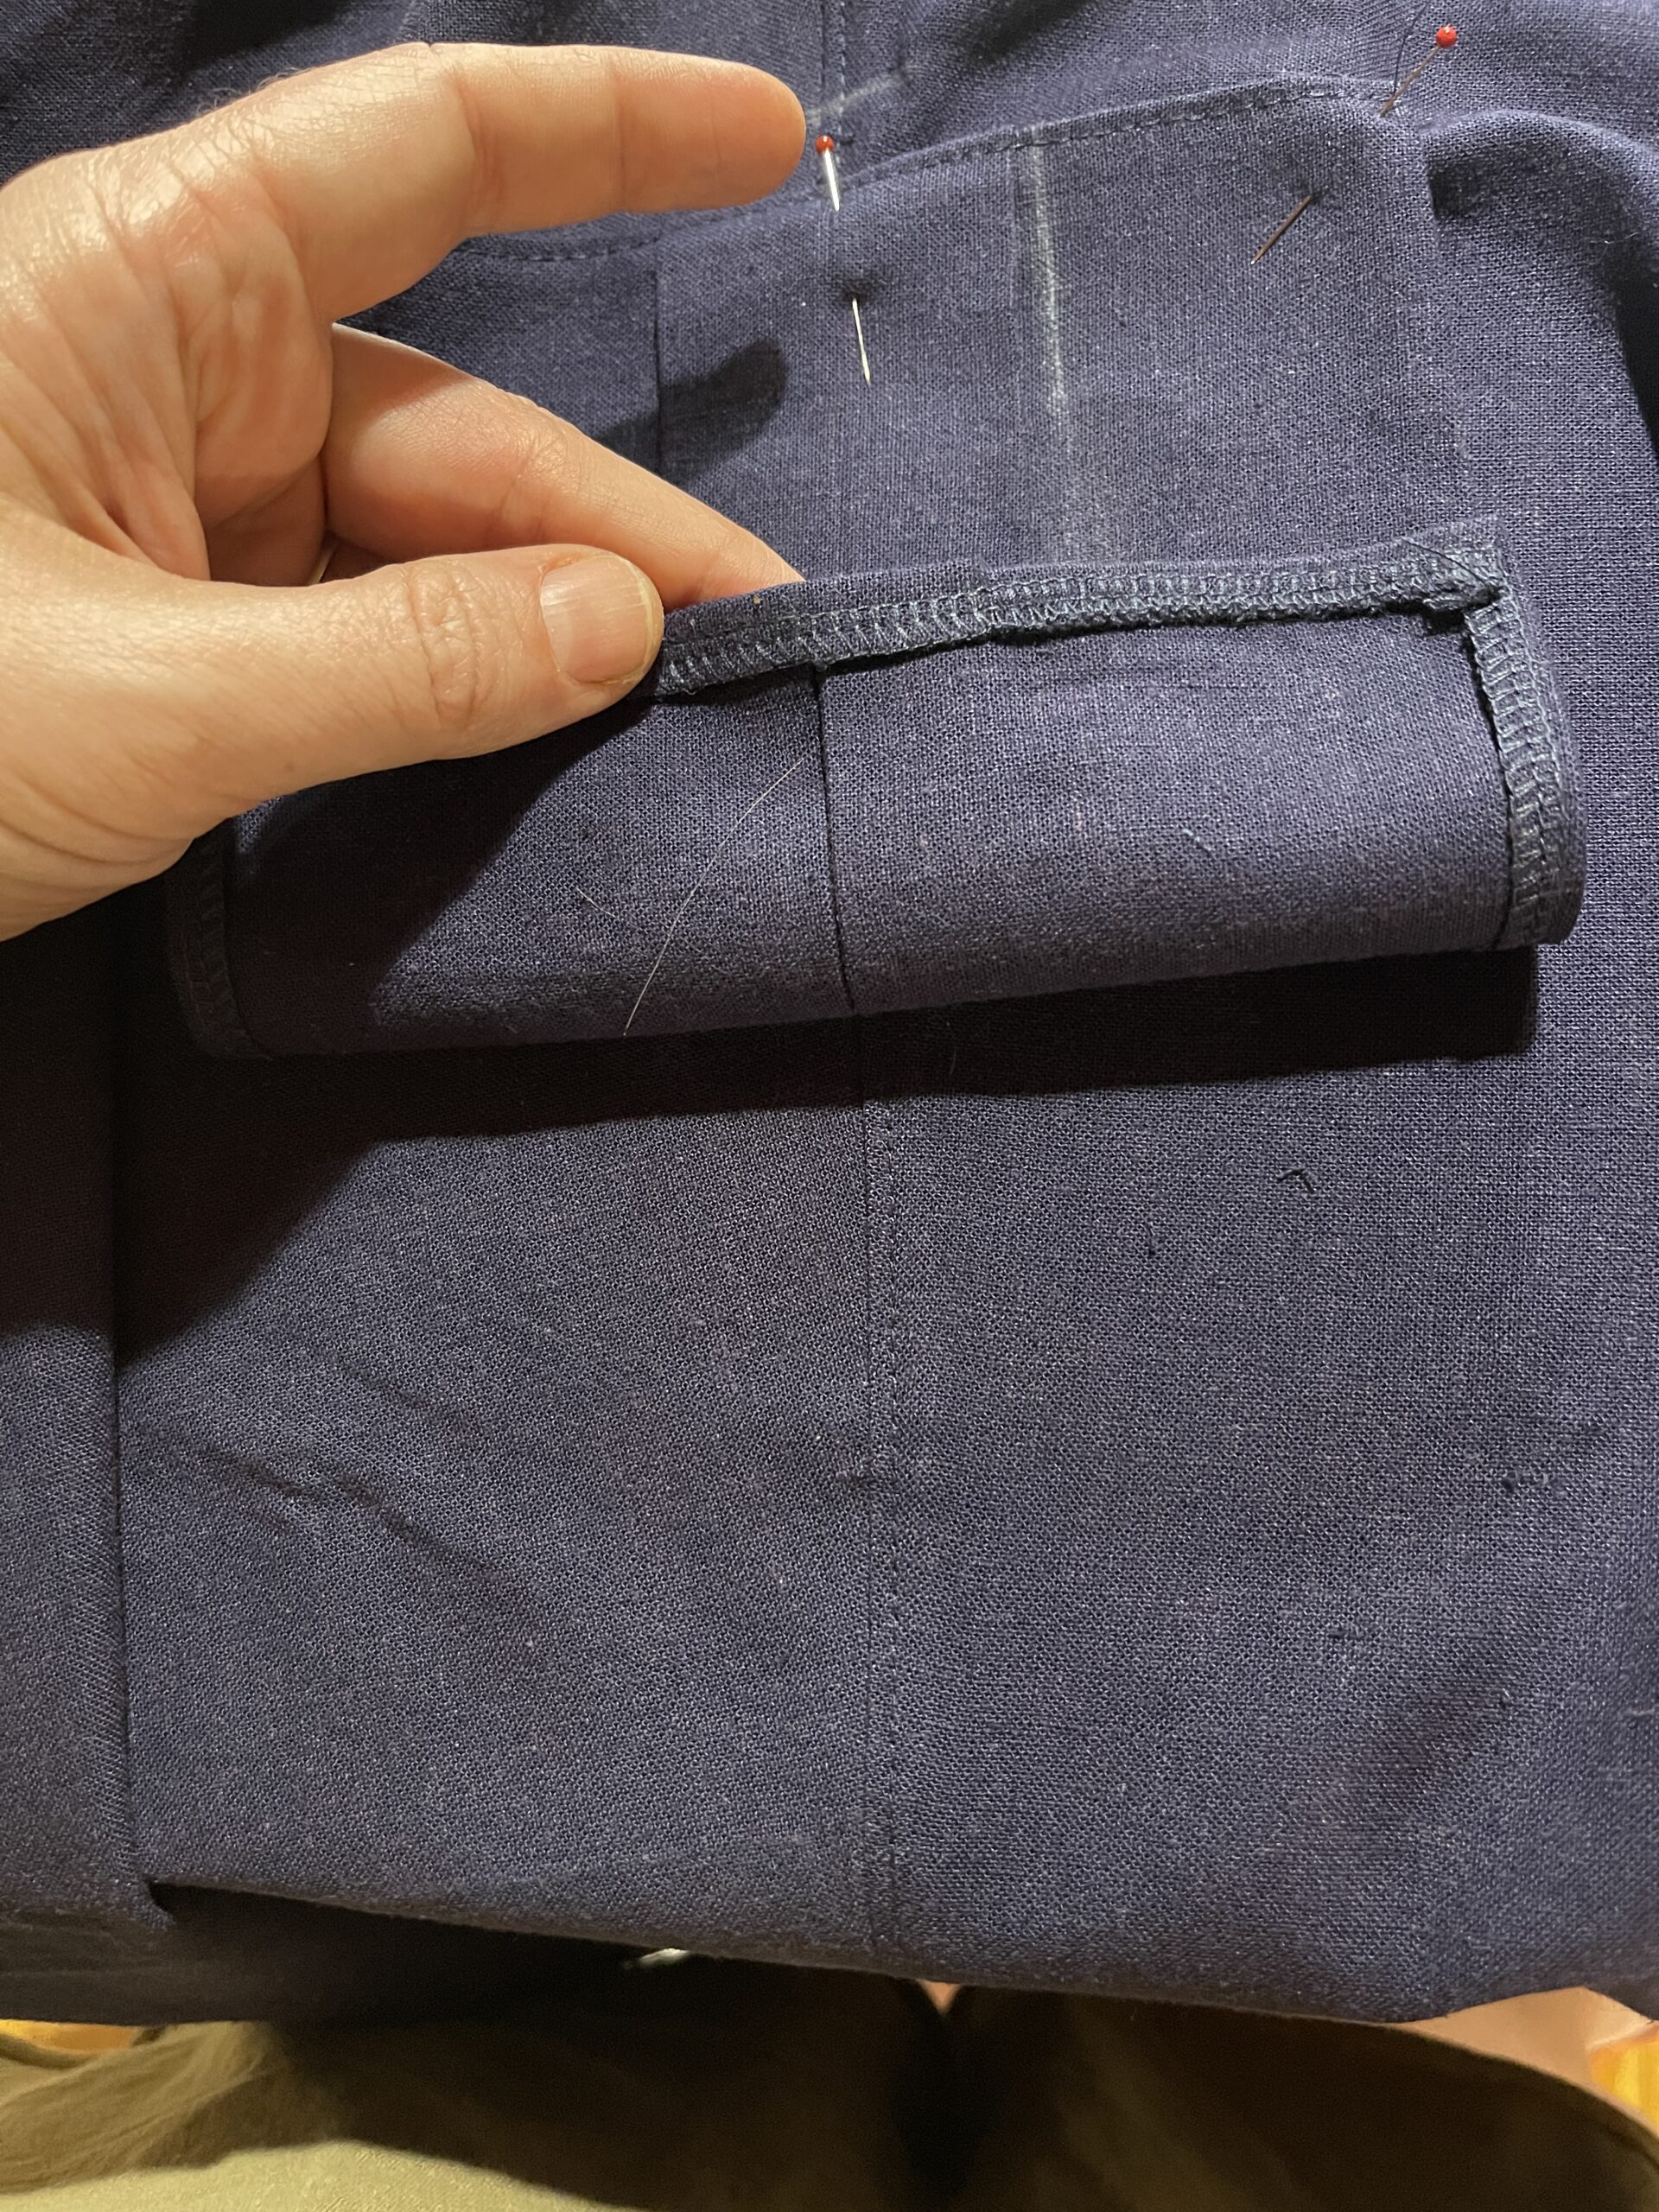
Pocket Flaps
- Butt the long edge of the flap against the top opening of the pocket, with wrong side facing up. Make sure they aren’t overlapping. (Right sides of pocket and pants are touching).
- Pin flap to pants, along the long edge
- Sew the long, finished edge of the flap to the pants with a 3/8” seam allowance
- Fold the flap down, over the pocket, and press.
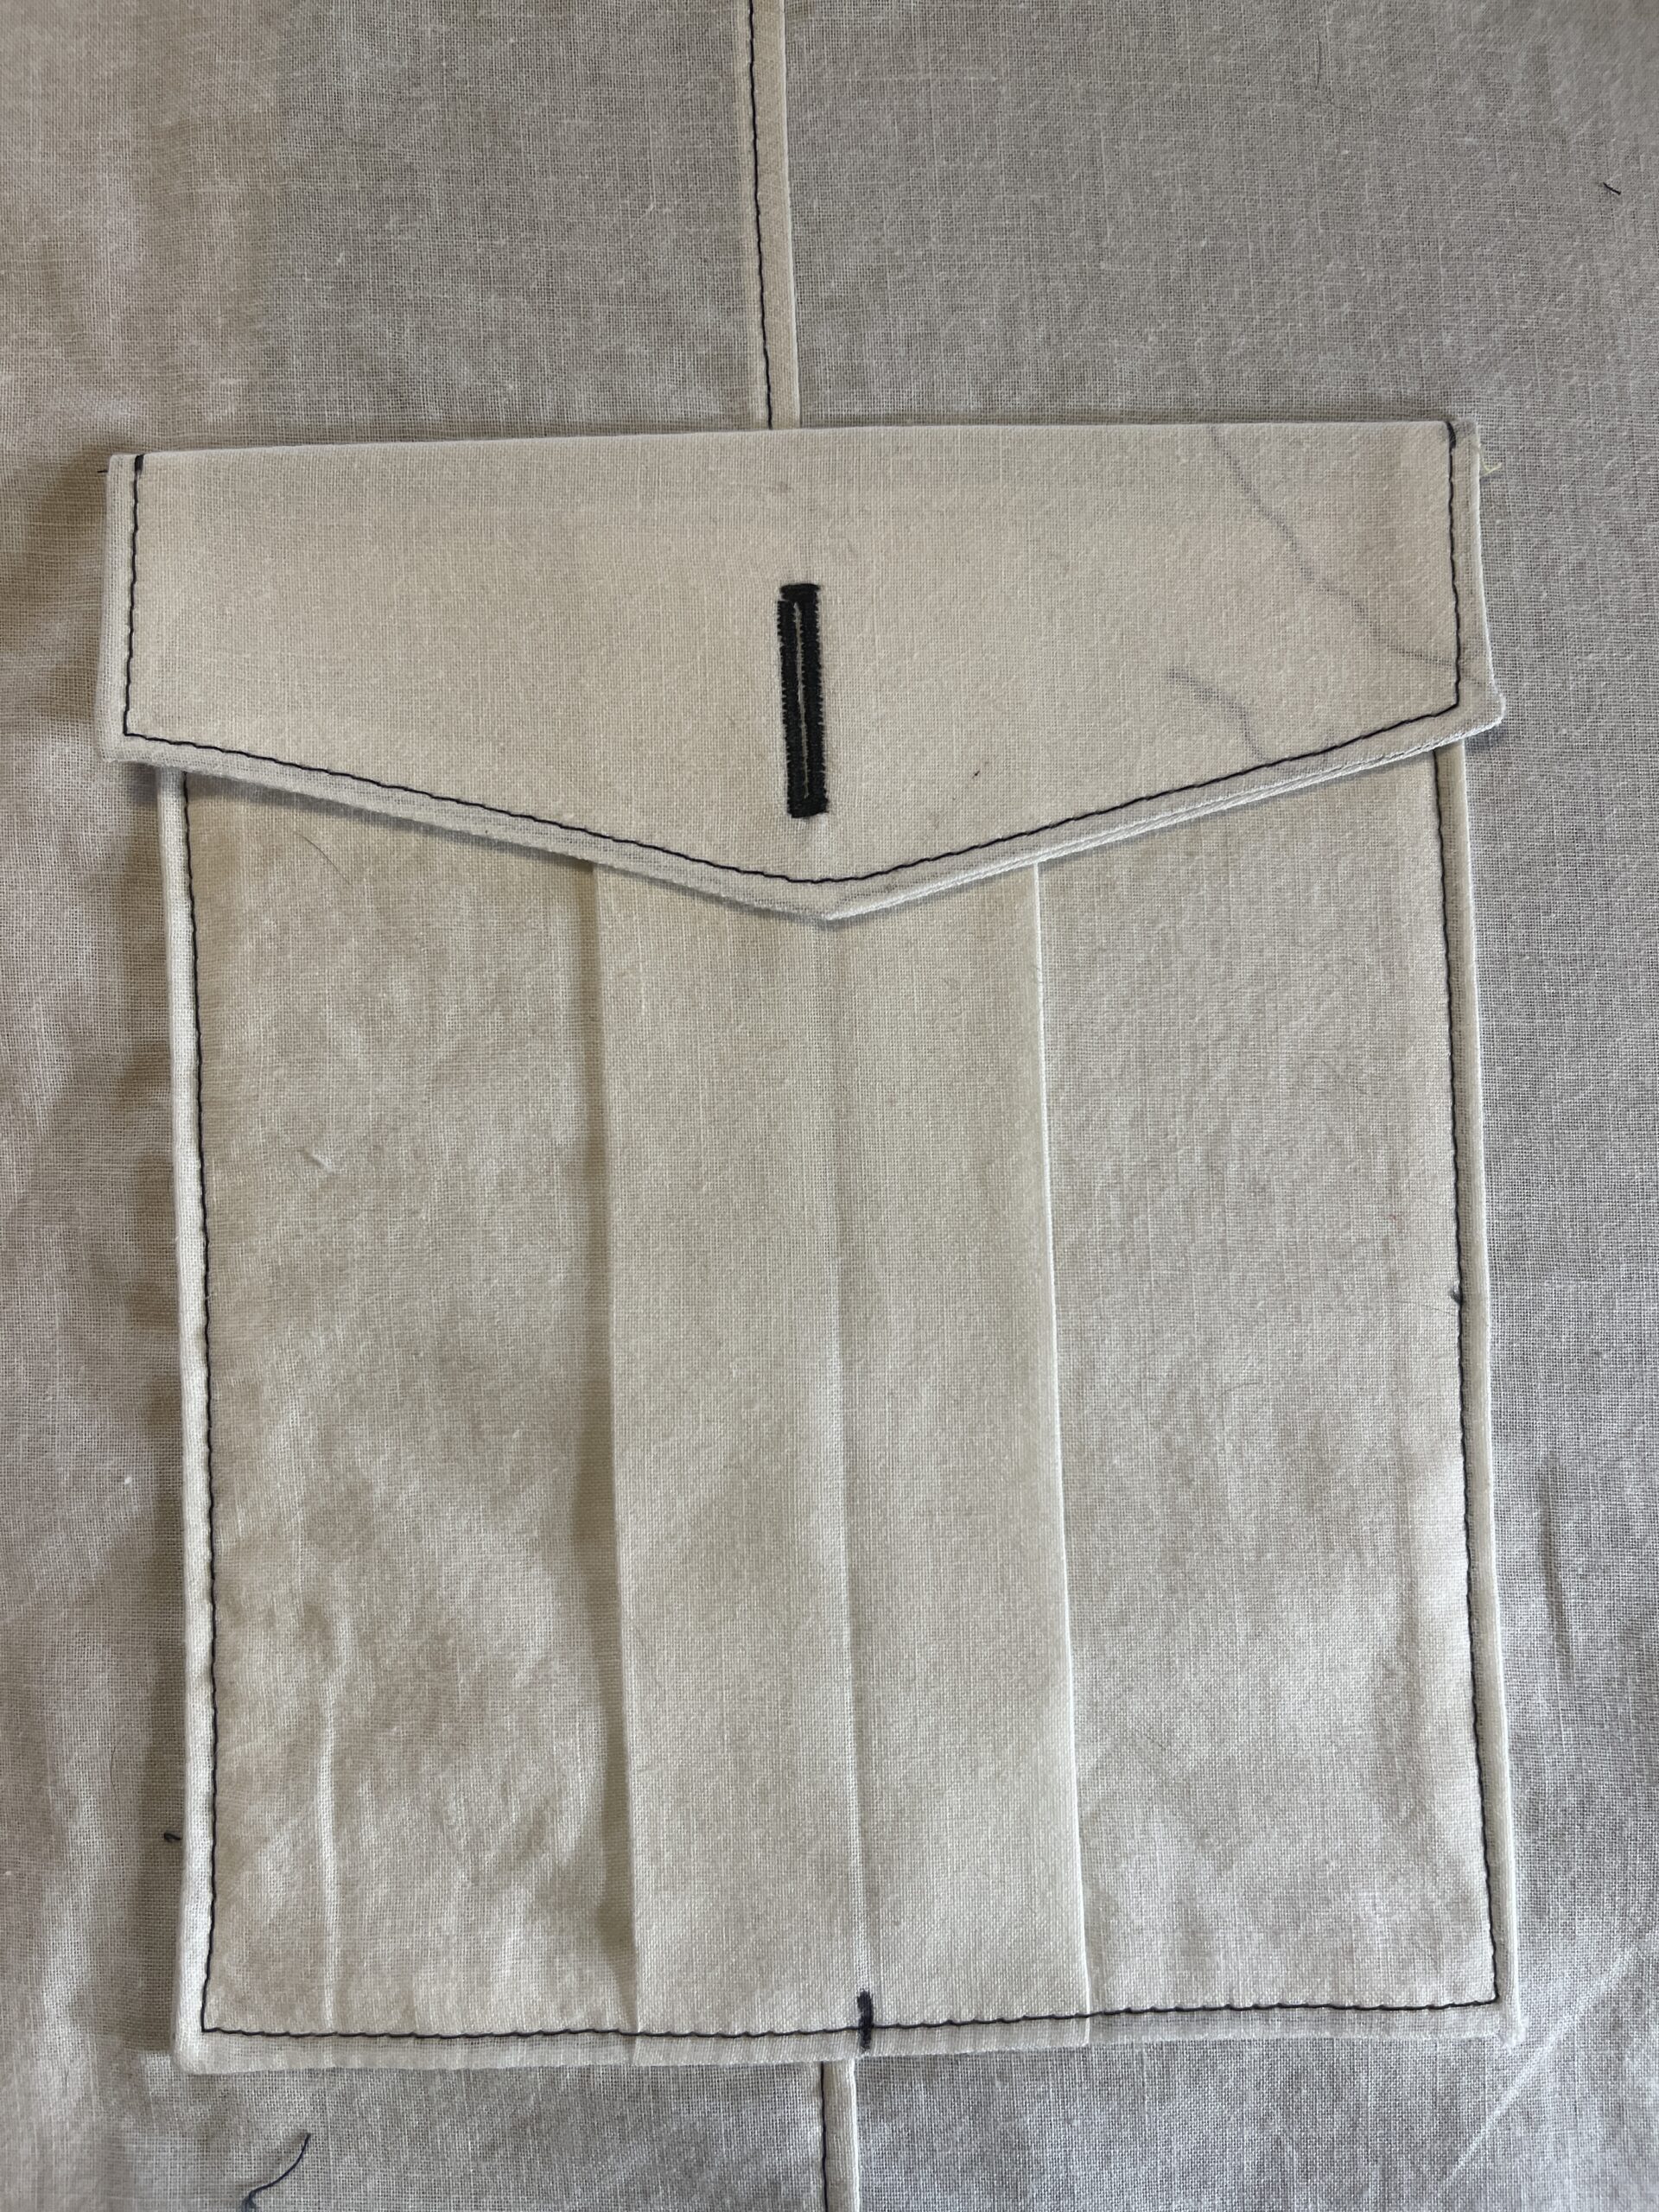
- Topstitch along the top edge, ¼” away from the edge, to secure the pocket.
- If you’re adding a button, hand-stitch it on.

Finish your pants as instructed (you’re now free to sew up those inseams)
We’re done! What are you gonna fill your pockets with? Let us know in the comments.